Once an environment is created, you can modify its configuration as your project requirements change or delete the environment when it is no longer needed.
You can perform the following actions on an environment:
-
Modify an Environment: Update the environment name, type, Git branch, or Destination configuration.
-
Delete an Environment: Permanently remove an environment along with all its associated jobs and run history.
Modifying an Environment
You can modify an environment after it is created to update its configuration. Some scenarios where you may want to modify an environment:
-
The Destination configured for the environment needs to be updated.
-
The environment type needs to be changed from staging to production.
-
A different Git branch needs to be used for the environment.
Perform the following steps to modify an environment:
-
In the Navigation Bar, click Transformations.
-
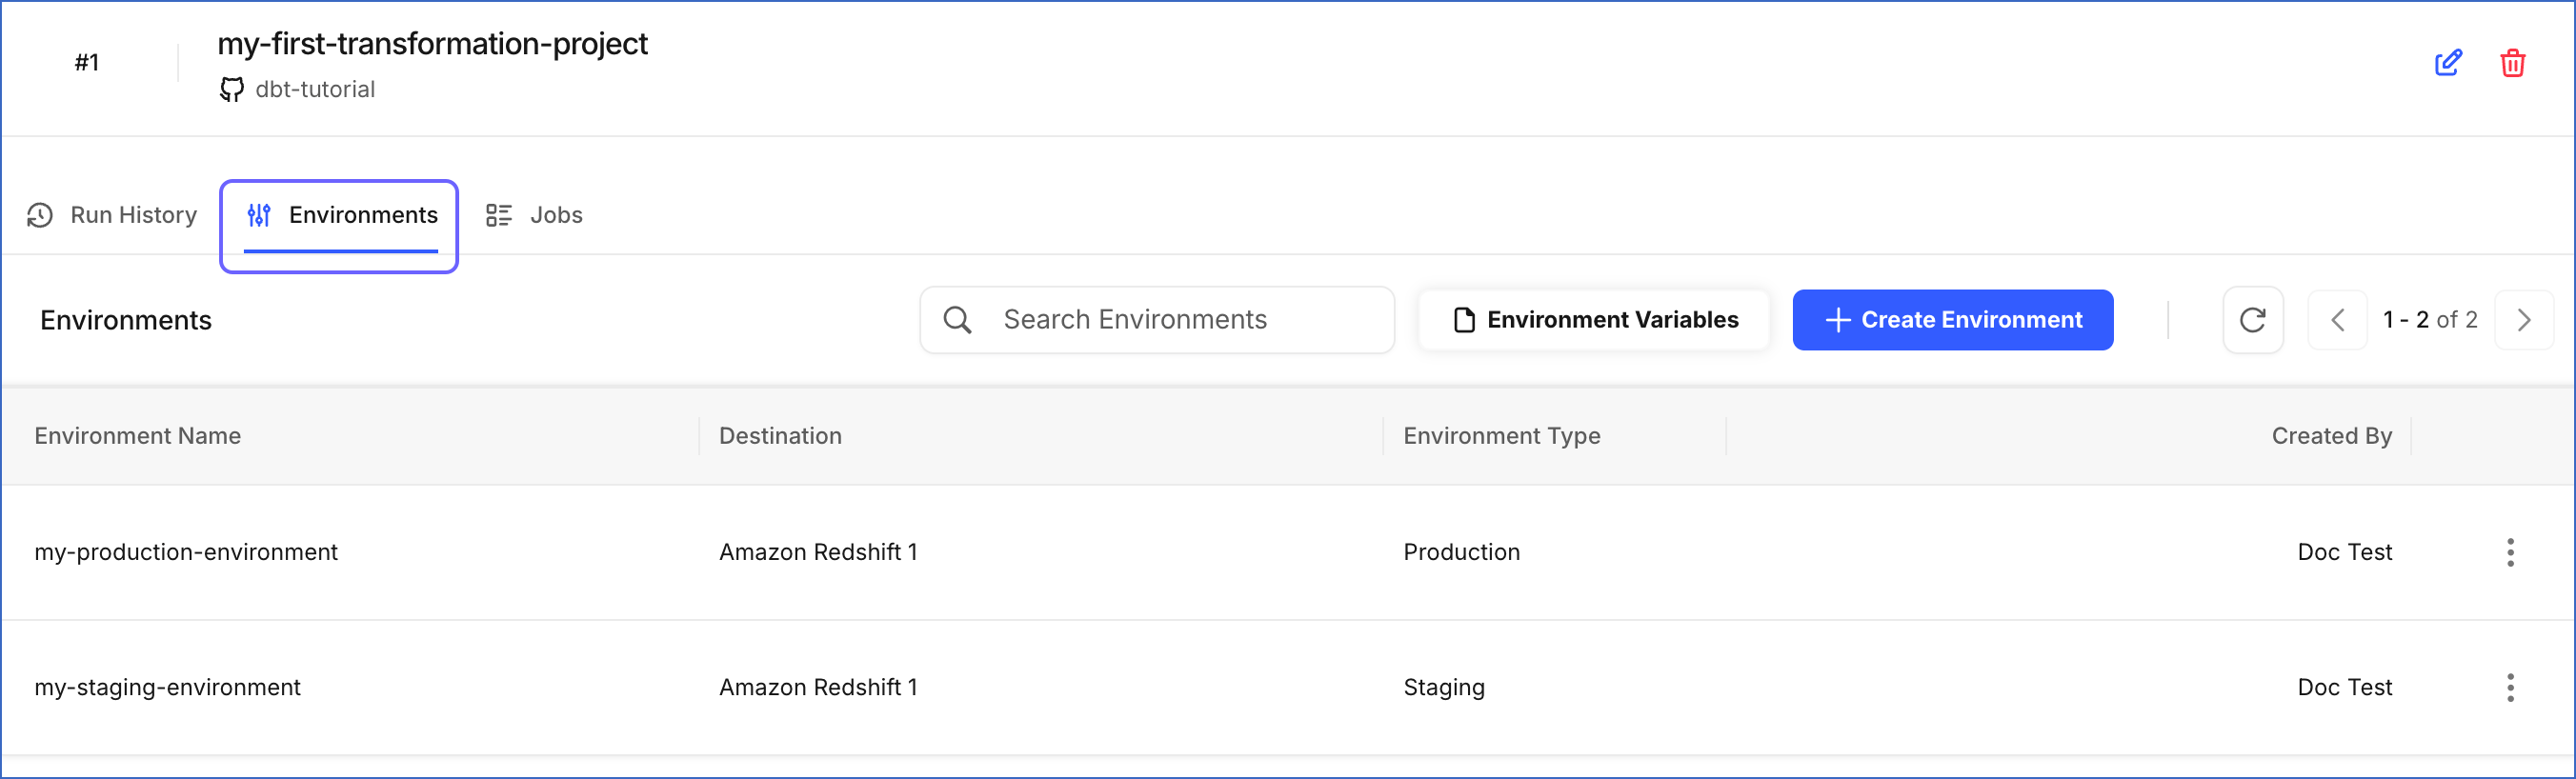
On the Transformations page, select the project for which you want to modify an environment.
-
In the Transformations Detailed View, click the Environments tab.
-
Click the Actions (
 ) icon corresponding to the environment you want to modify and select Edit Environment.
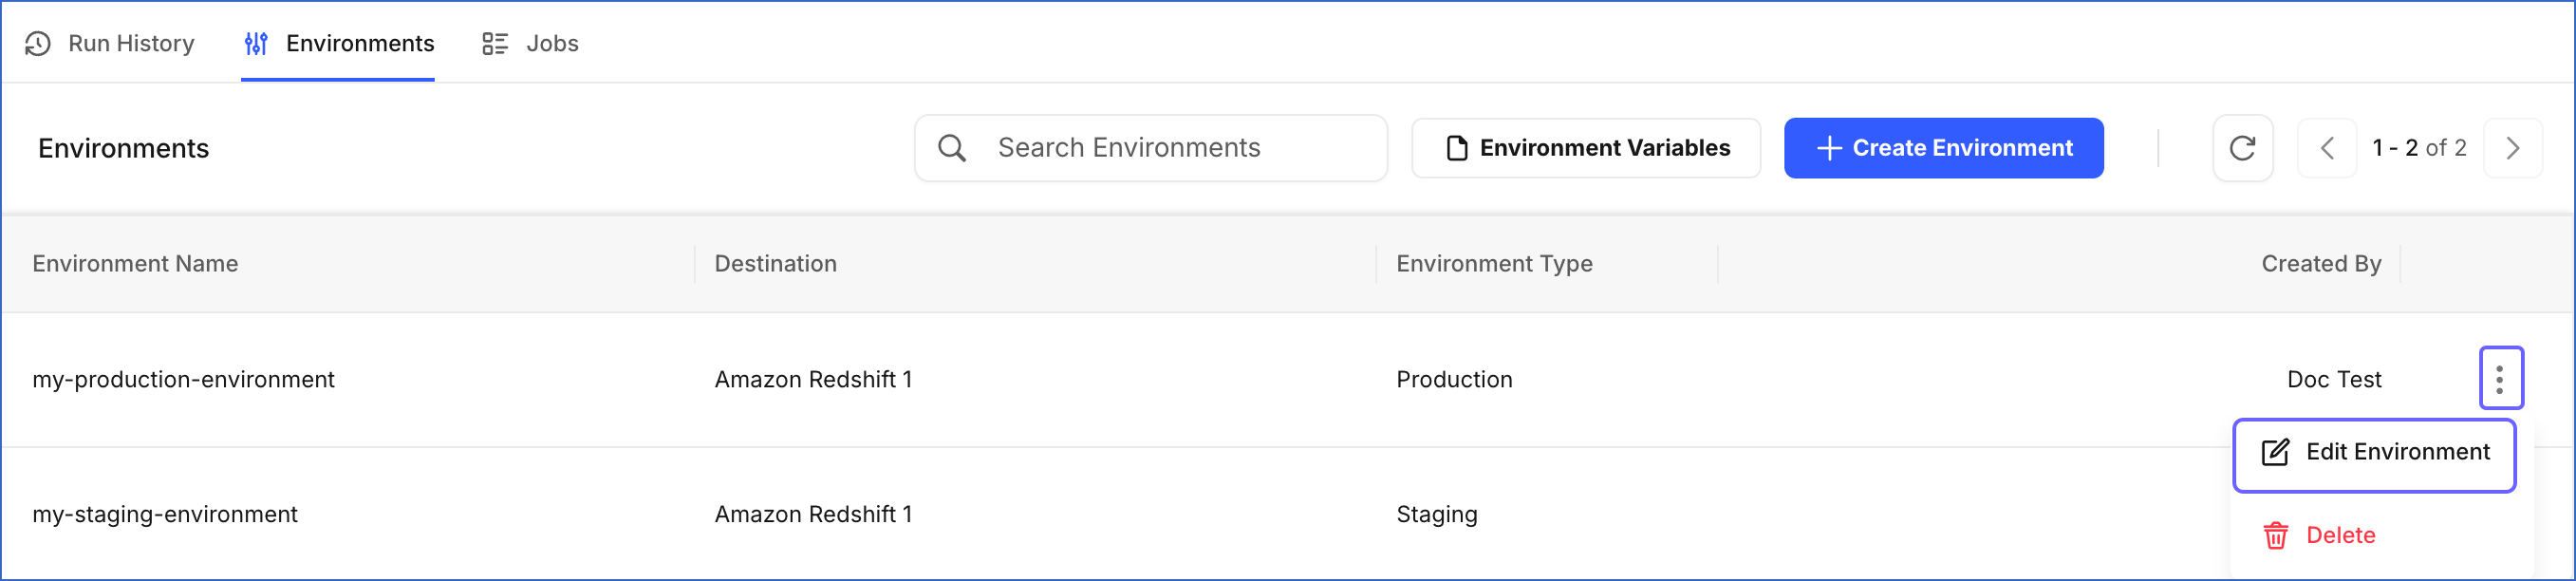
-
On the Edit Environment page, update the required fields:

-
Environment Name: Specify a new name for the environment.
-
Select Environment Type: Choose Staging for testing code changes or Production for running dbt models on live business data.
-
Use Custom Branch: Enable or disable the toggle. If enabled, you can change the Git Branch used for this environment.
-
Select Existing Destination: Choose the Destination where you want your dbt models to run. If you want to add a new one, click + Create Destination. Read the respective Destination documentation for configuration steps.
Note: Currently, Amazon Redshift, Google BigQuery, and Snowflake Destinations are supported for Transformations.
-
Configure Connection: Review the connection details of the selected Destination.
-
Database User: The user Hevo uses to connect to the Destination.
-
Database Password: The password for the database user.
-
Default Schema/Dataset name: Specify the name of the schema or dataset in the selected Destination where dbt writes the output tables.
-
-
-
-
Click Test Connection to verify the connection to your Destination.
-
Click Save Changes.
A notification is displayed to confirm that the environment has been updated successfully.
Deleting an Environment
You can delete an environment if it is no longer needed.
Deleting an environment is permanent and cannot be undone. All jobs and run history associated with the environment are permanently deleted. Any active runs in the environment are automatically canceled when it is deleted.
Some scenarios where you may want to delete an environment:
-
An environment was created for testing and is no longer required.
-
An environment was incorrectly configured.
-
The Transformation project is being restructured with a different environment setup.
Perform the following steps to delete an environment:
-
In the Navigation Bar, click Transformations.
-
On the Transformations page, select the project for which you want to delete an environment.
-
In the Transformations Detailed View, click the Environments tab.
-
Click the Actions (
) icon corresponding to the environment you want to delete and select Delete.
-
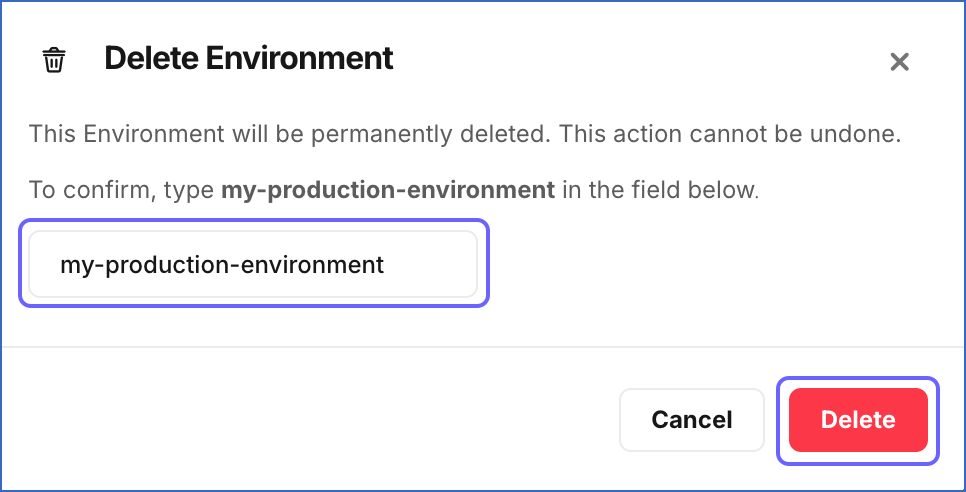
In the Delete Environment dialog, type the exact name of the environment in the field to confirm deletion, and then click Delete.
A notification is displayed to confirm that the environment has been deleted successfully.