Amazon Aurora is a drop-in replacement for MySQL that combines the performance and availability of traditional enterprise databases with the simplicity and cost-effectiveness of open source databases. Amazon Aurora is fully managed by Amazon Relational Database Service (RDS), which automates time-consuming administration tasks such as hardware provisioning, database setup, patching, and backups.
You can ingest data from the following Amazon Aurora MySQL instance types using Hevo Pipelines and replicate it to a Destination of your choice.
-
Provisioned Aurora MySQL: Suitable for workloads that require consistent performance and dedicated compute capacity. As the instance runs continuously, Hevo can maintain a stable connection and replicate data with minimal latency, making it ideal for production environments.
-
Aurora MySQL Serverless v2: Designed for variable or unpredictable workloads. It automatically adjusts compute capacity based on demand. This flexibility helps optimize performance and control costs. To ensure uninterrupted replication, it is recommended to configure a minimum capacity to prevent the instance from pausing during idle periods.
Prerequisites
-
The Amazon Aurora MySQL database instance is running.
-
The Amazon Aurora MySQL server version for your instance type is supported:
Instance Type Supported Version Provisioned Aurora MySQL 5.7, 8.0 Aurora MySQL Serverless v2 8.0 You can choose the MySQL server version while creating the database instance.
-
Binary Log (BinLog) replication is enabled on the primary instance of your Amazon Aurora MySQL database server.
Note: Amazon Aurora MySQL does not support BinLog replication on read replicas.
-
Hevo’s IP address(es) for your region is added to the Amazon Aurora MySQL database IP Allowlist.
-
The SELECT, RELOAD, SHOW DATABASES, and REPLICATION privileges are granted to the database user.
Note: We recommend that you create a database user for configuring your Amazon Aurora MySQL Source in Hevo. However, if you already have a database user, grant the required privileges.
-
The database hostname and port number of the Source instance are available.
Perform the following steps to configure your Amazon Aurora MySQL Source:
Set up MySQL Binary Logs for Replication
In MySQL, the binary log (BinLog) is a collection of log files that records modifications, including deletes, made to data objects in your server instance. Binary logs are typically used for data replication and data recovery.
Hevo uses binary logs to replicate incremental data from your MySQL server. For this, you must enable binary logging on your Amazon Aurora MySQL instance.
Perform the following steps to enable binary logging for your Amazon Aurora MySQL server:
1. Configure the parameter group
-
Log in to the Amazon RDS console.
-
In the left navigation pane, click Databases.
-
In the Databases section on the right, click the DB identifier of your Amazon Aurora database instance.

-
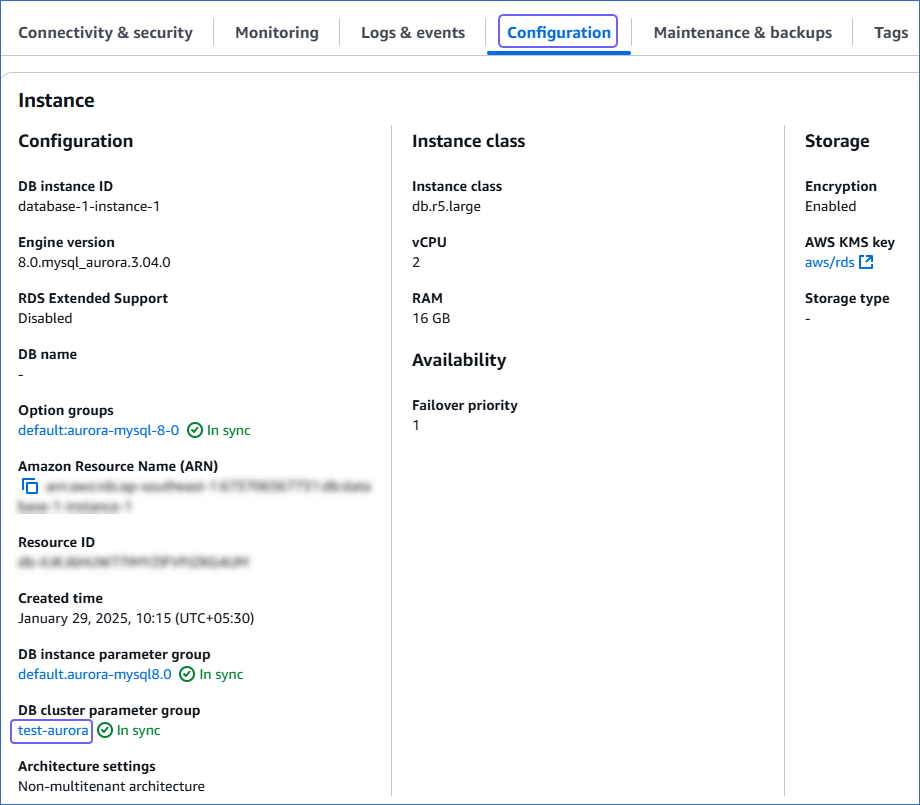
Click the Configuration tab, and then click the link text under DB cluster parameter group.
Note: If you are using the default Aurora DB cluster parameter group, you need to create one with the Type as DB cluster parameter group, as the default one is not editable.
-
Click Edit.

-
On the Modifiable parameters page, search and update the value of the following parameters:

Parameter Name Value binlog_formatROW binlog_row_imagefull gtid-modeON enforce_gtid_consistencyON binlog_row_value_optionsNo value; must be blank Note: Enabling Global Transaction Identifiers (GTIDs) is recommended because it simplifies replication by uniquely identifying transactions, making it easier to track them.
-
(Optional) Set the following parameters to keep the connections alive for an extended period during data replication when connecting via SSH:
Parameter Name Value Description wait_timeout86400 The number of seconds the server waits for activity on a non-interactive connection, such as a background app, before closing it. net_write_timeout600 The time the server waits for data to be written to a connection before terminating the write operation. net_read_timeout600 The time the server waits for more data from a connection before terminating the read operation. interactive_timeout86400 The number of seconds that the server waits for activity on an interactive connection, such as a GUI client, before closing it. Note: For consistency, set
interactive_timeoutto the same value aswait_timeout, so that interactive and non-interactive connections idle out after the same amount of elapsed time. -
Click Save Changes.
-
Reboot the database instance to apply the changes. To do this:
To do this:
-
In the left navigation pane, click Databases.
-
In the Databases section on the right, select the DB identifier of your Amazon Aurora MySQL database instance.
-
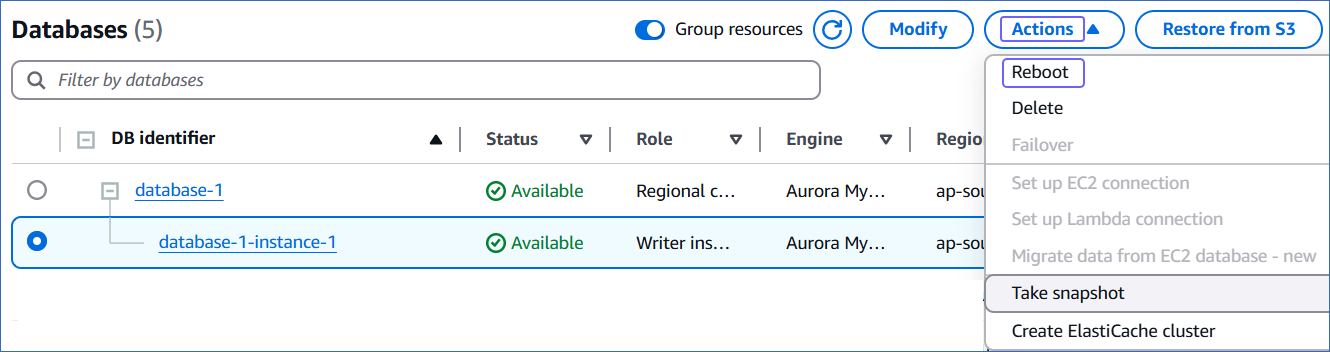
Click the Actions drop-down, and then click Reboot.
-
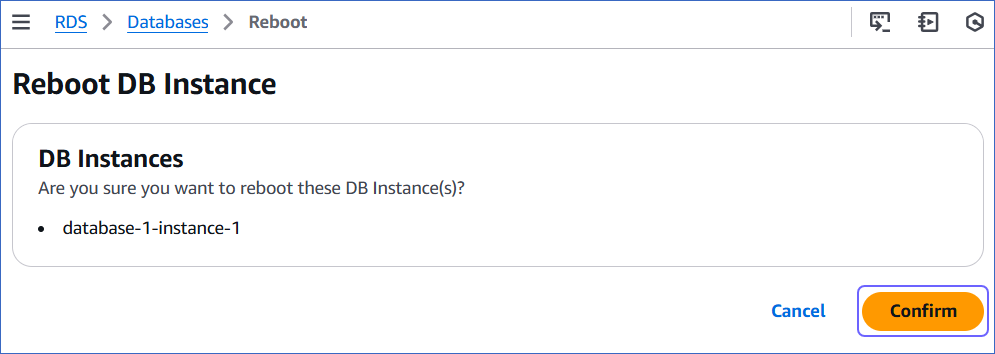
In the Reboot DB Instance section, click Confirm to reboot your DB instance.
-
After restarting, connect to your MySQL instance as the root user with a SQL client tool, such as MySQL Workbench. Then, verify that the binlog_format setting has persisted after the restart. If this setting is not correct, Hevo cannot replicate data using binary logs.
To verify, run the following command:
SHOW VARIABLES LIKE '%binlog_format%';
The expected output should be:
+---------------+------+
| Variable_name | Value|
+---------------+------+
| binlog_format | ROW |
+---------------+------+
The replication reference guide on MySQL’s documentation portal provides a complete reference of the options available for replication and binary logging.
2. Configure the BinLog retention period
-
Connect to your Amazon Aurora MySQL database instance as a root user with an SQL client tool, such as MySQL Workbench.
-
Run the following command to view the current BinLog retention period (in hours):
call mysql.rds_show_configuration; -
If the BinLog retention period is less than 72 hours, run the following command to set it to at least 72 hours (three days).
call mysql.rds_set_configuration('binlog retention hours', 72);
Allowlist Hevo IP addresses for your region
You need to allowlist the Hevo IP address for your region to enable Hevo to connect to your Amazon Aurora MySQL database. To do this:
-
Log in to the Amazon RDS console.
-
In the left navigation pane, click Databases.
-
In the Databases section on the right, click the DB identifier of your Amazon Aurora database instance.
-
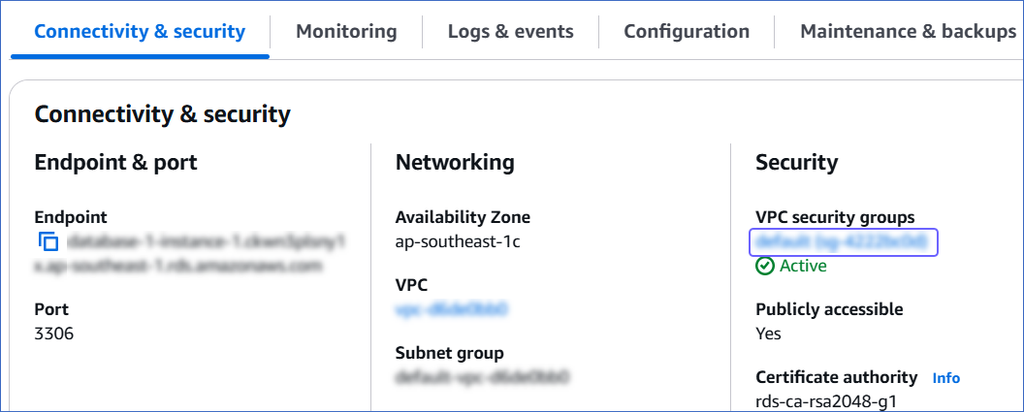
In the Connectivity & security tab, click the link text under Security, VPC security groups.
-
On the Security Groups page, select the check box for your Security group ID, and from the Actions drop-down, click Edit inbound rules.
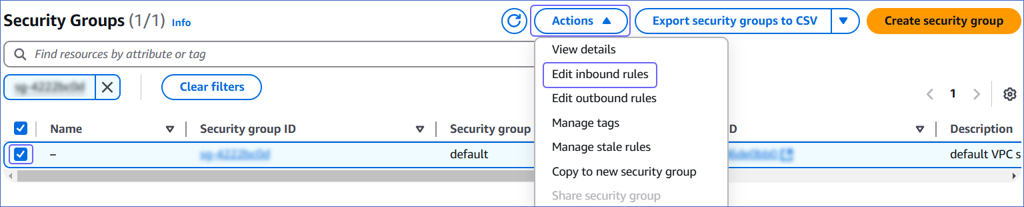
-
On the Edit inbound rules page, do the following:

-
Click Add rule.
-
In the Type column, select MySQL/Aurora from the drop-down.
-
In the Source column, select Custom from the drop-down and enter Hevo’s IP addresses for your region. Repeat steps 1-3 to allowlist all the IP addresses.
-
Click Save rules.
-
Configure SSH Server Settings (Optional)
If you are connecting to Hevo through an SSH tunnel for reliable data replication, ensure that your SSH server is configured to maintain long-lived connections. You can do this by adding specific stability parameters to the SSH server configuration file.
To do this:
-
Log in to your SSH host.
-
Edit your SSH configuration file, sshd_config. This file is generally located in the
/etc/sshdirectory. -
Add or update the following parameters and save the file:
# Keep client connections alive ClientAliveInterval 500 ClientAliveCountMax 50 # Handle multiple concurrent data streams MaxSessions 50 MaxStartups 30:50:100 -
Run the following commands to validate the changes and restart the server:
# Check for errors before restarting the SSH service
sudo sshd -t

# Restart the service
# Ubuntu/Debian
sudo systemctl restart ssh

# OR
# RHEL/CentOS/Fedora/Arch Linux
sudo systemctl restart sshd
Create a Database User and Grant Privileges
1. Create a database user (Optional)
Perform the following steps to create a database user in your Amazon Aurora MySQL database:
-
Connect to your Amazon Aurora MySQL database instance as a root user with an SQL client tool, such as MySQL Workbench.
-
Run the following command to create a user in your database:
CREATE USER <database_username>@'%' IDENTIFIED BY '<password>';Note: Replace the placeholder values in the command above with your own. For example, <database_username> with hevo.
2. Grant privileges to the user
The following table lists the privileges that the database user for Hevo requires to connect to and ingest data from your MySQL database:
| Privilege | Grants access to |
|---|---|
| SELECT | Retrieve rows from the database tables. |
| RELOAD | Clear or reload internal caches, flush tables, or acquire locks. |
| SHOW DATABASES | View the list of database names in the server. |
| REPLICATION CLIENT | Access the MySQL server’s BinLog for replication. |
| REPLICATION SLAVE | View replication status and log details. |
| EXECUTE | Run procedures to read BinLog settings on the MySQL server. |
Connect to your Amazon Aurora MySQL database as a root user with an SQL client tool, such as MySQL Workbench, and run the following script. These commands grant only the necessary privileges required by Hevo to ingest data from your Amazon Aurora MySQL database.
# Grant Privileges to the Database User
GRANT RELOAD, SHOW DATABASES, REPLICATION CLIENT, REPLICATION SLAVE ON *.* TO <database_username>@'%';
GRANT EXECUTE ON PROCEDURE mysql.rds_show_configuration TO <database_username>@'%';

# (Optional) Grant Hevo access to all Tables in the Database
GRANT SELECT ON <database_name>.* TO <database_username>;

# Grant Hevo access to the Tables in the Database that you want to replicate
GRANT SELECT, SHOW VIEW ON <database_name>.<table_name> TO <database_username>;

# Finalize the User’s Permissions
FLUSH PRIVILEGES;
Note:
-
The
SELECT,RELOAD, andSHOW DATABASESprivileges are required only for the historical load. -
Replace the placeholder values in the commands above with your own. For example, <database_username> with hevo.
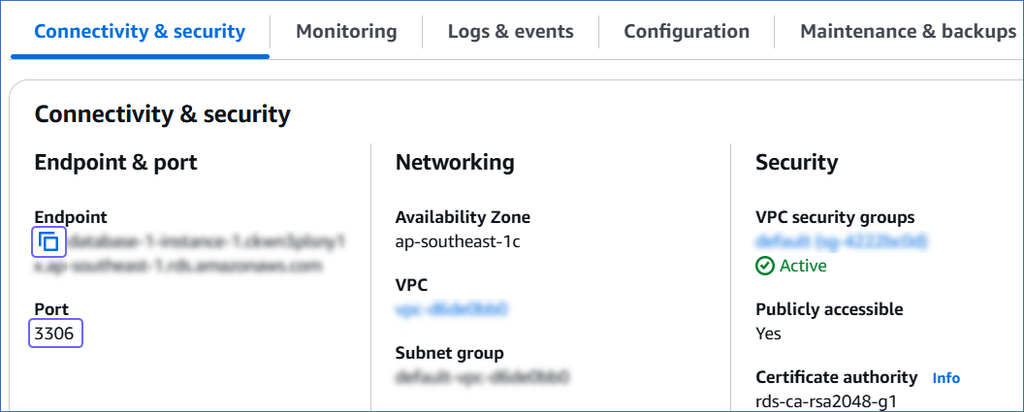
Retrieve the Database Hostname and Port Number (Optional)
Note: The Amazon Aurora MySQL hostnames start with your database name and end with rds.amazonaws.com. For example, database-1-instance-1.xxxxxxxxx.rds.amazonaws.com
-
In the left navigation pane of the Amazon RDS console, click Databases.
-
In the Databases section on the right, click the DB identifier of your Amazon Aurora MySQL database instance.
-
In the Connectivity & security tab, do the following:
-
Click the Copy icon to copy the Endpoint and save it.
-
Copy the Port and save it.
-
Use these values as your Database Host and Database Port, respectively, while configuring your Amazon Aurora MySQL Source in Hevo.
Configure Amazon Aurora MySQL as a Source in your Pipeline
Perform the following steps to configure your Amazon Aurora MySQL Source:
-
Click PIPELINES in the Navigation Bar.
-
Click + Create Pipeline in the Pipelines List View.
-
On the Select Source Type page, select Amazon Aurora MySQL.
-
On the Select Destination Type page, select the type of Destination you want to use.
-
On the page that appears, do the following:

-
Select Pipeline Mode: Choose BinLog. Hevo supports only this mode for Edge Pipelines created with MySQL Source. If you choose any other mode, you can proceed to create a Standard Pipeline.
-
Select Pipeline Type: Choose the type of Pipeline you want to create based on your requirements, and then click Continue.
-
If you select Edge, skip to step 6 below.
-
If you select Standard, read Amazon Aurora MySQL to configure your Standard Pipeline.
This section is displayed only if all the following conditions are met:
-
The selected Destination type is supported in Edge.
-
The Pipeline mode is set to BinLog.
-
Your Team was created before September 15, 2025, and has an existing Pipeline created with the same Destination type and Pipeline mode.
For Teams that do not meet the above criteria, if the selected Destination type is supported in Edge and the Pipeline mode is set to BinLog, you can proceed to create an Edge Pipeline. Otherwise, you can proceed to create a Standard Pipeline. Read Amazon Aurora MySQL to configure your Standard Pipeline.
-
-
-
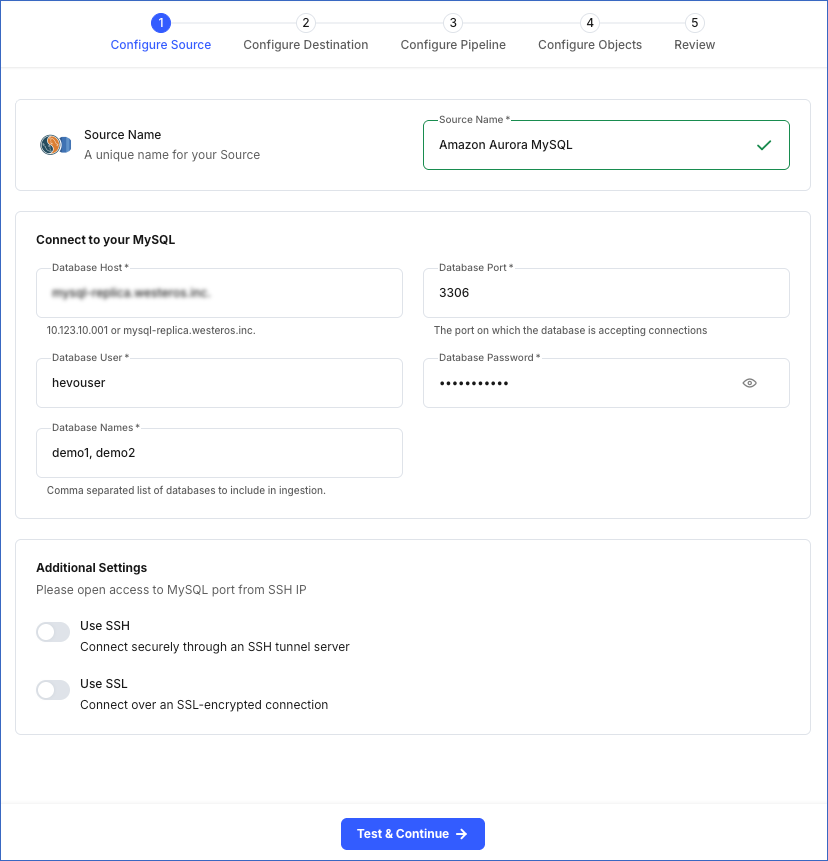
In the Configure Source screen, specify the following:
-
Source Name: A unique name for your Source, not exceeding 255 characters. For example, Amazon Aurora MySQL Source.
-
In the Connect to your MySQL section:
-
Database Host: The MySQL host’s IP address or DNS. This is the endpoint that you obtained in Step 4 above.
Note: For URL-based hostnames, exclude the http:// or https:// part. For example, if the hostname URL is http://mysql-database.westeros.inc, enter mysql-database.westeros.inc.
-
Database Port: The port on which your Amazon Aurora MySQL server listens for connections. This is the port number that you obtained in Step 4 above. Default value: 3306.
-
Database User: The authenticated user who has the permissions to read tables in your database. This user can be the one you created in Step 3 above or an existing user. For example, hevouser.
-
Database Password: The password of your database user.
-
Database Names: The comma separated list of databases from where you want to replicate data. For example, demo1, demo2.
-
-
In the Additional Settings section:
-
Use SSH: Enable this option to connect to Hevo using an SSH tunnel instead of directly connecting your MySQL database host to Hevo. This provides an additional level of security to your database by not exposing your MySQL setup to the public. You can optionally define additional parameters on your SSH server to maintain long-lived sessions during data replication.
If this option is turned off, you must configure your Source to accept connections from Hevo’s IP addresses.
-
Use SSL: Enable this option to use an SSL-encrypted connection. Specify the following:
-
CA File: The file containing the SSL server certificate authority (CA).
-
Client Certificate: The client’s public key certificate file.
-
Client Key: The client’s private key file.
-
-
-
-
Click Test & Continue to test the connection to your Amazon Aurora MySQL Source. Once the test is successful, you can proceed to set up your Destination.
Additional Information
Read the detailed Hevo documentation for the following related topics:
Data Type Mapping
Hevo maps the MySQL Source data type internally to a unified data type, referred to as the Hevo Data Type, in the table below. This data type is used to represent the Source data from all supported data types in a lossless manner.
The following table lists the supported MySQL data types and the corresponding Hevo data type to which they are mapped:
| MySQL Data Type | Hevo Data Type |
|---|---|
| - BIT(1) - BOOLEAN - TINYINT(1) - TINYINT UNSIGNED(1) |
BOOLEAN |
| - TINYINT(>1) - SMALLINT - TINYINT UNSIGNED(>1) |
SHORT |
| - INT - MEDIUMINT - SMALLINT UNSIGNED - MEDIUMINT UNSIGNED - YEAR |
INTEGER |
| - BIGINT - INT UNSIGNED - BIGINT UNSIGNED |
LONG |
| - FLOAT(0-23) | FLOAT |
| - REAL - DOUBLE - FLOAT(24-53) |
DOUBLE |
| - NUMERIC - DECIMAL |
DECIMAL |
| - CHAR - VARCHAR - TINYTEXT - TEXT - MEDIUMTEXT - LONGTEXT - JSON - ENUM - SET |
VARCHAR |
| - TIMESTAMP | TIMETZ |
| - DATE | DATE |
| - TIME | TIME |
| - DATETIME | TIMESTAMP |
| - BIT(>1) - BINARY - VARBINARY - TINYBLOB - BLOB - MEDIUMBLOB - LONGBLOB |
BYTEARRAY |
| - GEOMETRY - LINESTRING - POLYGON - MULTIPOINT - MULTILINESTRING - MULTIPOLYGON - GEOMETRYCOLLECTION |
JSON |
Any other data type not listed in the table above is not supported by Hevo.
Note: If any of the Source objects contain data types that are not supported by Hevo, the corresponding fields are marked as unsupported during object configuration in the Pipeline.
Source Considerations
- MySQL does not generate log entries for cascading deletes. So, Hevo cannot capture these deletes for log-based Pipelines.
Limitations
-
Hevo only fetches tables from the MySQL database. It does not fetch other entities such as functions, stored procedures, views, and triggers.
-
Hevo does not set the metadata column __hevo__marked_deleted to True for data deleted from the Source table using the TRUNCATE command. This action could result in a data mismatch between the Source and Destination tables.