Prerequisites
-
You are logged in to your Hevo account.
-
You have configured the Source system from which you want to ingest data in the Configure Source tab.
-
You have configured the Destination system into which you want to replicate data in the Configure Destination tab.
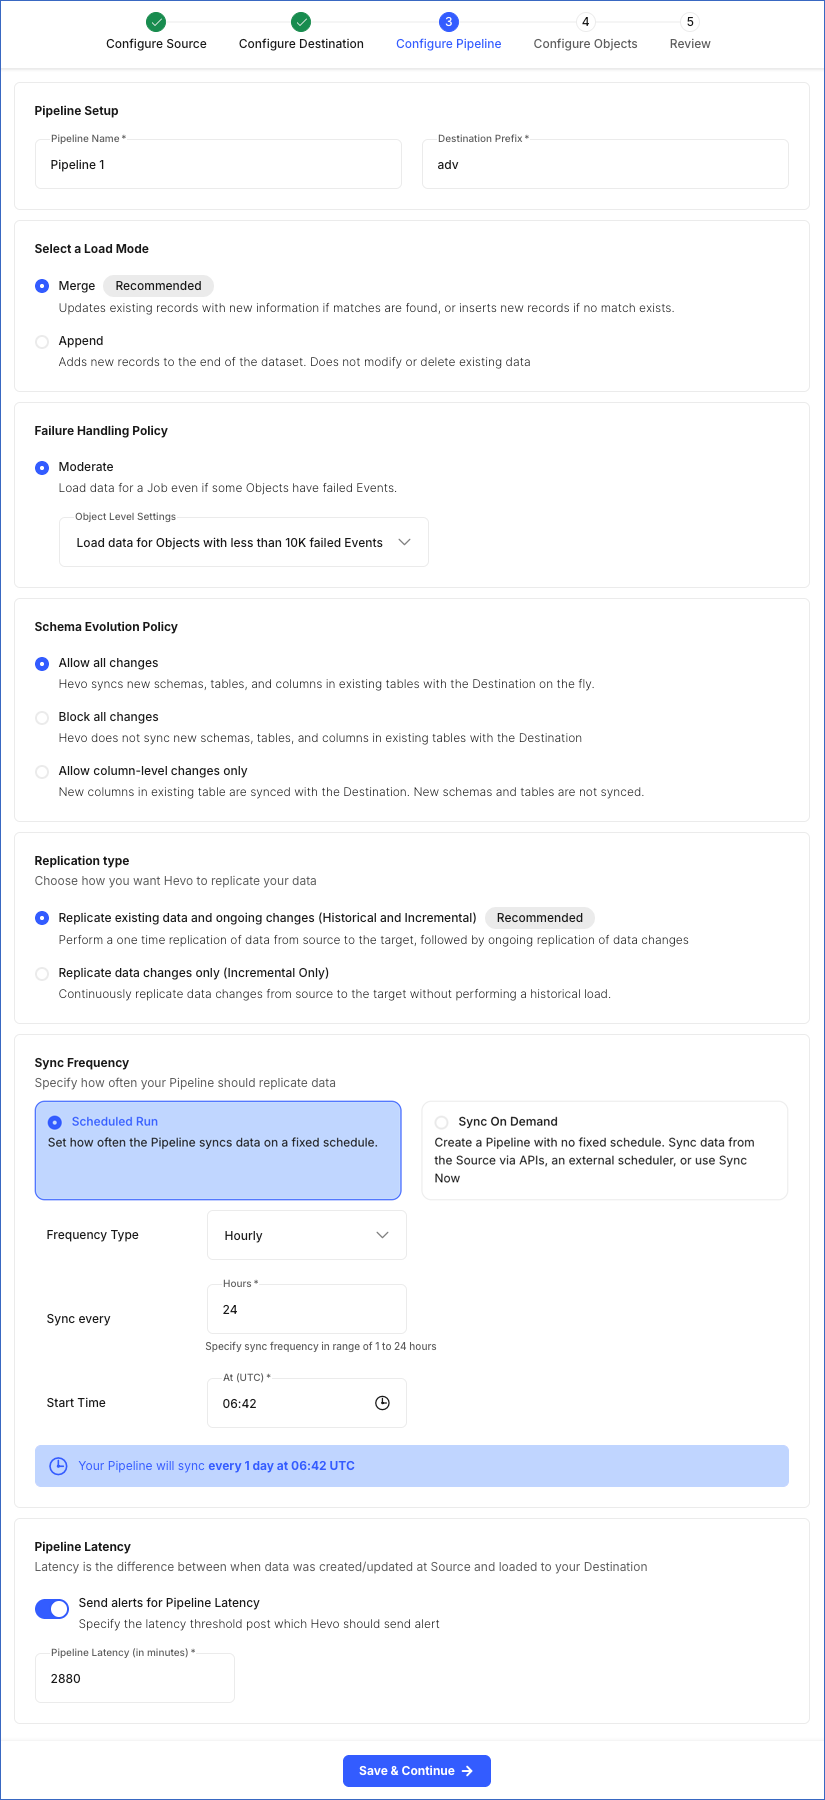
Configure the Pipeline Settings
You can specify your Pipeline settings after configuring your Destination. To do this, perform the following steps on the Configure Pipeline page:
-
In the Pipeline Setup section, specify the following:
-
Pipeline Name: A unique name for your Pipeline, not exceeding 255 characters.
-
Destination Prefix: A string value, not exceeding 32 characters, that you want to add at the beginning of your Destination table names. The string can have alphanumeric characters and underscores. As Hevo automatically adds a trailing underscore, you do not need to provide one at the end of the specified prefix string. For example, pp_1 but not pp_1_.
Note:
-
In Google BigQuery, a dataset whose name begins with an underscore is treated as a hidden dataset. As a result, for Pipelines that use BigQuery as the Destination, the Destination prefix cannot start with an underscore.
-
Hevo creates the tables following the conventions defined by the Destination for naming identifiers. Read your Destination documentation for the rules.
-
-
-
In the Select a Load Mode section, specify one of the following:
Note: This section is not displayed for Pipelines created with Ordergroove as the Source, as Hevo supports only the Merge load mode for this Source.
-
Merge (Recommended): In this mode, existing data records are updated based on the matching criteria, such as primary keys, and new records are added to your Destination table if they do not match the criteria. This is the default selection.
Note: You must define a primary key for the Source object if it does not have one.
-
Append: In this mode, new data records are added at the end of your Destination table without modifying or deleting any existing data.
Note: This option may result in duplicate data in your Destination tables.
If you select Merge mode, only Source objects that have a defined primary key are displayed in this mode on the Configure Objects page. For objects without a primary key, Hevo changes the load mode to Append.
Note: Hevo does not automatically revert these objects to Merge mode later. However, if required, you can manually change the load mode for any Source object from the Configure Objects page.
-
-
In the Failure Handling Policy section, specify the policy for handling object-level failures:
-
Moderate: In this mode, data from all successfully processed objects in the job is ingested and loaded into your Destination tables. Select an action from the drop-down to be performed in case of failures:
-
Don’t load data for Objects with failed Events: In this case, Hevo loads data from only those objects in a job that are processed successfully.
-
Load data for Objects with less than 10K failed Events: In this case, Hevo marks the entire job as failed if the number of failed Events across all objects in it exceeds the pre-defined threshold value of 10K.
-
-
-
In the Schema Evolution Policy section, specify the option to sync the Source schema changes with the Destination schema:
-
Allow all changes: In this option, Hevo replicates any changes in the Source schema, such as the addition of new columns, schemas, tables, and or updates to existing ones, to the Destination schema. This is the default selection.
-
Block all changes: In this option, Hevo does not replicate any changes in the Source schema to the Destination schema. This means that any modifications in the Source schema, such as the addition of new columns, tables, schemas, and or updates to existing ones, are not synced with the Destination schema.
-
Allow column-level changes only: In this option, Hevo replicates any changes only in the columns of the selected Source object(s) to the Destination. This means that any modifications to the Source columns, such as adding, deleting, and renaming, are synced with the Destination schema.
Note: Any tables or schemas created in the Source post-Pipeline creation are not synced.
-
-
In the Replication type section, specify the kind of data that you want Hevo to replicate:
Note: This section is not displayed for Pipelines created with SaaS Sources. Hevo always replicates both historical and incremental data for these Pipelines.
-
Replicate existing data and ongoing changes (Historical and Incremental): In this option, Hevo first replicates all existing data from the selected Source tables and thereafter captures only data changes. Hevo recommends this method to ensure integrity between your Source and Destination data.
-
Replicate data changes only (Incremental only): In this option, Hevo replicates only the new and changed data from your Source table.
-
-
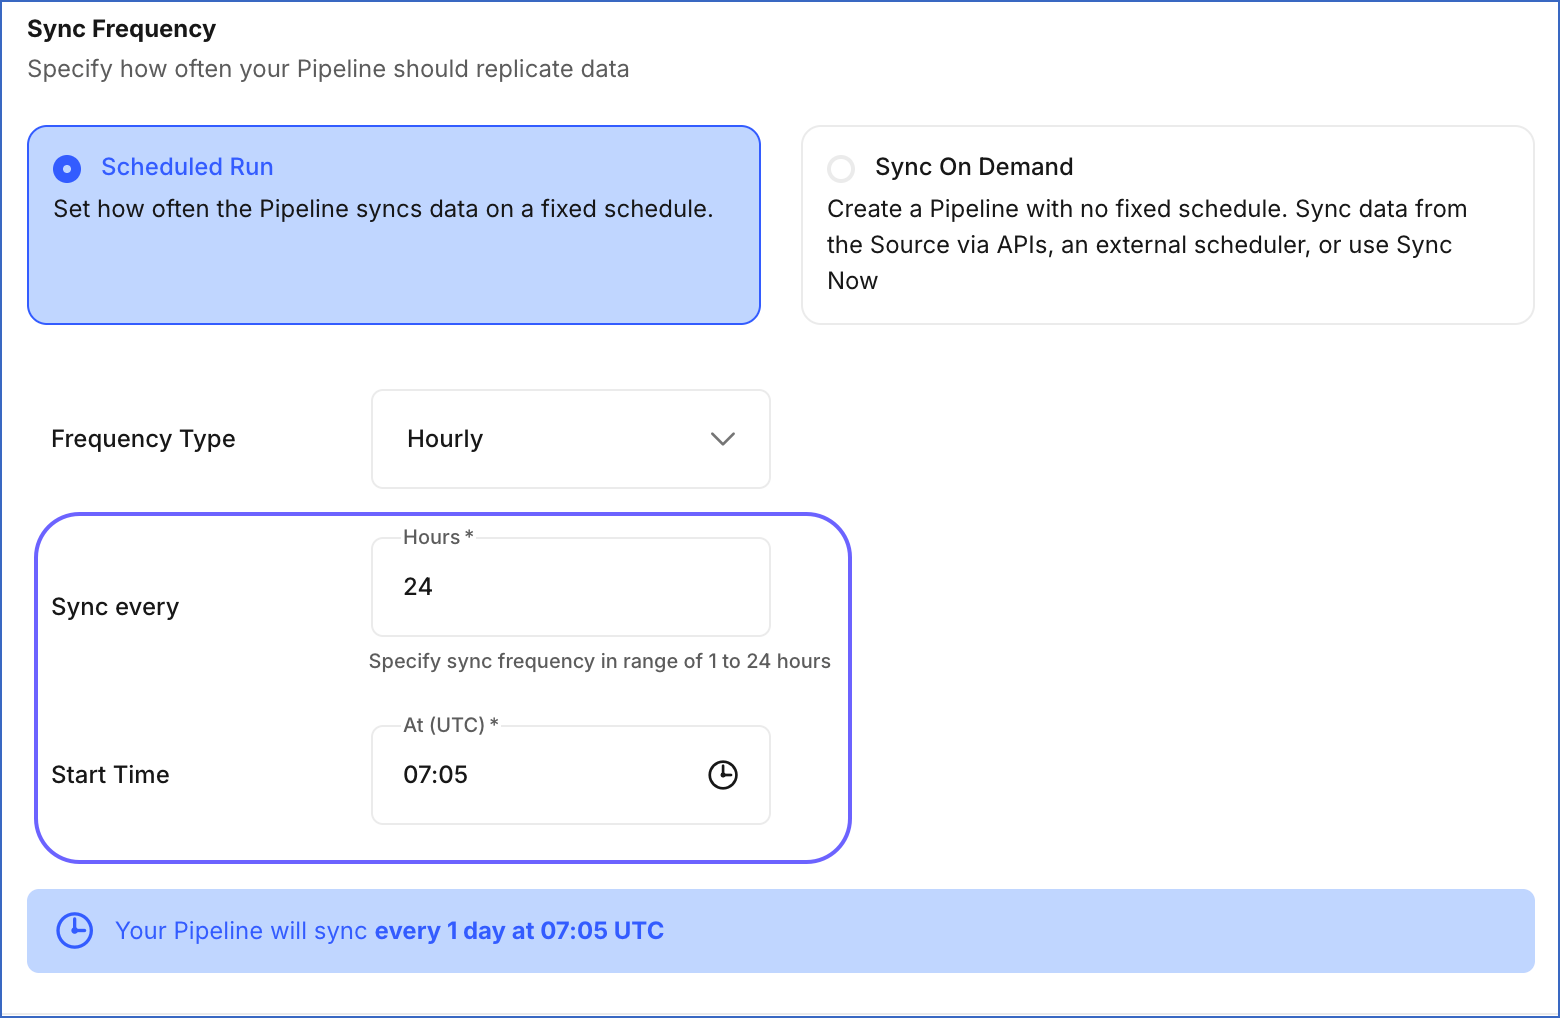
In the Sync Frequency section, specify the sync type for the Pipeline. Select one of the following:
-
Scheduled Run: In this mode, the Pipeline syncs data from the Source on a fixed schedule. Specify the following:
-
Frequency Type: The interval type in hours or minutes. Select Hourly or Every n minutes.
-
Sync every: The interval at which the Pipeline runs jobs to process data. Set an interval based on the selected Frequency Type:
-
Hourly: Specify an integer value between 1 and 24. Default value: 6.
If the interval is set to 24 hours, the following field is displayed:
-
Start Time: Enter a value in hh:mm (UTC) format to sync data at a fixed time every day. For example, specify 07:00 (UTC) if you want to sync the Pipeline at 00:00 (MST). By default, the field displays the current local time in UTC. For example, 07:51 UTC if the time is 00:51 MST.
Note: The start time must be between 00:00 and 23:59.
-
-
Every n minutes: Select the desired frequency from the drop-down. Default value: 30 minutes.
Note: If you need to sync data more frequently, contact Hevo Support.
-
-
-
Sync On Demand: In this mode, the Pipeline does not run on a fixed schedule and must be triggered using Hevo APIs, an external scheduler, such as Airflow, or the Sync Now option.
Note: For log-based Pipelines, ensure the Pipeline run frequency is higher than the database log retention period to avoid log expiry and subsequent data loss. For example, if the log retention period is 24 hours, the Pipeline must run more frequently than every 24 hours.
-
-
In the Pipeline Latency section:
-
Send alerts for Pipeline Latency: Enable this option to receive alerts when your Pipeline latency exceeds the set value. If enabled, Hevo displays the following field:
- Pipeline Latency (in minutes): The latency threshold value for your Pipeline. Hevo sends an alert when this threshold is exceeded. Latency is the difference between when the data was created or updated at the Source and when it was loaded to your Destination. Set a value to at least twice the specified sync frequency (in minutes).
-
-
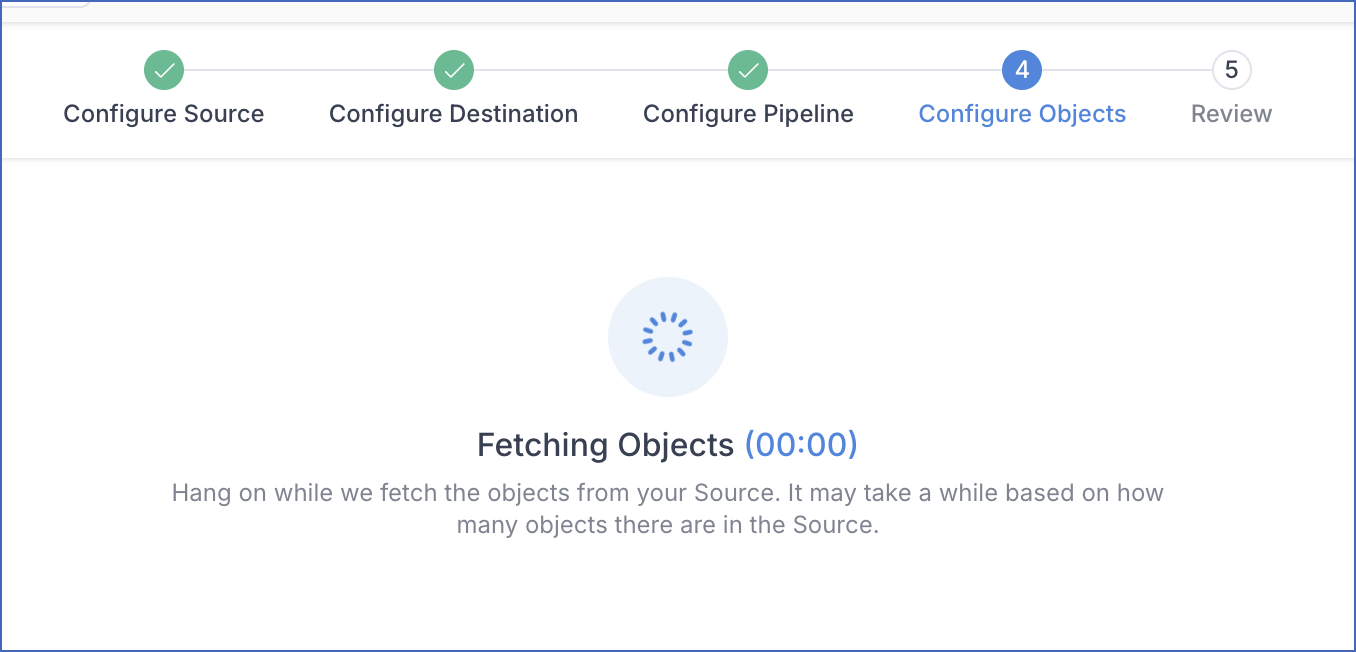
Click Save & Continue. Once the Pipeline settings are saved, Hevo fetches all the objects from the database specified while configuring the Source.