Amazon Redshift Serverless is a cloud-based data warehouse that lets you analyze and query large amounts of data without needing to manage any servers or infrastructure. You are charged only for the resources you use to run your queries, making it suitable for varying workloads. So, if you’re not running a query, you’re not being charged. It works with standard SQL, which means if you’ve ever used a spreadsheet tool or a basic database before, it’s easy to manage.
If you are new to AWS and Amazon Redshift Serverless, follow the steps below to create an AWS account and an Amazon Redshift Serverless workspace for Hevo to load data into. If you already have an AWS account and a running Redshift serverless instance, skip to Step 2.
Prerequisites
-
You have the required IAM permissions to create and manage Amazon Redshift Serverless resources.
-
An Amazon Redshift Serverless instance is running. This is the core service you will be connecting to.
-
A workgroup and namespace are created. A workgroup organizes the compute resources for your queries.
-
The cluster identifier and port number of the Amazon Redshift Serverless instance are available. These are needed to connect Hevo to your database.
Log in to AWS and Access Amazon Redshift Serverless
If you are new to AWS and don’t have an account yet, skip to Create an AWS account. If your AWS account and instance are already set up, skip to signing in to AWS account.
Sign in to an existing AWS account
-
Go to https://aws.amazon.com/console and click Sign in to console.
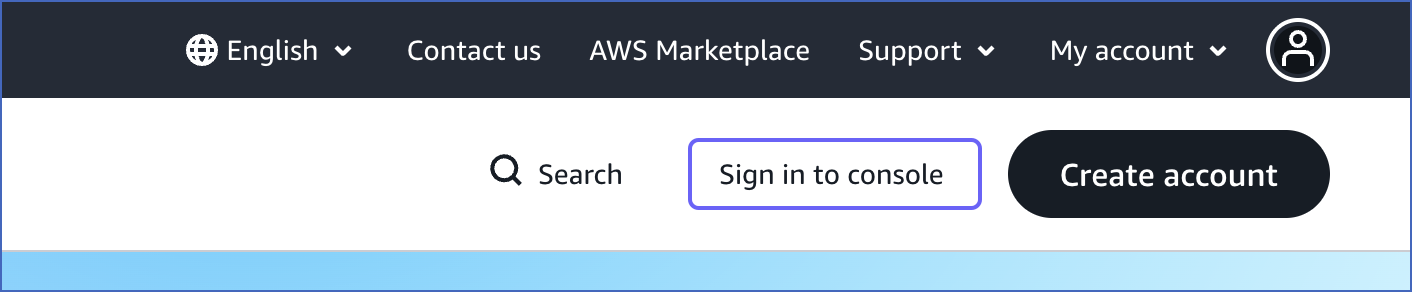
-
Click Sign in using root user email.

-
Select the Root user option if you are the account owner and have admin access, or the IAM user option if your organization has set up individual user accounts with specific permissions.
Note: The account admin may create roles based on AWS IAM policies for database permissions and assign these to users.
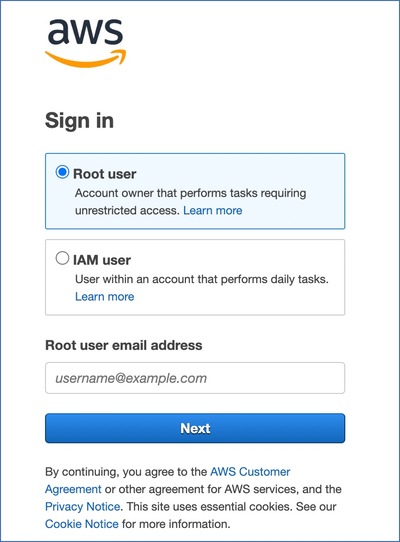
-
Provide the Root user email address and click Next.
-
Provide the Root user password.
-
Click Sign In.
Once you have signed in, proceed to access the Amazon Redshift Serverless dashboard.
Create an AWS account
Tip: Amazon Redshift offers a 3-month free trial for new users. If you’re just getting started, this is a great way to explore without incurring costs right away.
-
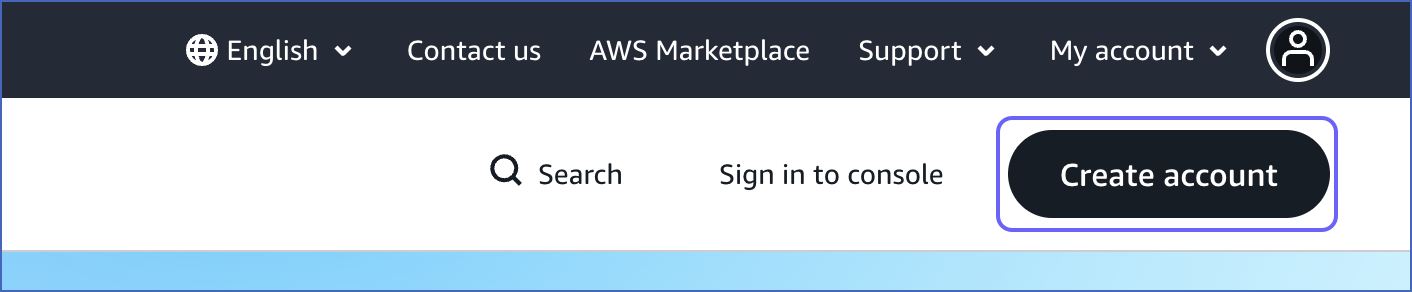
Go to aws.amazon.com and click Create account.
-
On the Sign up for AWS page, specify the following:
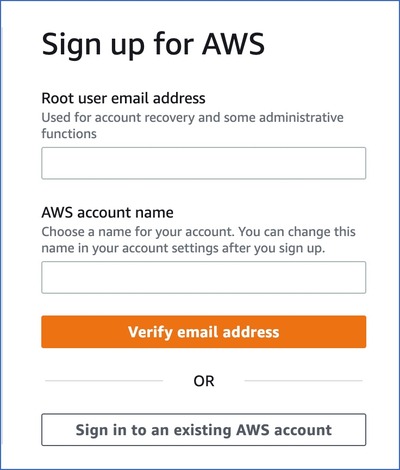
-
Root user email address: A valid email address to create and manage your AWS account. The root user serves as the account admin.
-
AWS account name: A unique name for your AWS account, for example, My Company Data. You can change this later if required.
-
-
Click Verify email address and check your inbox for a verification code.
-
Provide the verification code and proceed to set up your account.
-
Follow the remaining on-screen prompts to complete your account setup, including setting a password and providing billing information.
Once done, you’ll have access to your AWS account and can proceed to access the Amazon Redshift Serverless dashboard.
Access the Amazon Redshift Serverless Dashboard
-
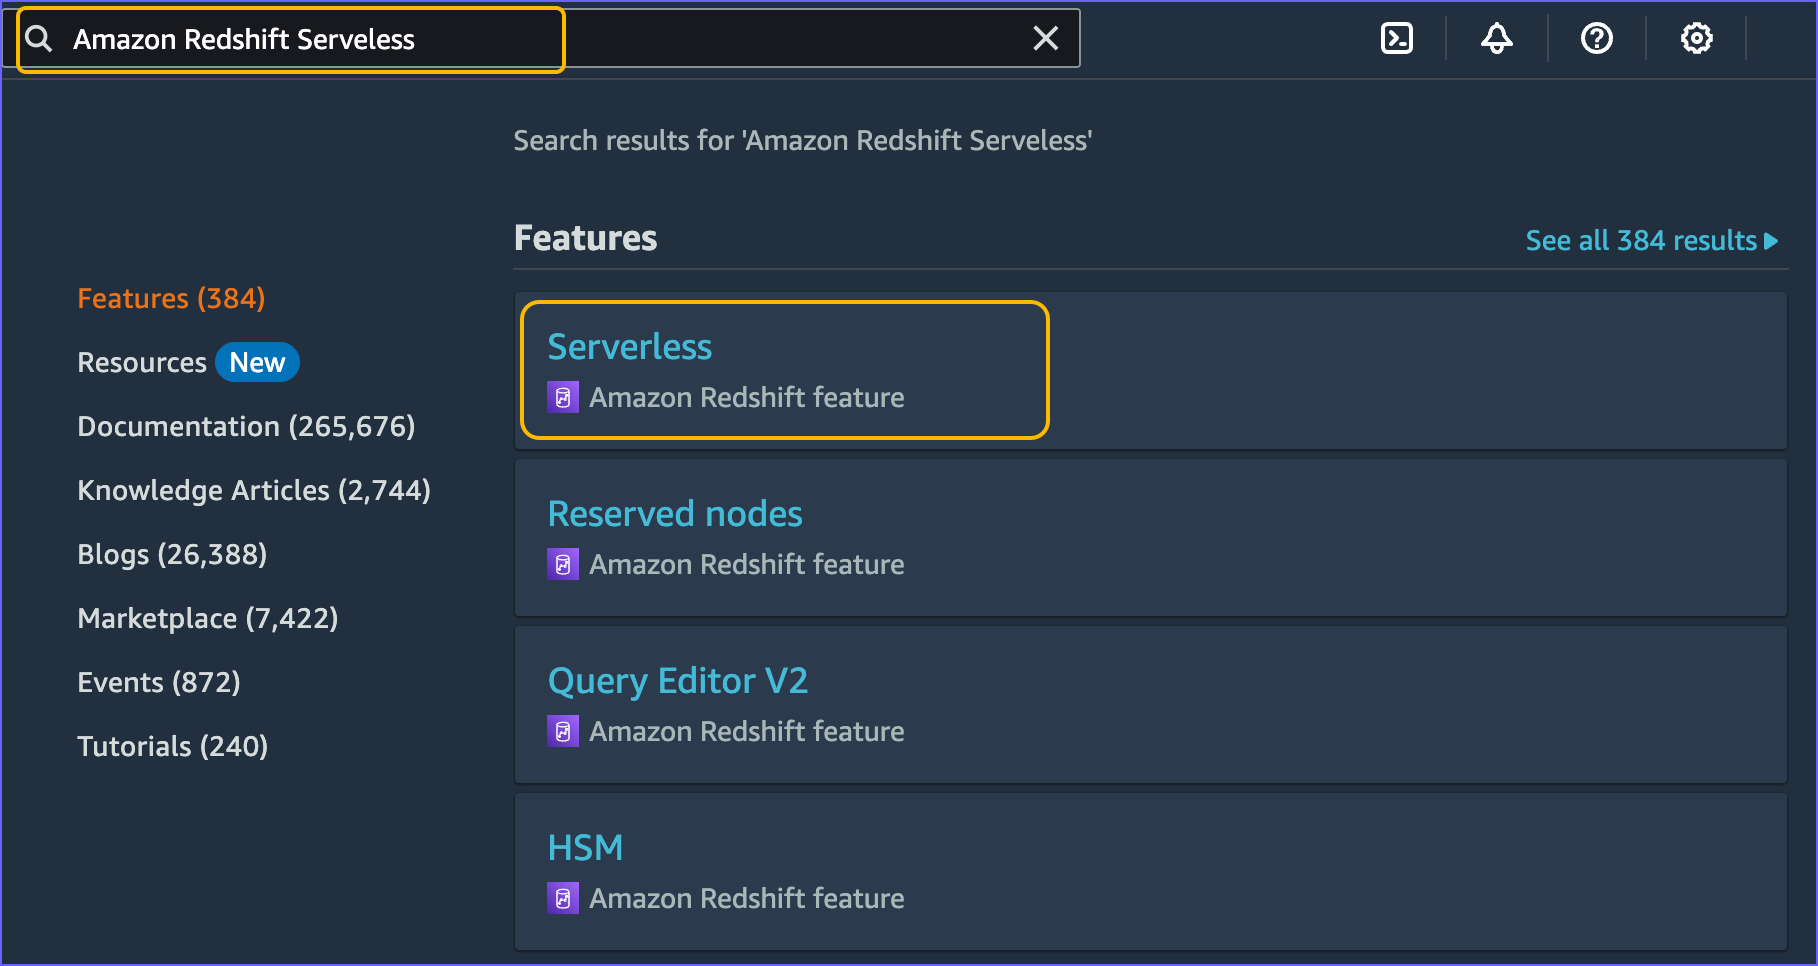
In the AWS Console Home, use the search bar to find Amazon Redshift Serverless.
-
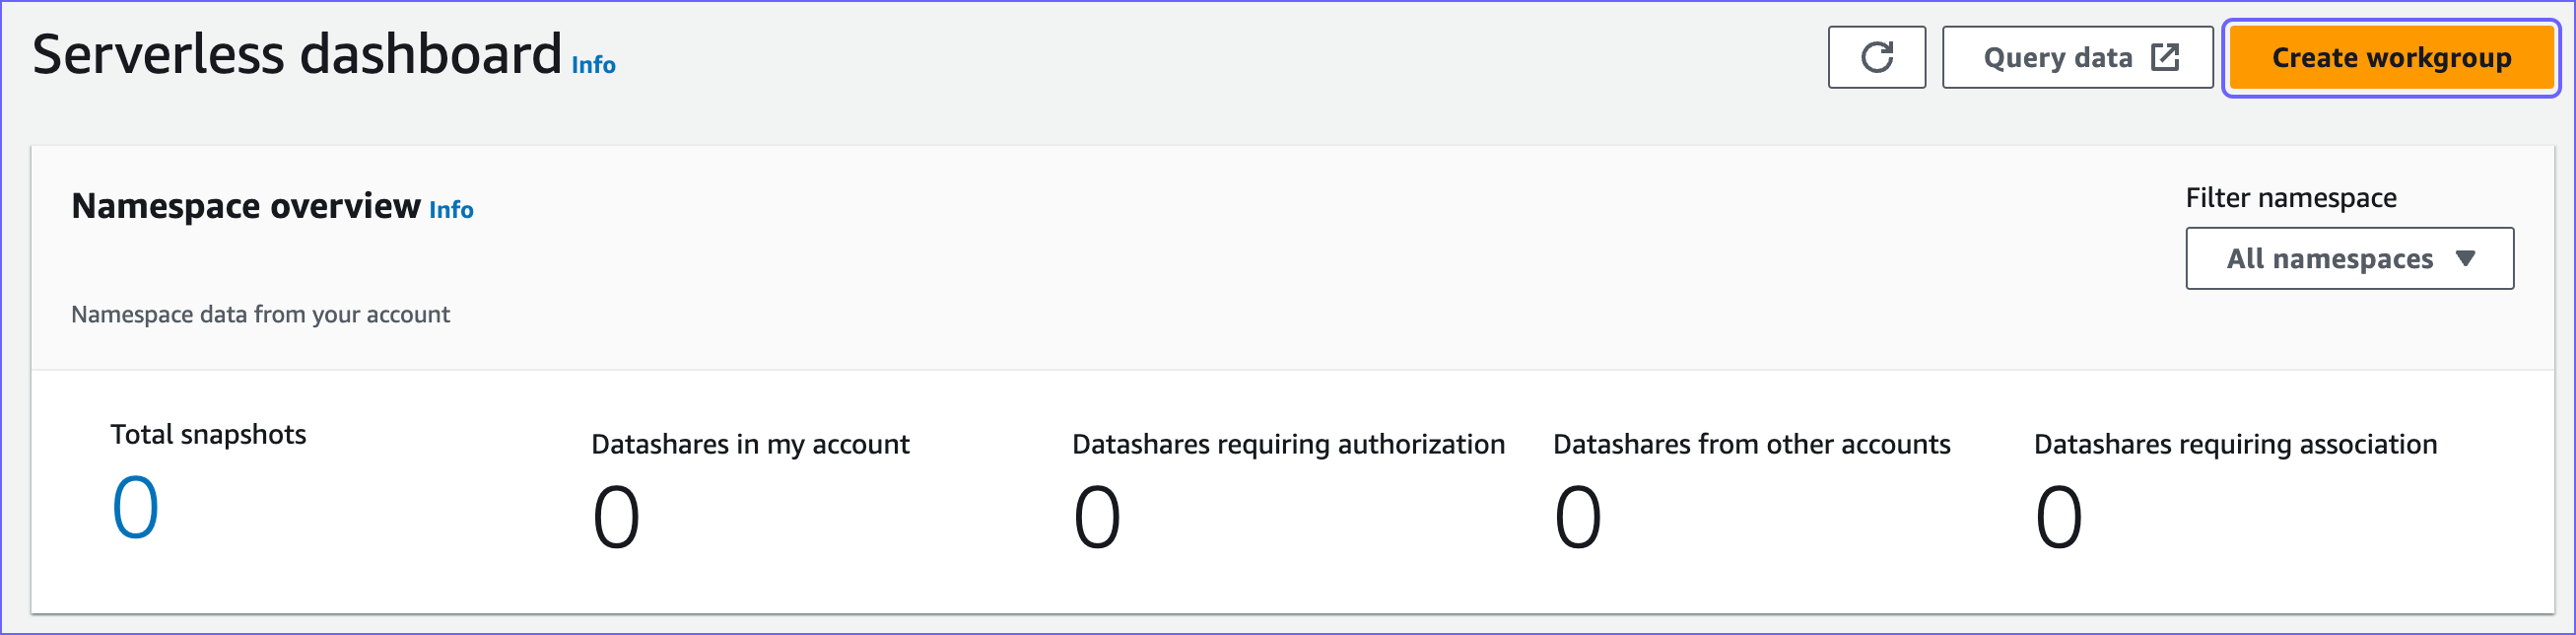
Click Serverless to open the Serverless dashboard.
Create a Workgroup and Namespace
A workgroup is a collection of compute resources, such as Redshift Processing Units (RPUs) and VPC subnet groups, that run your data queries. A namespace contains the database objects and users. Together, they allow you to run queries and manage workloads independently.
Perform the following steps to create a workgroup and a namespace:
-
On the Serverless dashboard, in the top right corner, click Create workgroup.
-
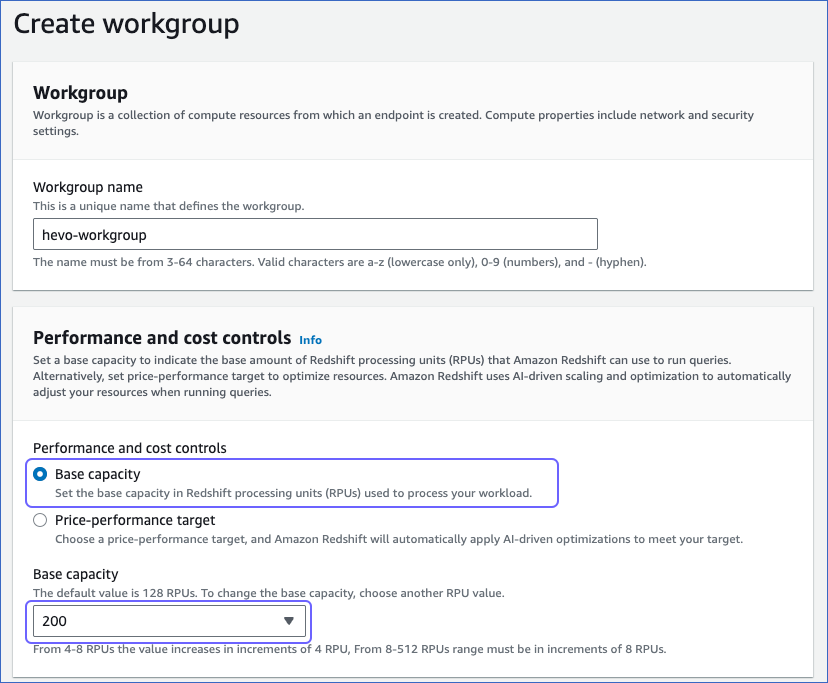
On the Create workgroup page, do the following:
-
In the Workgroup section, specify a unique name for your workgroup. For example, hevo-workgroup. This name identifies your compute environment.
-
In the Performance and cost controls section, choose the option that best meets your requirements. Here, we choose the Base capacity option and select 200 as the capacity, measured in RPUs, from the drop-down. You can adjust this value based on your usage.
Note: Higher RPU values provide more processing power and can improve query performance. However, this also increases the cost.
-
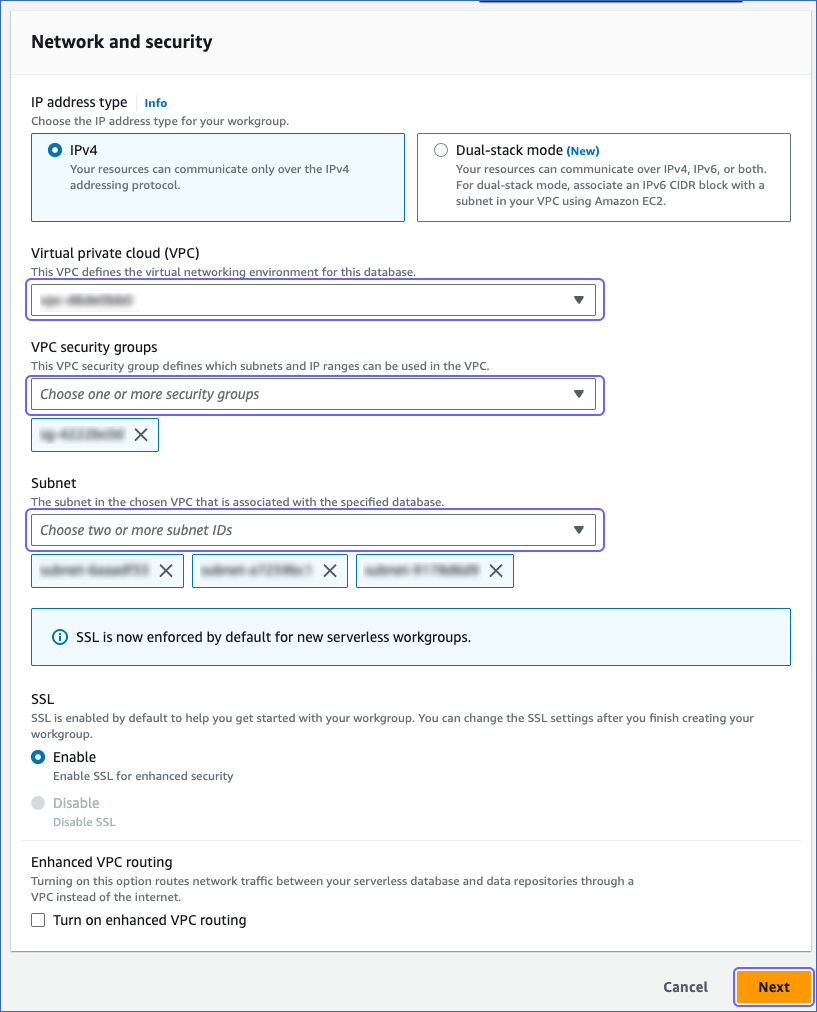
In the Network and security section, specify the following:
-
IP address type: The IP address type relevant to your requirements. Here, we select IPv4.
-
Virtual private cloud (VPC): The virtual networking environment for the Serverless database. This is your private network environment within AWS.
-
VPC security groups: The security group(s) that define the subnets, IP ranges, and rules that control inbound traffic for your VPC endpoint. It controls who can access your Serverless database.
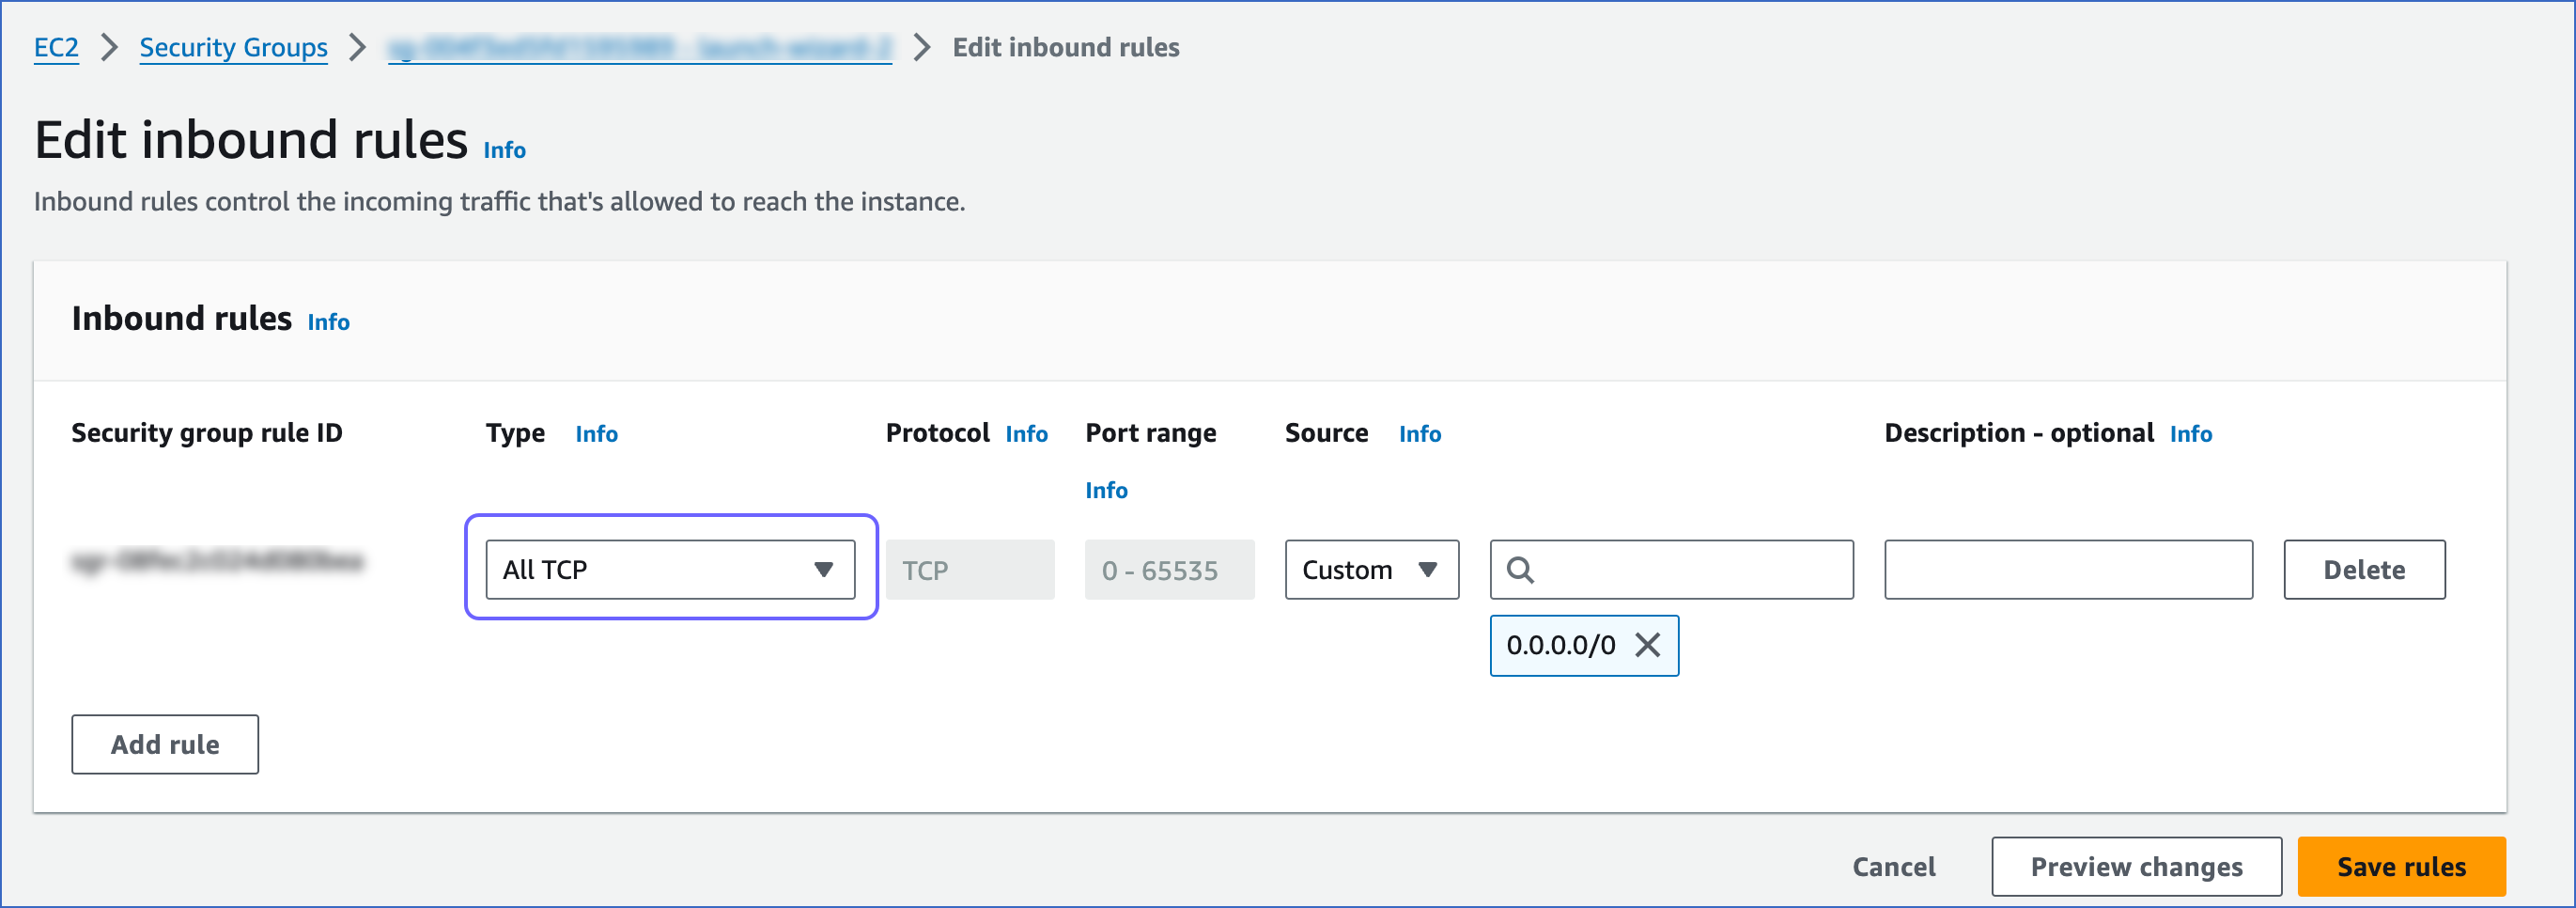
Note: Ensure that the security group you select has the protocol Type set to All TCP in its inbound rule configuration. Read Configuring security group communication settings for the steps to edit inbound rules. This allows Hevo to connect to your Serverless database on any TCP port, including port 5439, which is the default port Amazon Redshift uses.
-
Subnet: The IP address segments associated with the selected VPC. This defines the IP address range within your network.
-
-
-
Click Next.
-
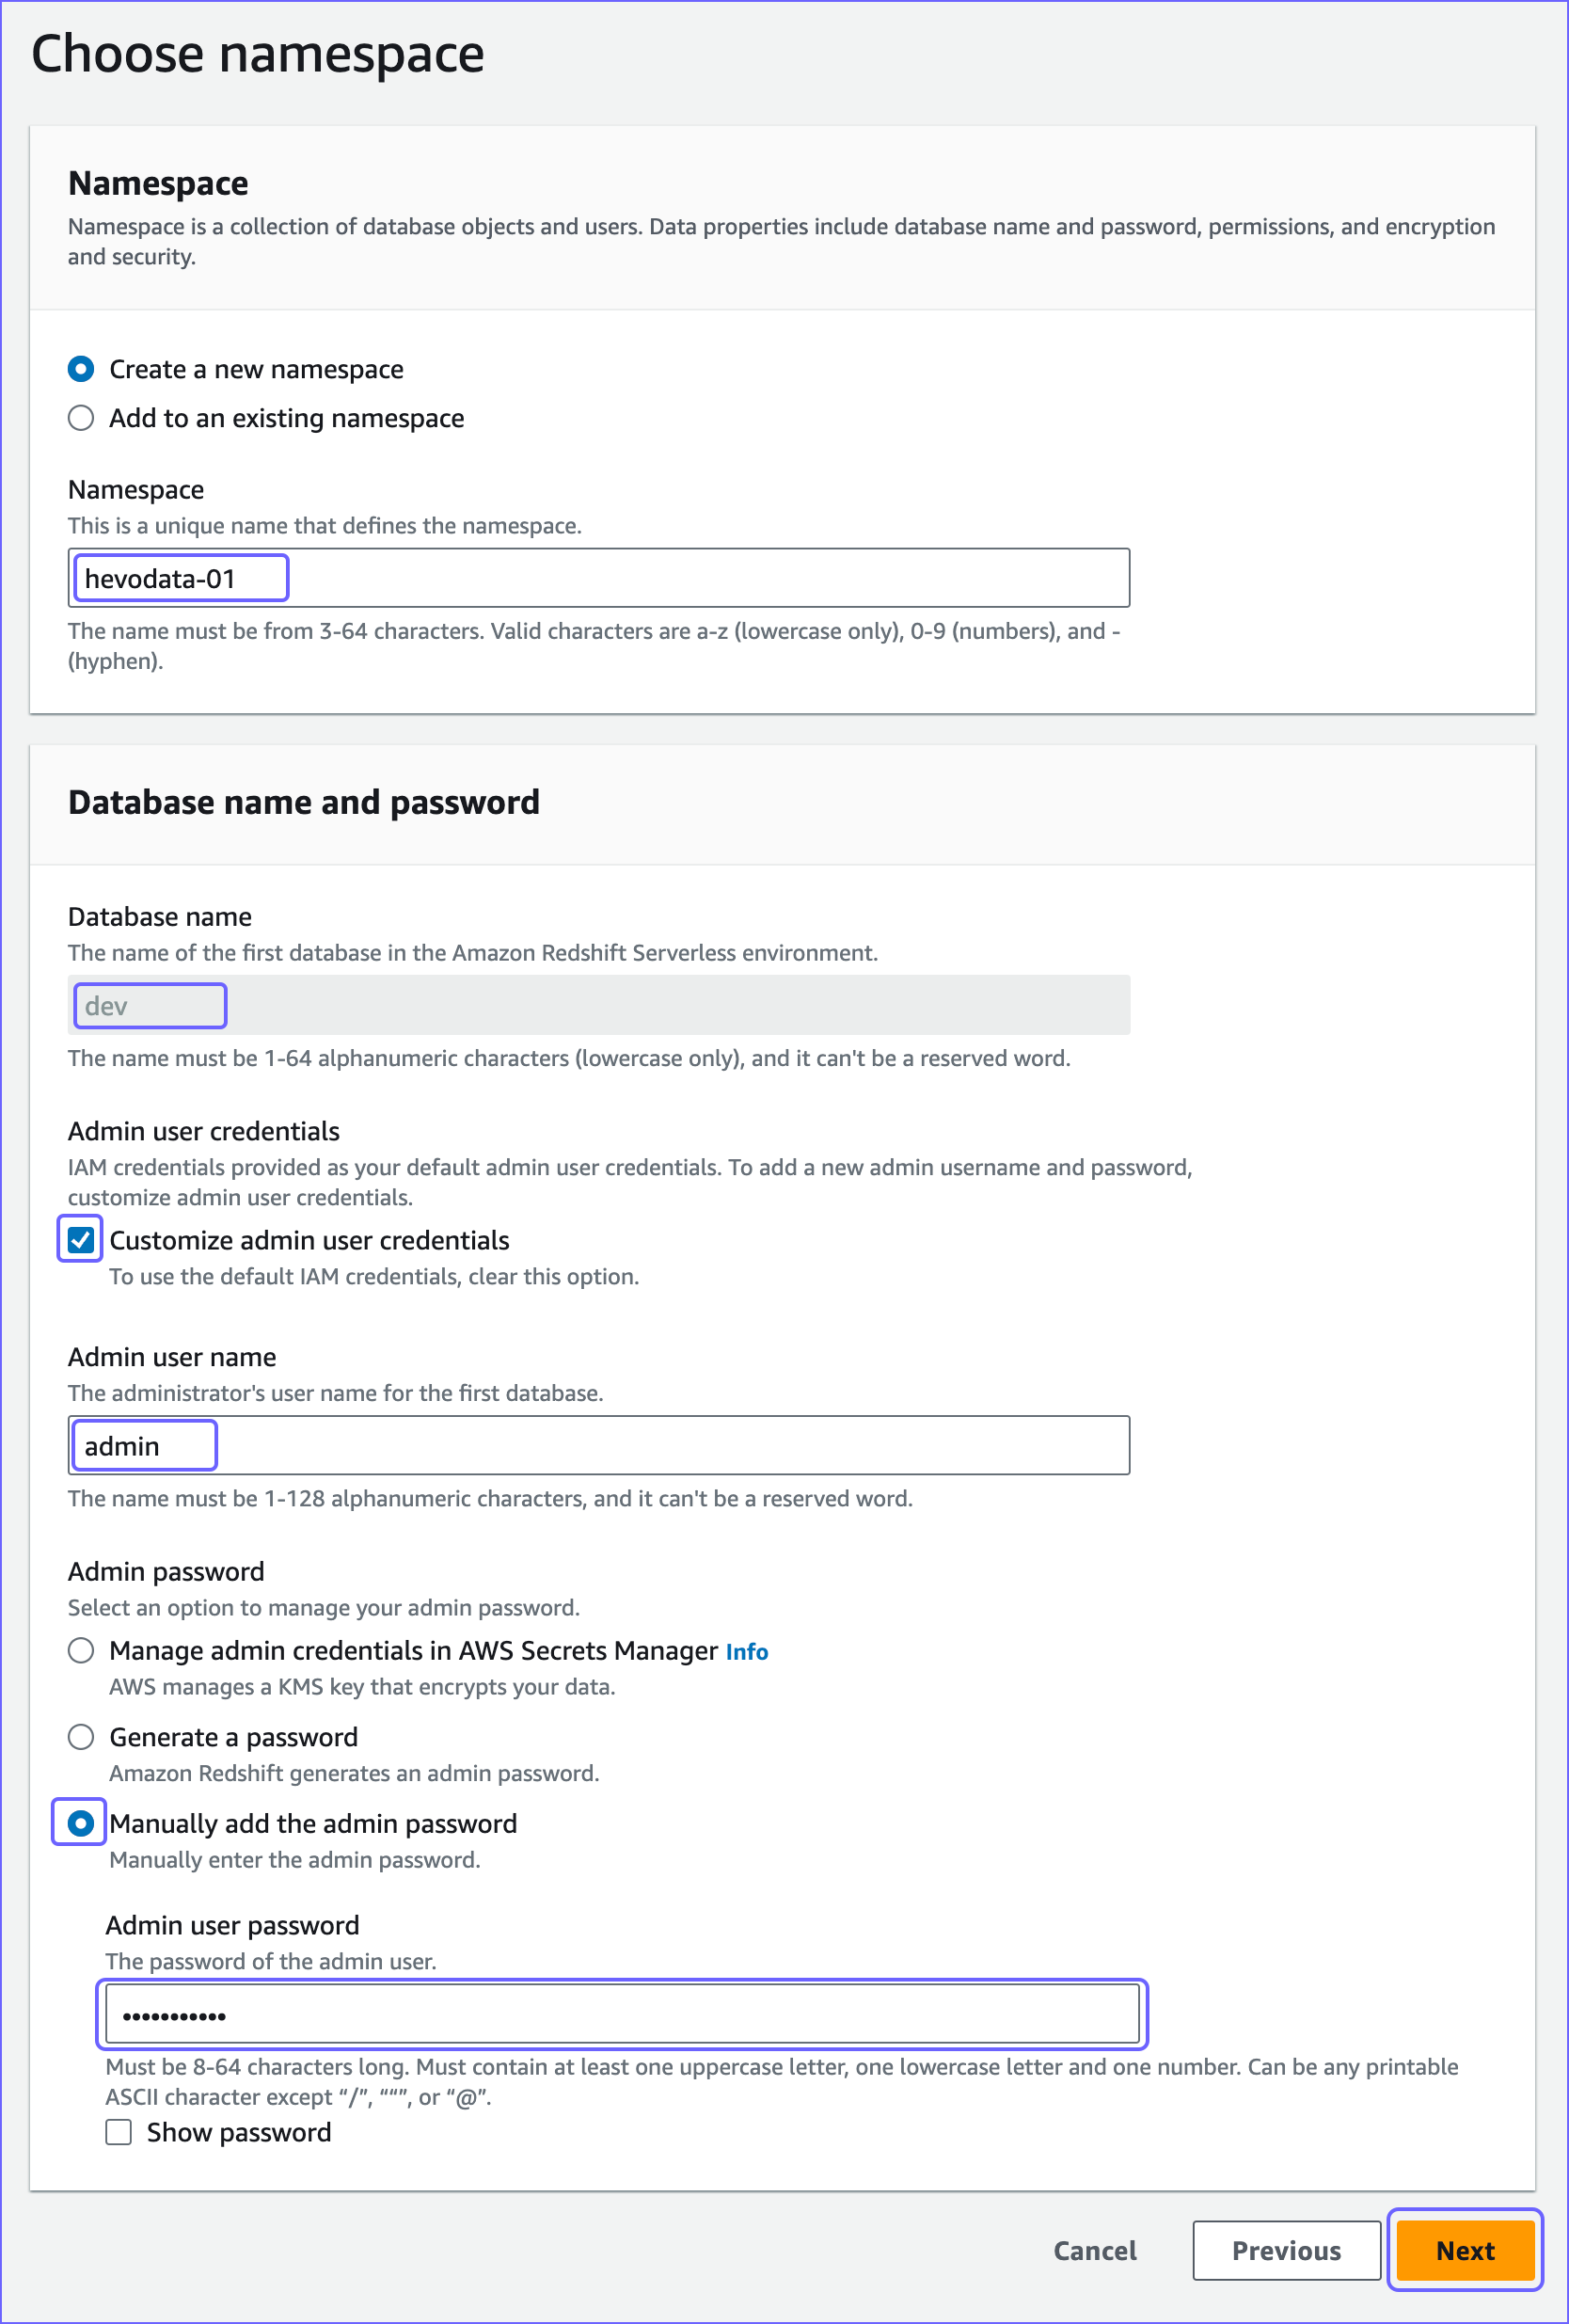
On the Choose namespace page, specify the following:
-
Namespace: A unique name for your namespace. For example, hevodata-01.
-
Admin user credentials: The credentials to authorize the admin user on the Serverless database.
-
Customize admin user credentials (recommended): If selected, it allows you to add a new admin username and password. Otherwise, your IAM credentials are used as the default admin credentials.
-
Admin user name: The username of your admin user. Default value: admin.
-
Admin password: Select the following option to generate your admin password:
-
Manually add the admin password: If selected, you can provide the admin password manually.
- Admin user password: The password of your admin user.
-
-
-
Copy the Database name, Admin user name, and Admin user password credentials and save them securely. You will need these credentials while configuring your Amazon Redshift Serverless Destination. If you lose them, you may need to reset your access.
-
Click Next.
-
On the Review and create page, review the workgroup and namespace settings and click Create.
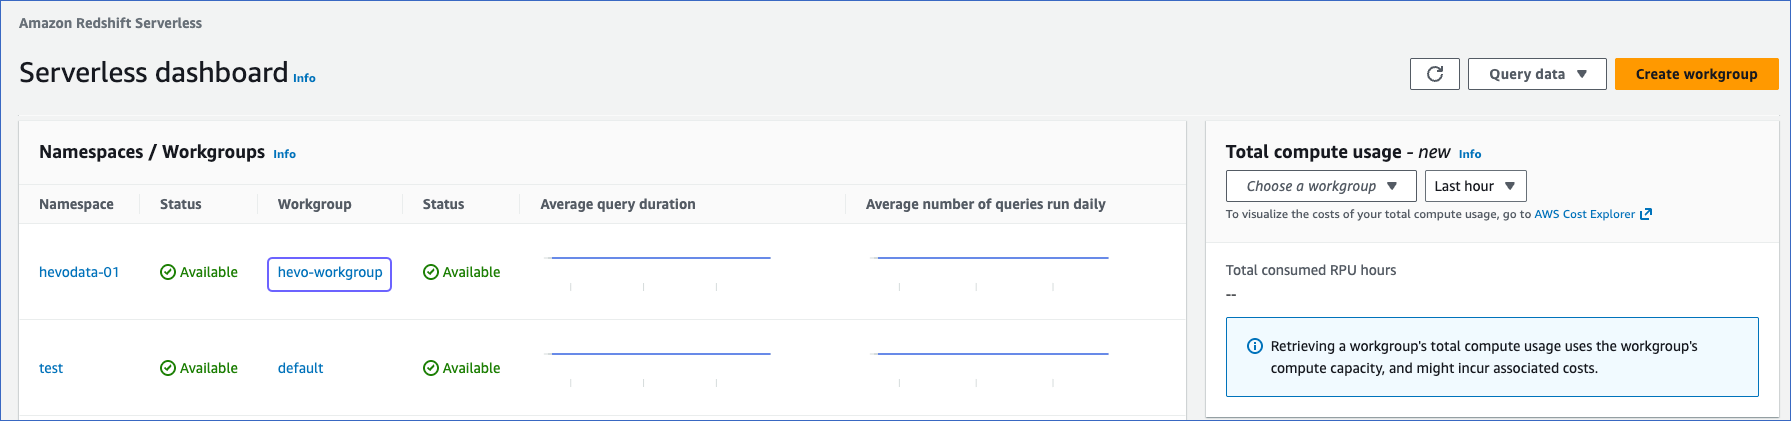
Once the workgroup and namespace are created, you can view them in the Serverless dashboard, under the Namespaces/Workgroups section. You can now move on to Step 3, where you obtain the Redshift serverless connection settings that Hevo uses to connect to your Destination.

Obtain the Redshift Serverless Connection Settings
Hevo connects to your Amazon Redshift Serverless data warehouse using the database cluster identifier and the port number. To retrieve these details, do one of the following, depending on how you want Hevo to connect to your Redshift Serverless database:
-
Retrieve the publicly accessible endpoint: Use this if Hevo is connecting to your Serverless database over the public internet. This is suitable for teams connecting from outside AWS or standard setups where your database does not need to be restricted to a private network.
-
Retrieve the VPC endpoint: Use this if you want Hevo to connect through a private network within AWS. This avoids exposing your database to the public internet and is recommended for environments with strict security and compliance requirements.
Retrieve the publicly accessible endpoint
Use this endpoint to connect your Amazon Redshift Serverless instance to Hevo over the public internet. To retrieve the publicly accessible endpoint, perform the following steps:
Note: Using a publicly accessible endpoint will expose your Serverless database to the internet. Ensure that your security groups and admin credentials are correctly configured before proceeding.
-
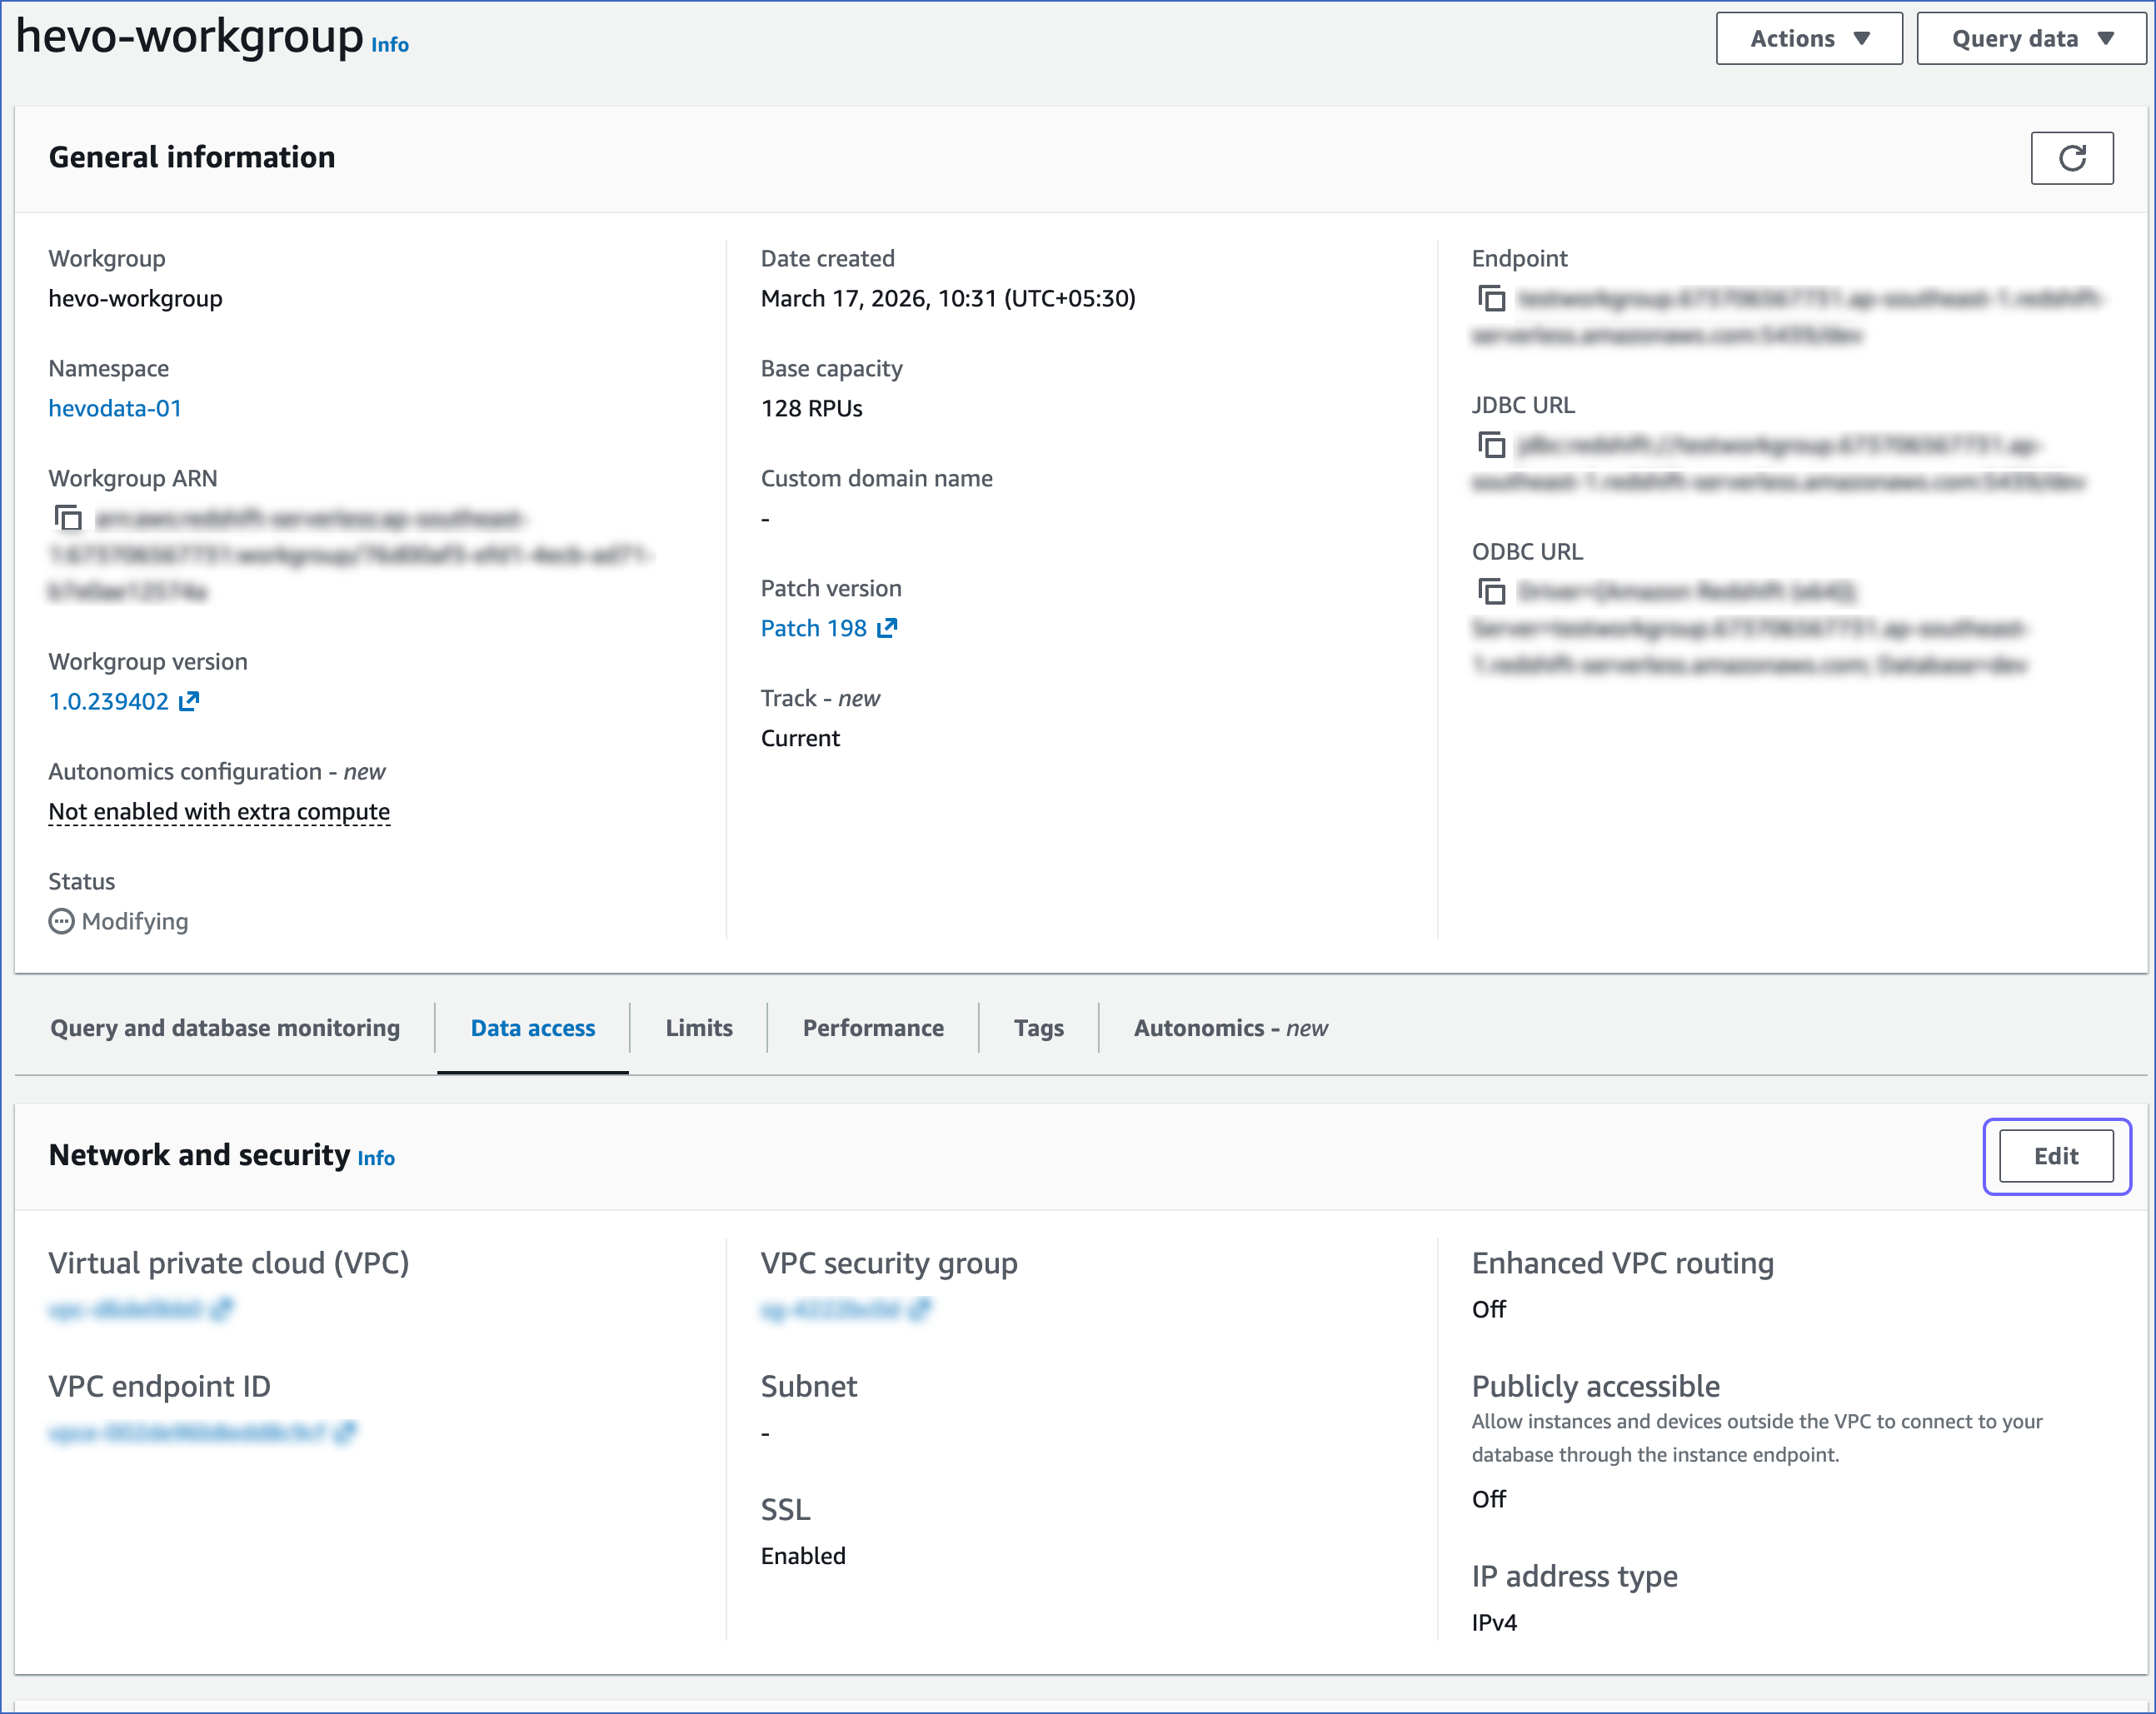
In the Namespaces/workgroups section, select the Workgroup that you created in the Create a Workgroup and Namespace section.
-
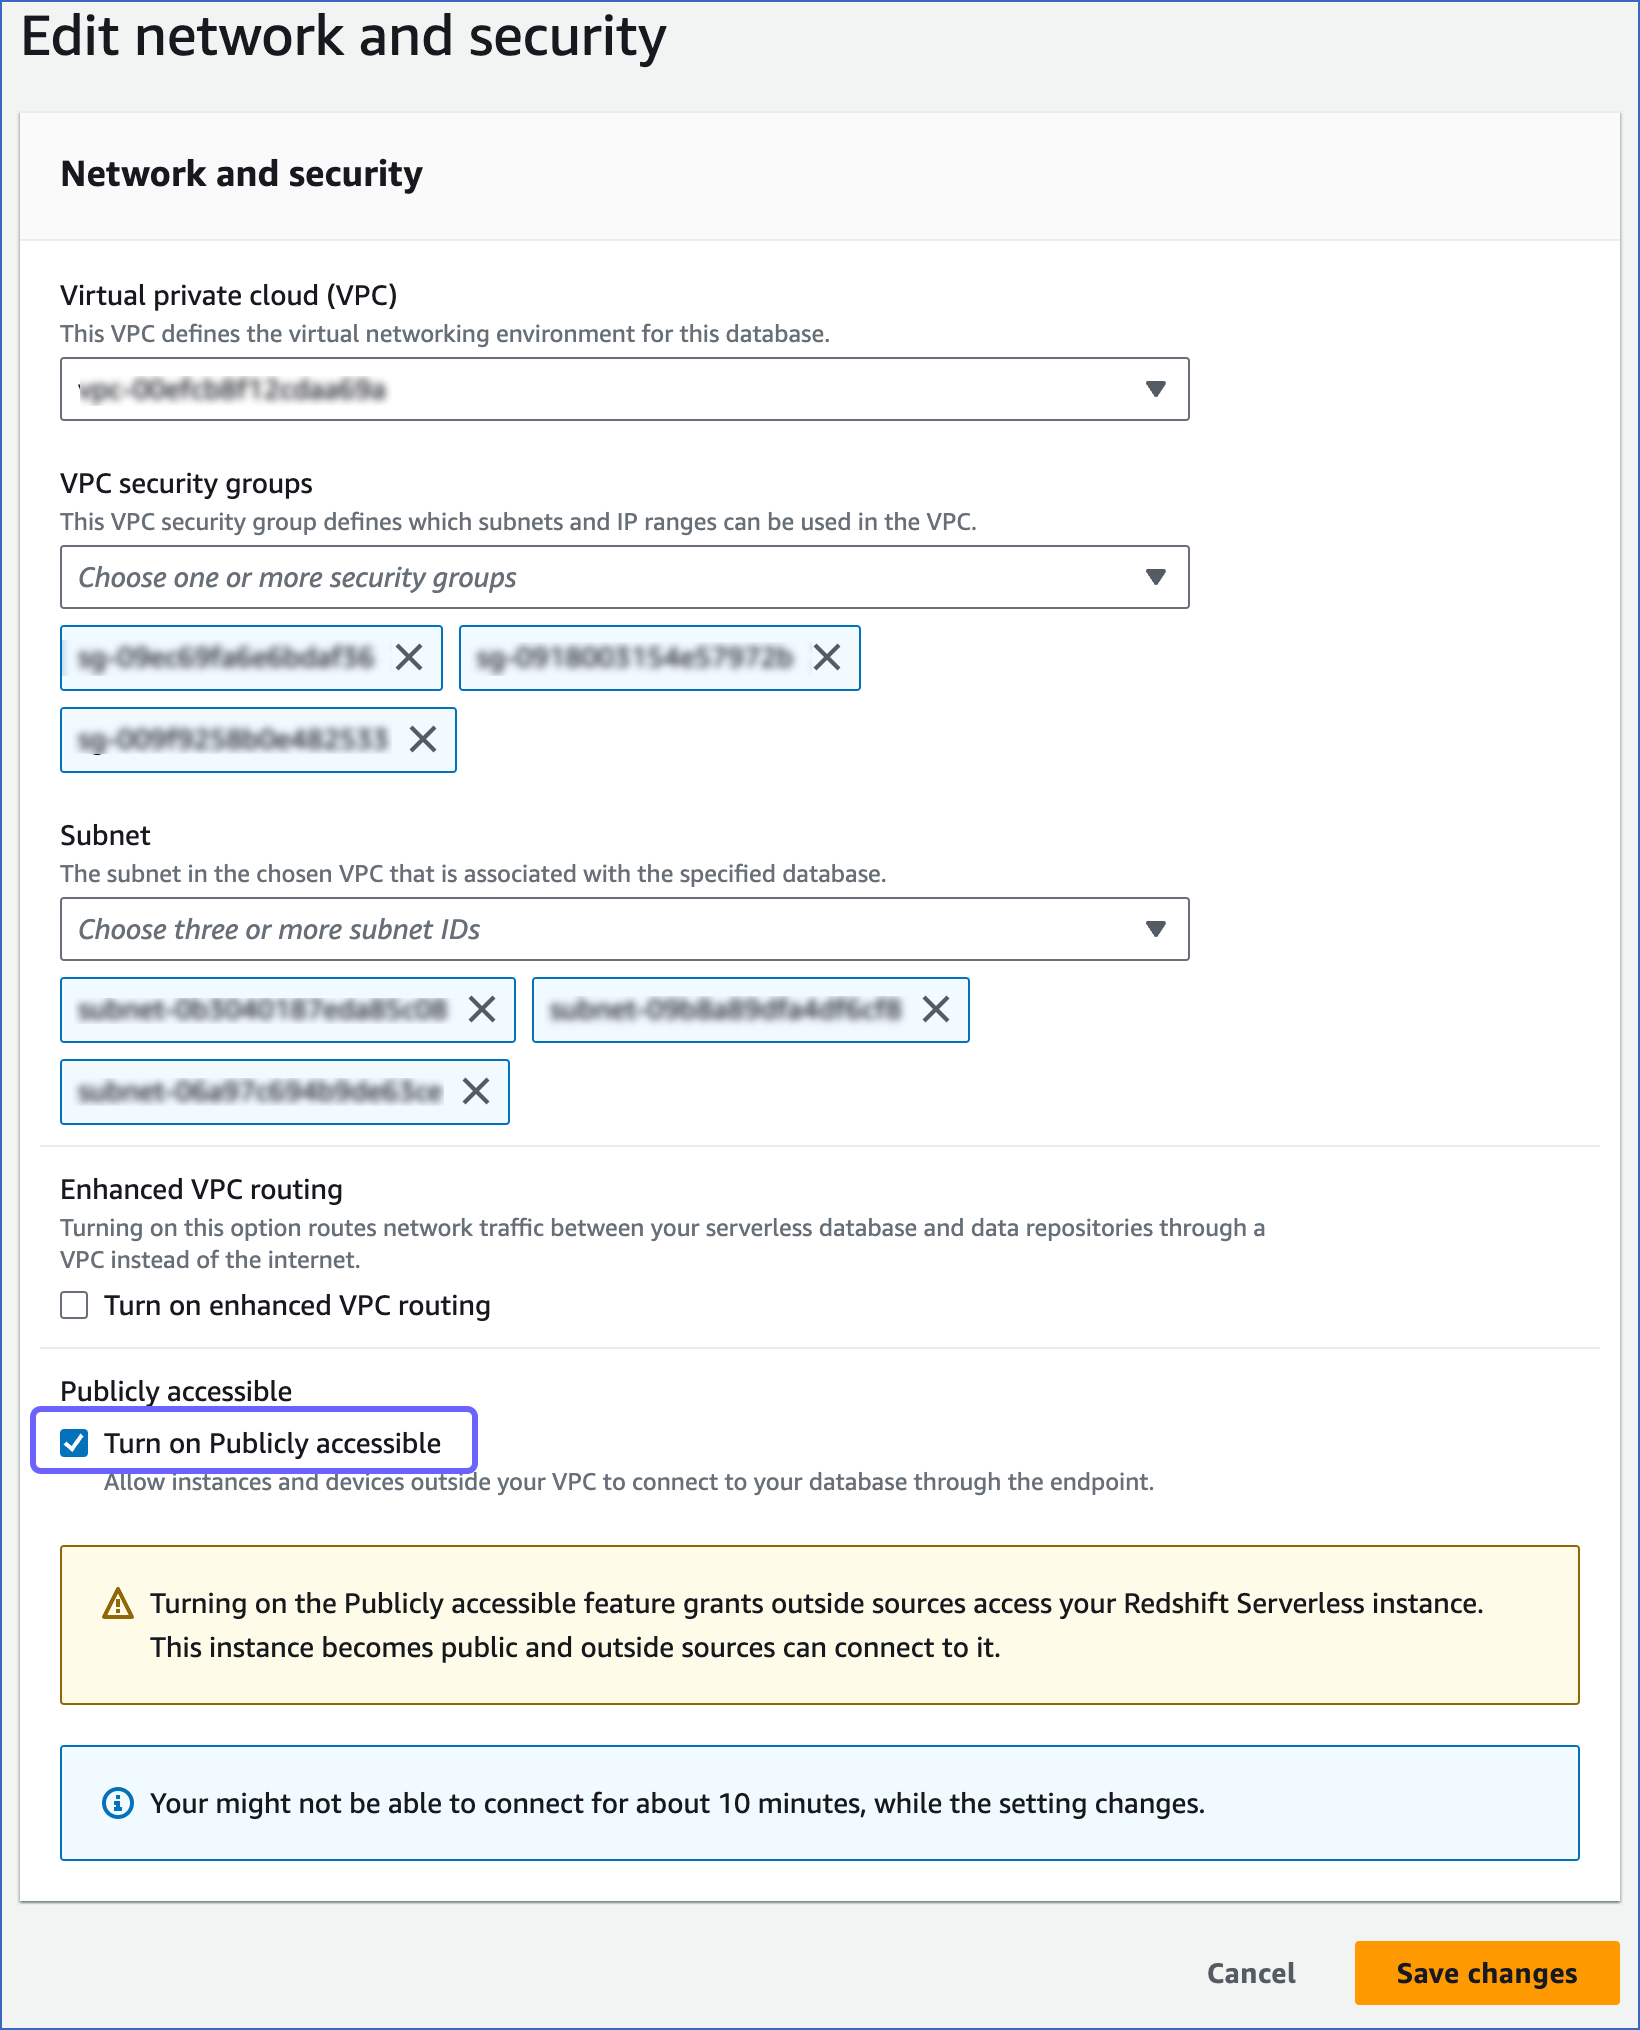
On the <your workgroup> page, under the Network and security section, click Edit.
-
On the Edit network and security page, select the Turn on Publicly accessible check box to allow Hevo to connect to your Serverless database.
-
Click Save changes.
-
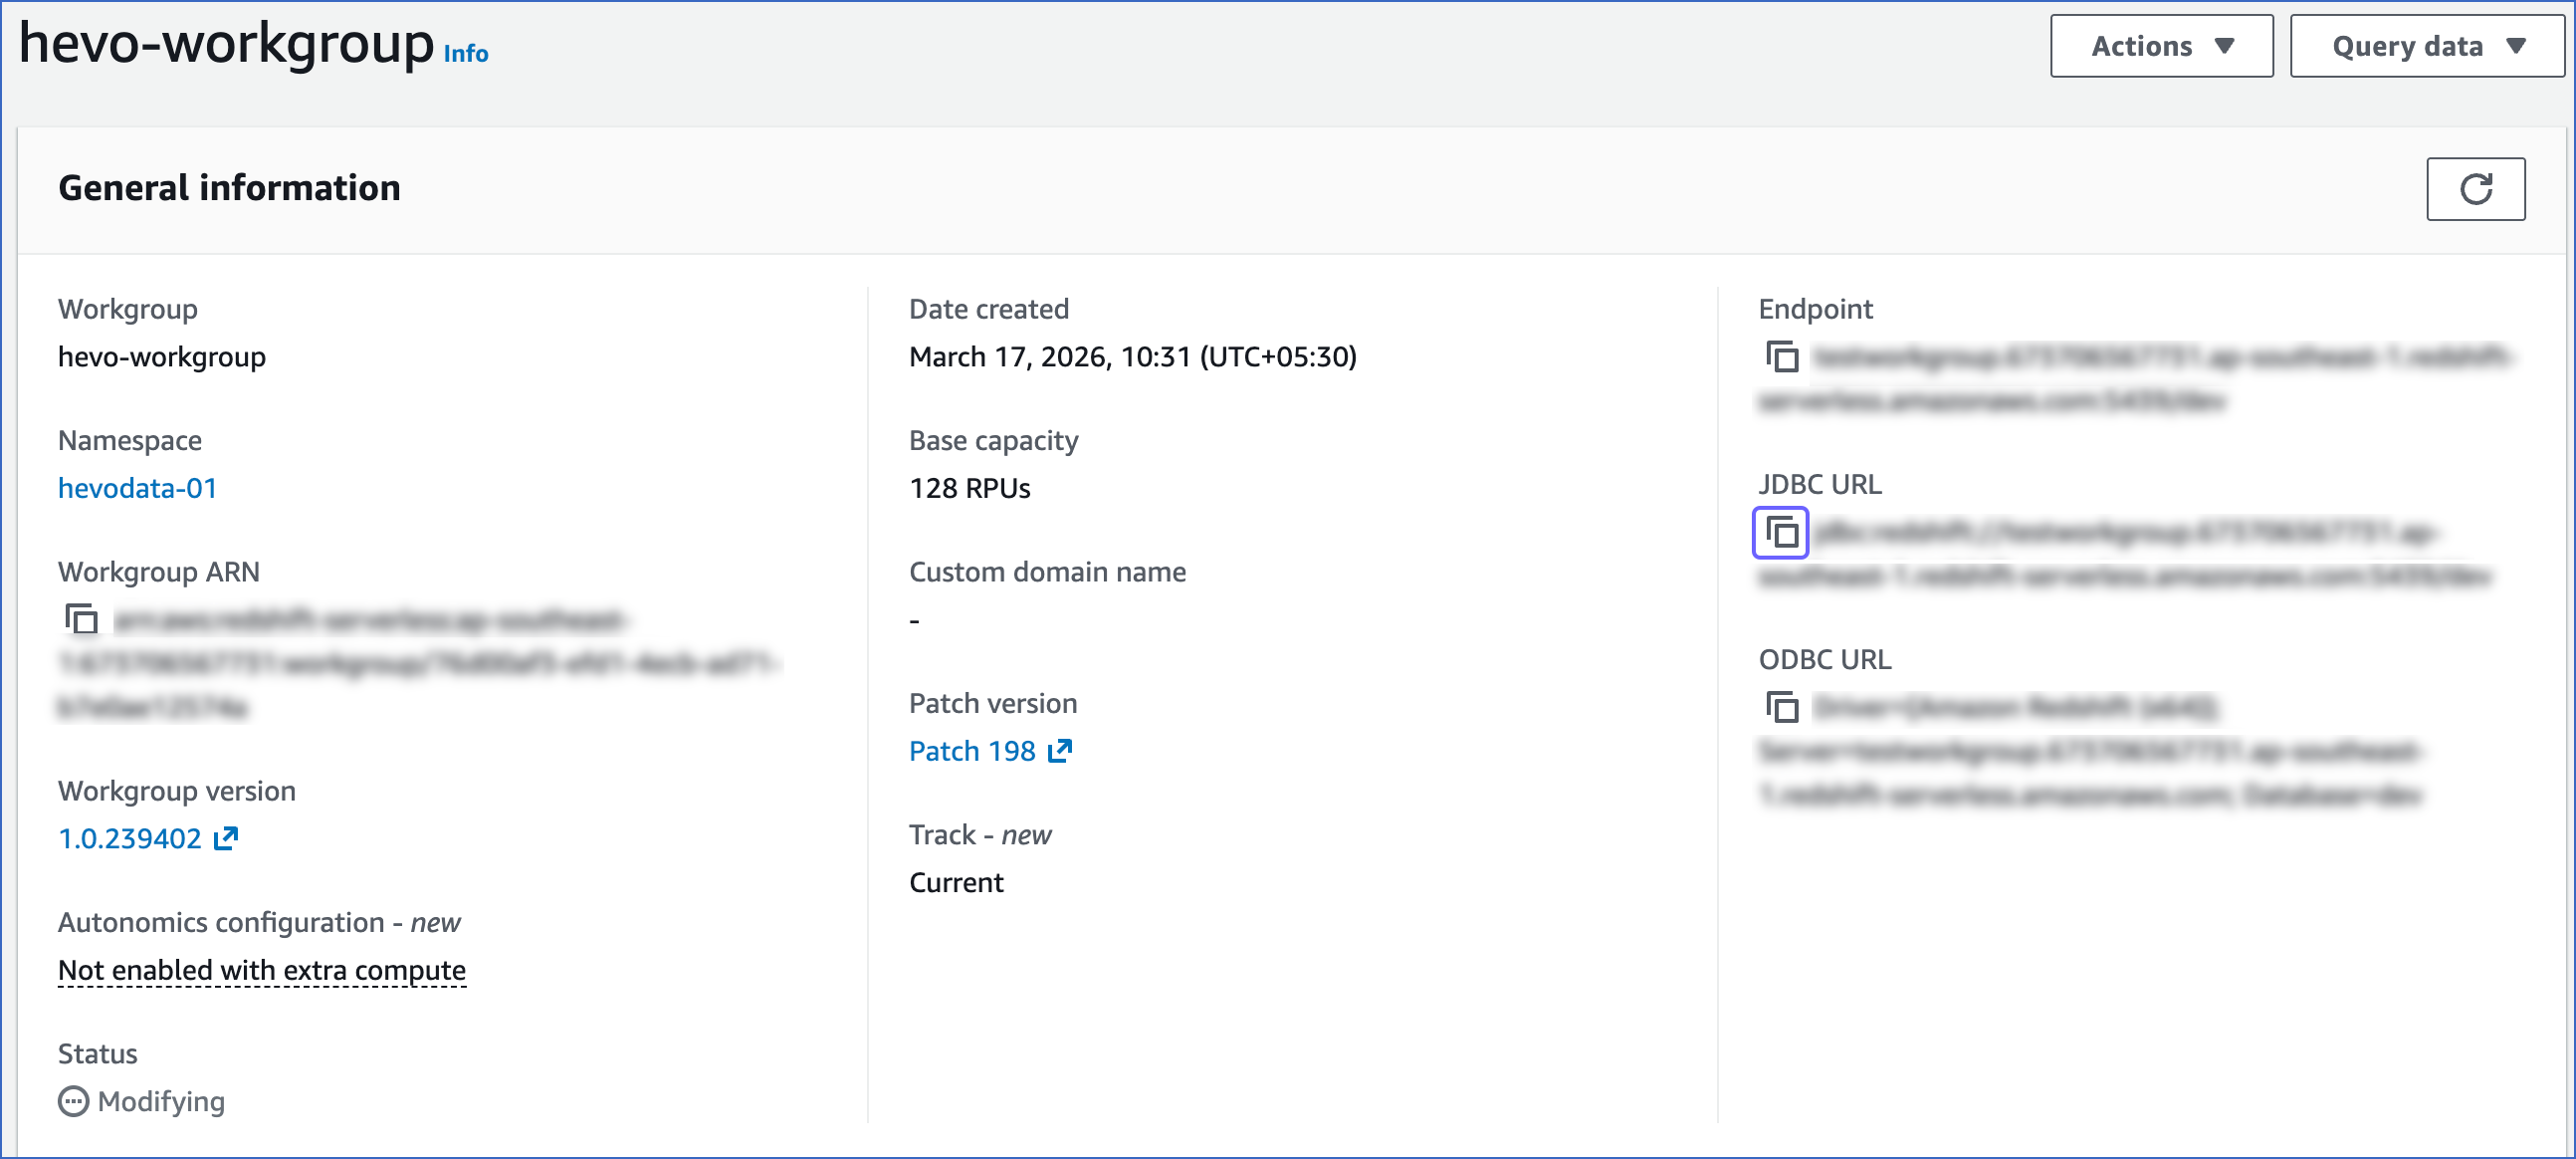
In the General information section, click the copy (
 ) icon corresponding to the JDBC URL to copy it. The database cluster identifier and the port number can be obtained from this URL.
-
Database cluster identifier: Remove the jdbc:redshift:// and :<portnumber>/<databasename> parts from the JDBC URL to obtain the database cluster identifier, and use it while configuring your Destination in Hevo.
For example, if jdbc:redshift://examplecluster.abc123xyz789.us-west-2.redshift-serverless.amazonaws.com:5439/dev is the URL, use examplecluster.abc123xyz789.us-west-2.redshift-serverless.amazonaws.com as the cluster identifier.
Note: Copy the cluster identifier exactly as it appears. Even a small typo will prevent Hevo from connecting to your Serverless database.
-
Port number: The number in the JDBC URL before the database name.
For example, in the JDBC URL jdbc:redshift://examplecluster.abc123xyz789.us-west-2.redshift-serverless.amazonaws.com:5439/dev, 5439 is the port number.
-
-
Proceed to configure Amazon Redshift Serverless as a Destination in Hevo.
Retrieve the VPC endpoint
Use this endpoint to connect to Amazon Redshift Serverless through a private network within AWS. Your database is never exposed to the public internet, making it a more secure option. To retrieve the VPC endpoint, perform the following steps:
-
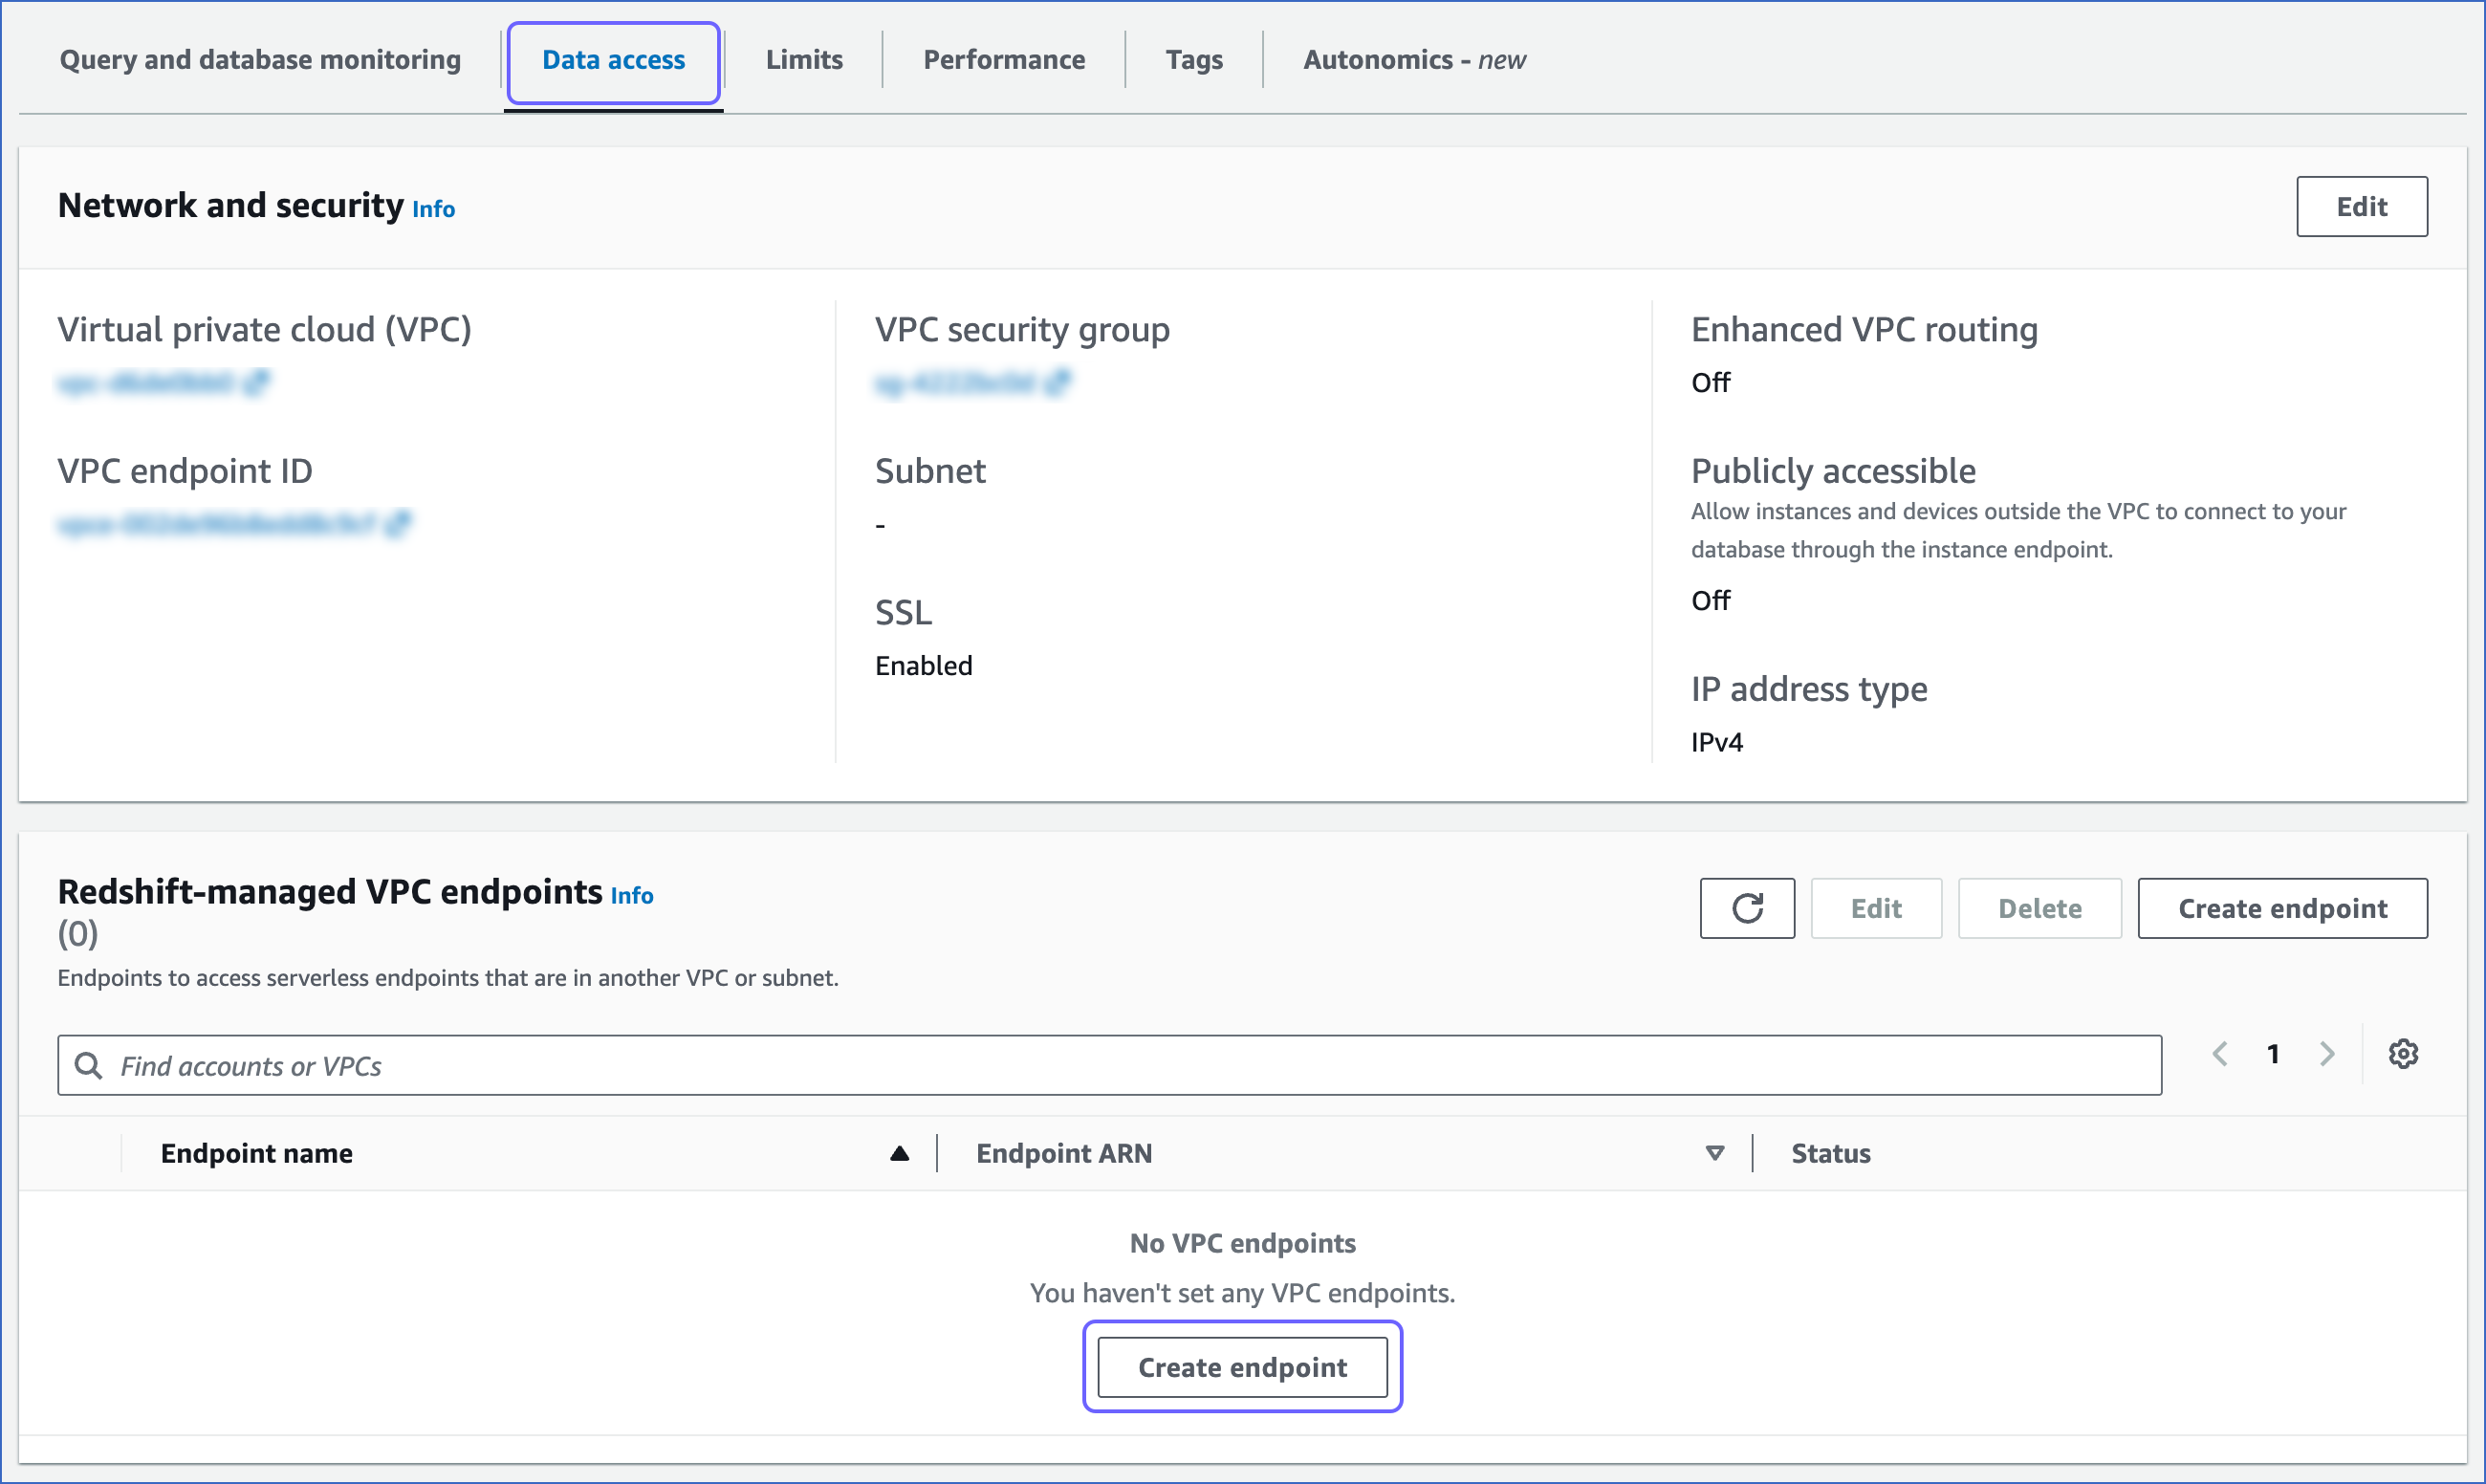
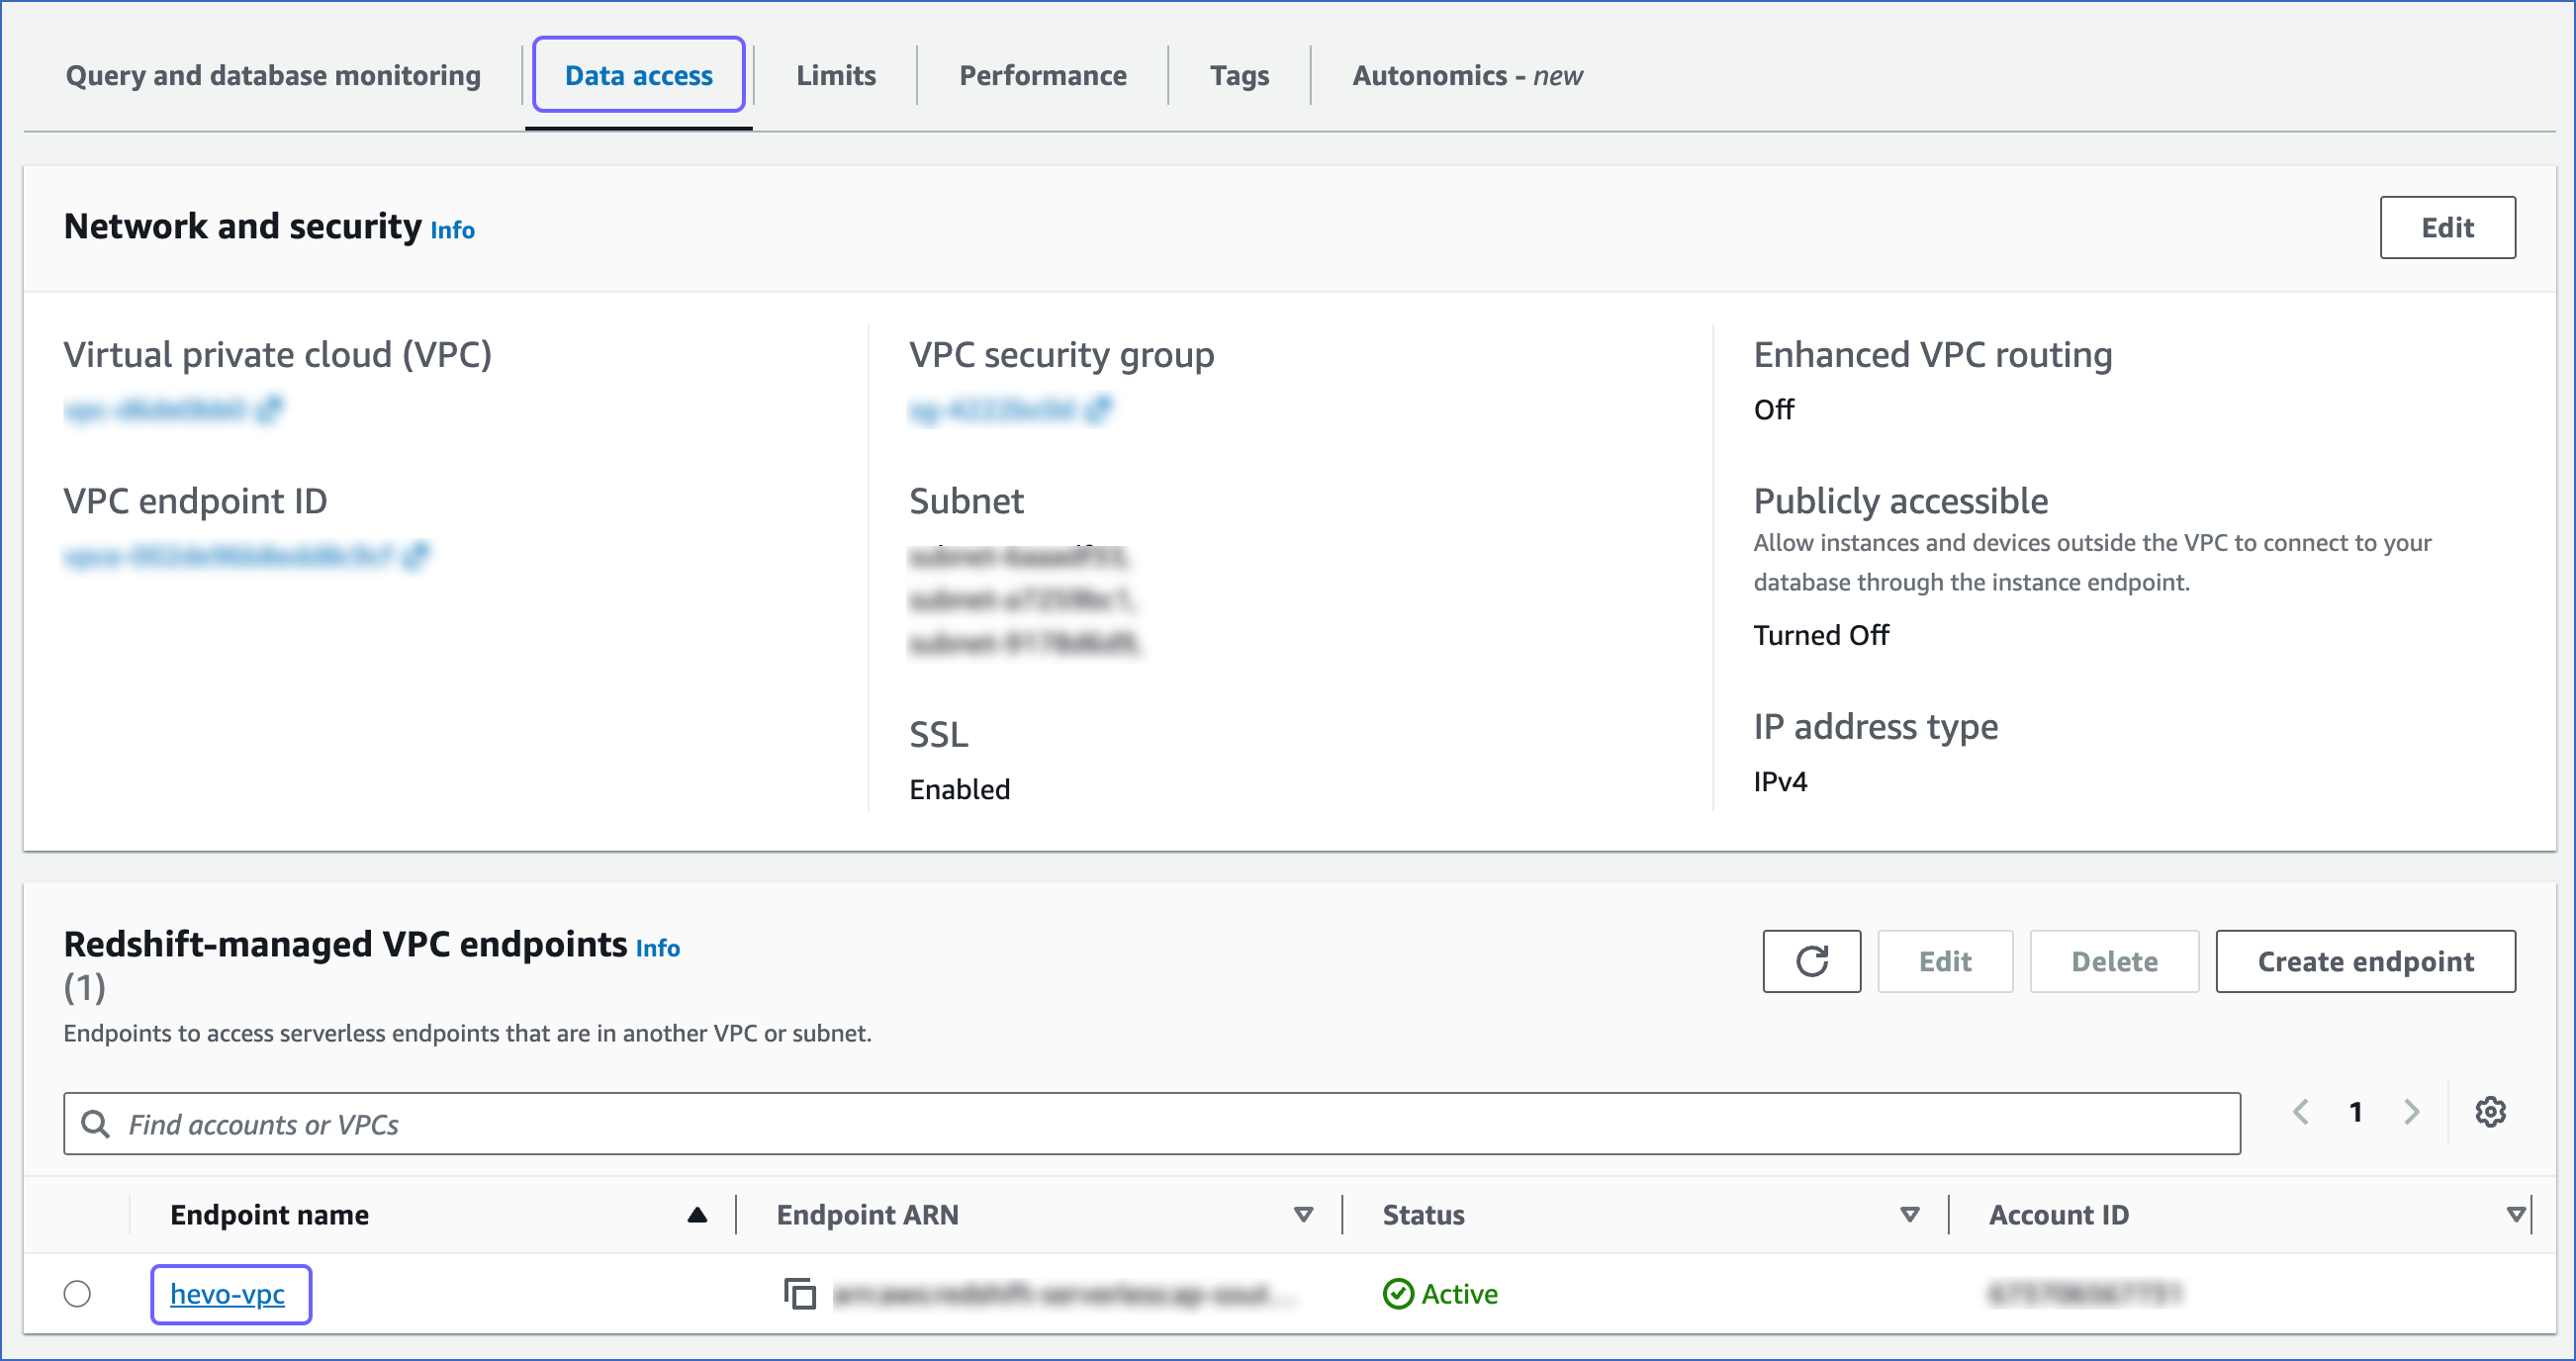
In the Data access tab, under the Redshift-managed VPC endpoints, click Create endpoint.
-
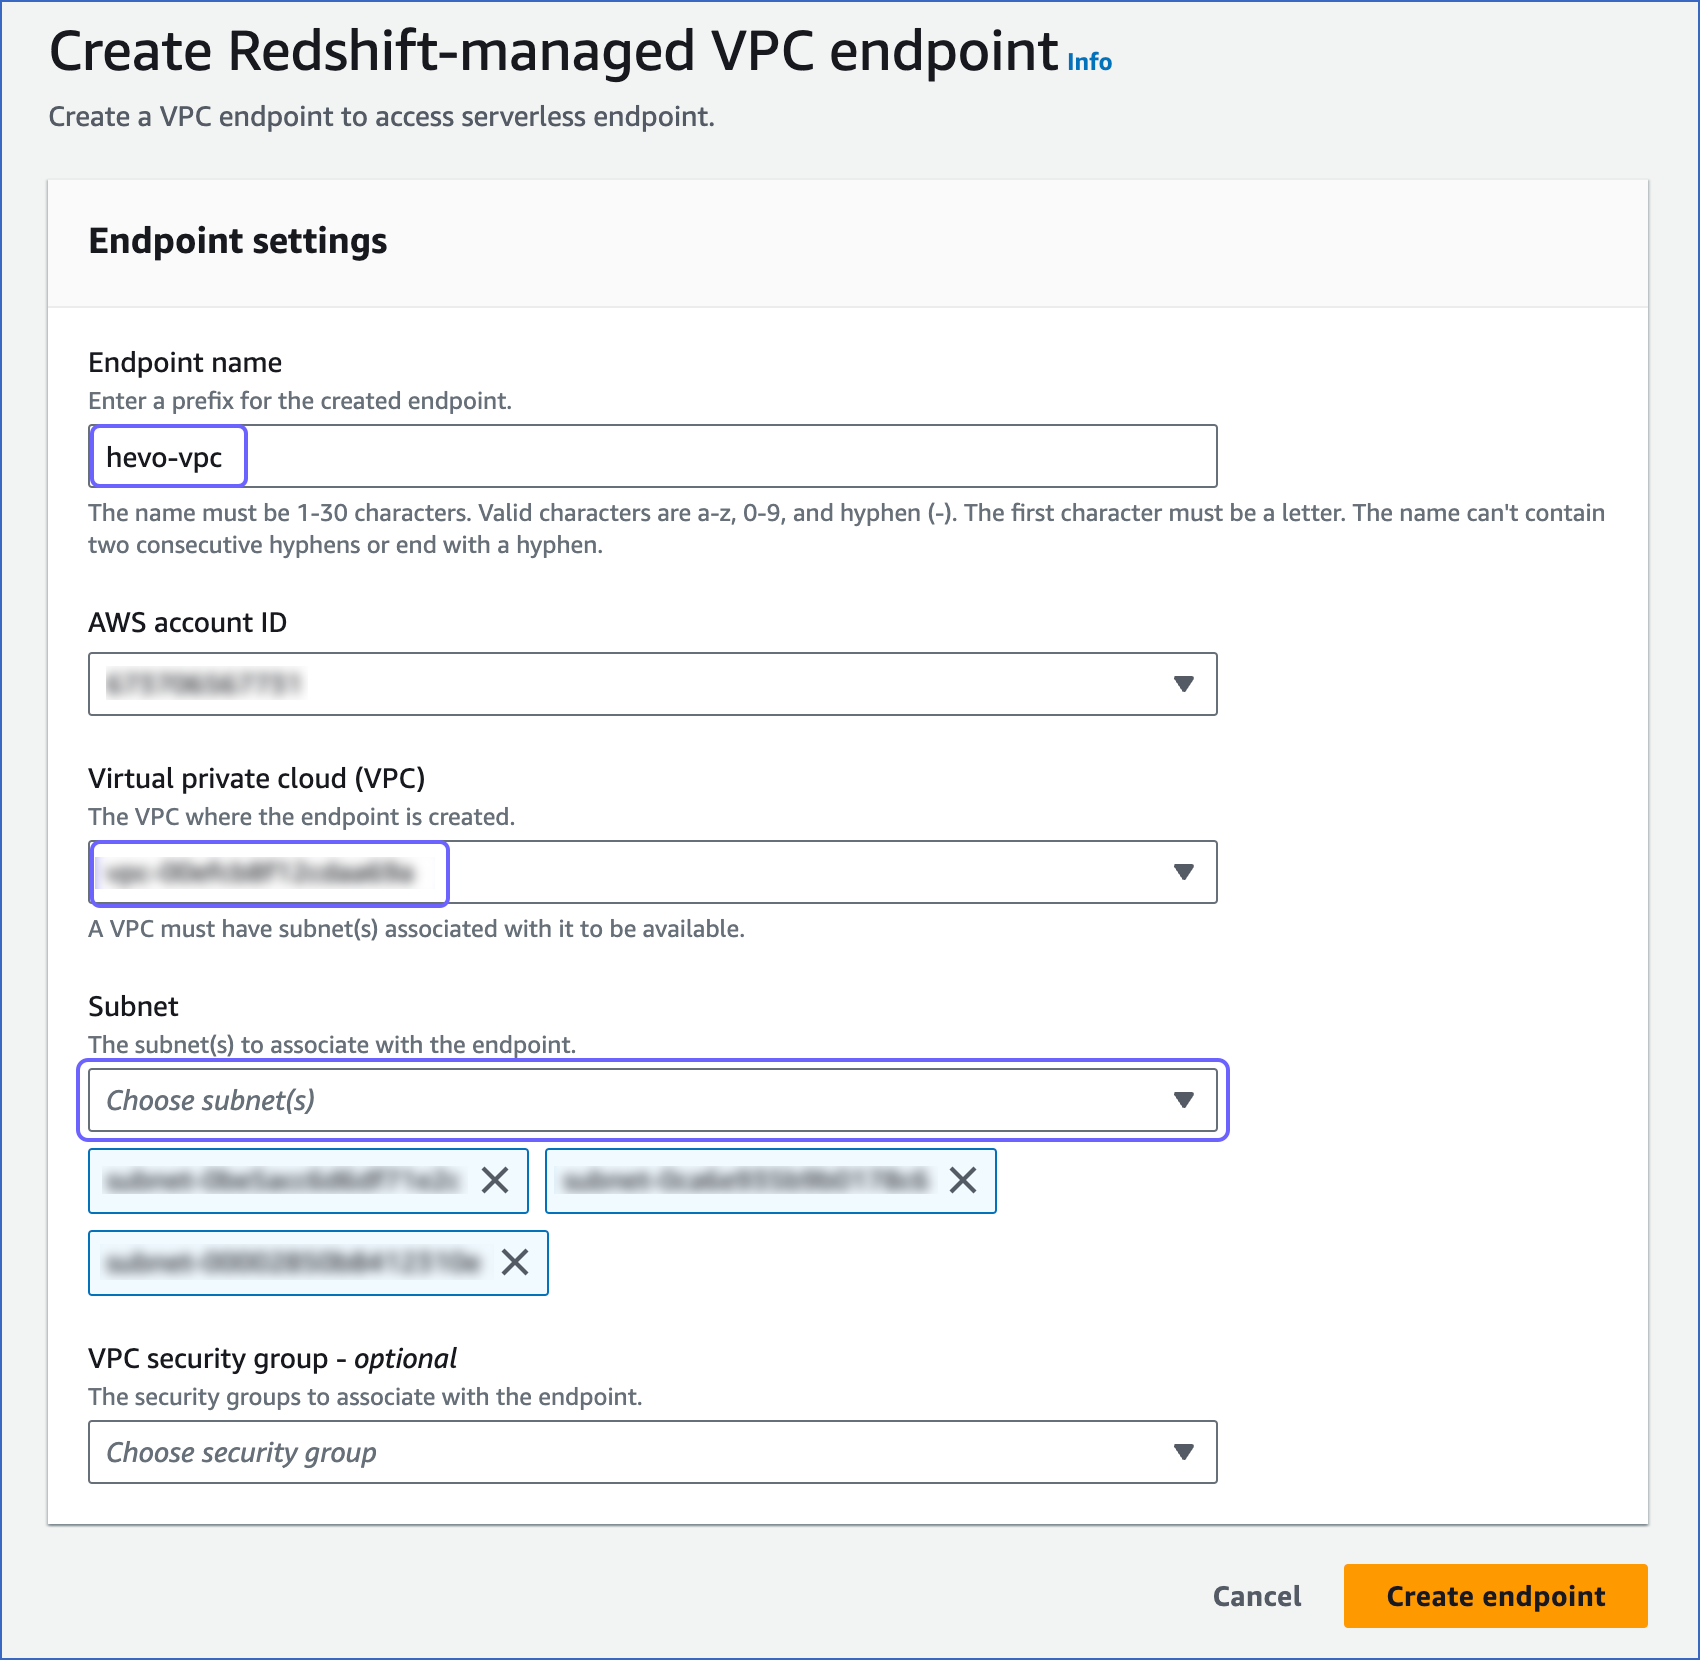
On the Create Redshift-managed VPC endpoint page, specify the following:
-
Endpoint name: A unique name for the VPC endpoint. For example, hevo-vpc.
-
Virtual private cloud (VPC): The virtual networking environment where the endpoint is created. The selected VPC must have subnets associated with it.
-
Subnet: The IP address segments associated with the selected VPC.
-
-
Click Create endpoint.
-
On the <your workgroup> page, Data access tab, under the Redshift-managed VPC endpoints, select the VPC endpoint that you created above.
-
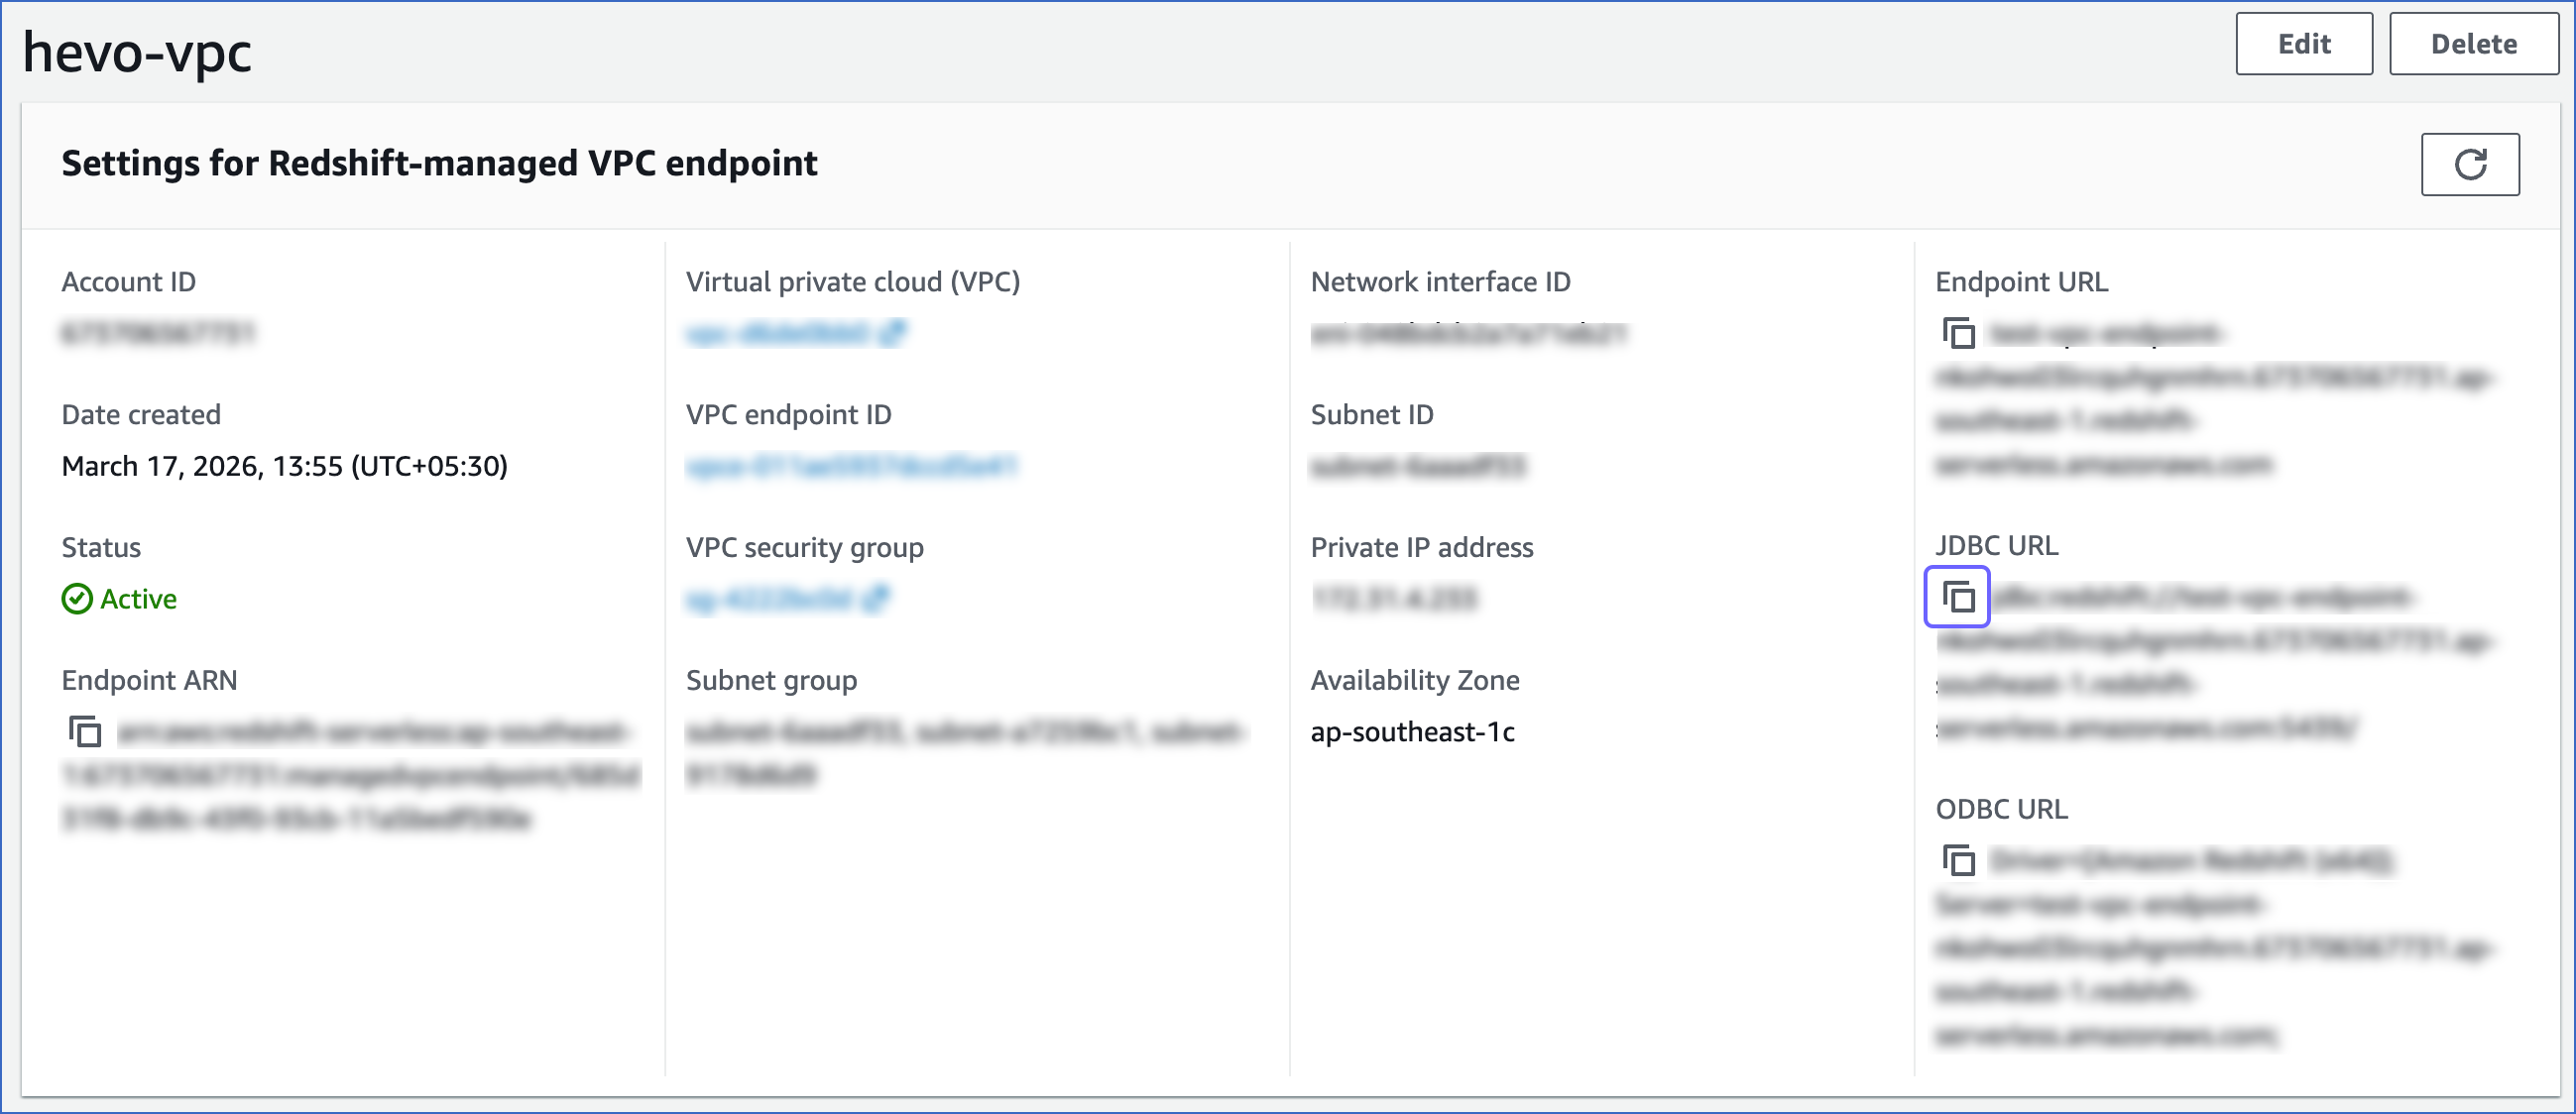
On the Settings for Redshift-managed VPC endpoint page, click the copy (
) icon corresponding to the JDBC URL to copy it. The database cluster identifier and the port number can be obtained from this URL.-
Database cluster identifier: Remove the jdbc:redshift:// and :<portnumber>/<databasename> parts from the JDBC URL to obtain the database cluster identifier, and use it while configuring your Destination in Hevo.
For example, if jdbc:redshift://examplecluster.abc123xyz789.us-west-2.redshift-serverless.amazonaws.com:5439/dev is the URL, use examplecluster.abc123xyz789.us-west-2.redshift-serverless.amazonaws.com as the cluster identifier.
Note: Copy the cluster identifier exactly as it appears. Even a small typo will prevent Hevo from connecting to your Serverless database.
-
Port number: The number in the JDBC URL before the database name.
For example, in the JDBC URL jdbc:redshift://examplecluster.abc123xyz789.us-west-2.redshift-serverless.amazonaws.com:5439/dev, 5439 is the port number.
-
-
Proceed to configure Amazon Redshift Serverless as a Destination in Hevo.
Configure Amazon Redshift Serverless as a Destination in Edge
Perform the following steps to configure Amazon Redshift Serverless as a Destination in Edge using the credentials and connection settings you have gathered so far:
-
Click Destinations in the Navigation Bar.
-
Click the Edge tab in the Destinations List View and click + Create Edge Destination.
-
On the Create Destination page, click Amazon Redshift.
-
In the screen that appears, specify the following:
-
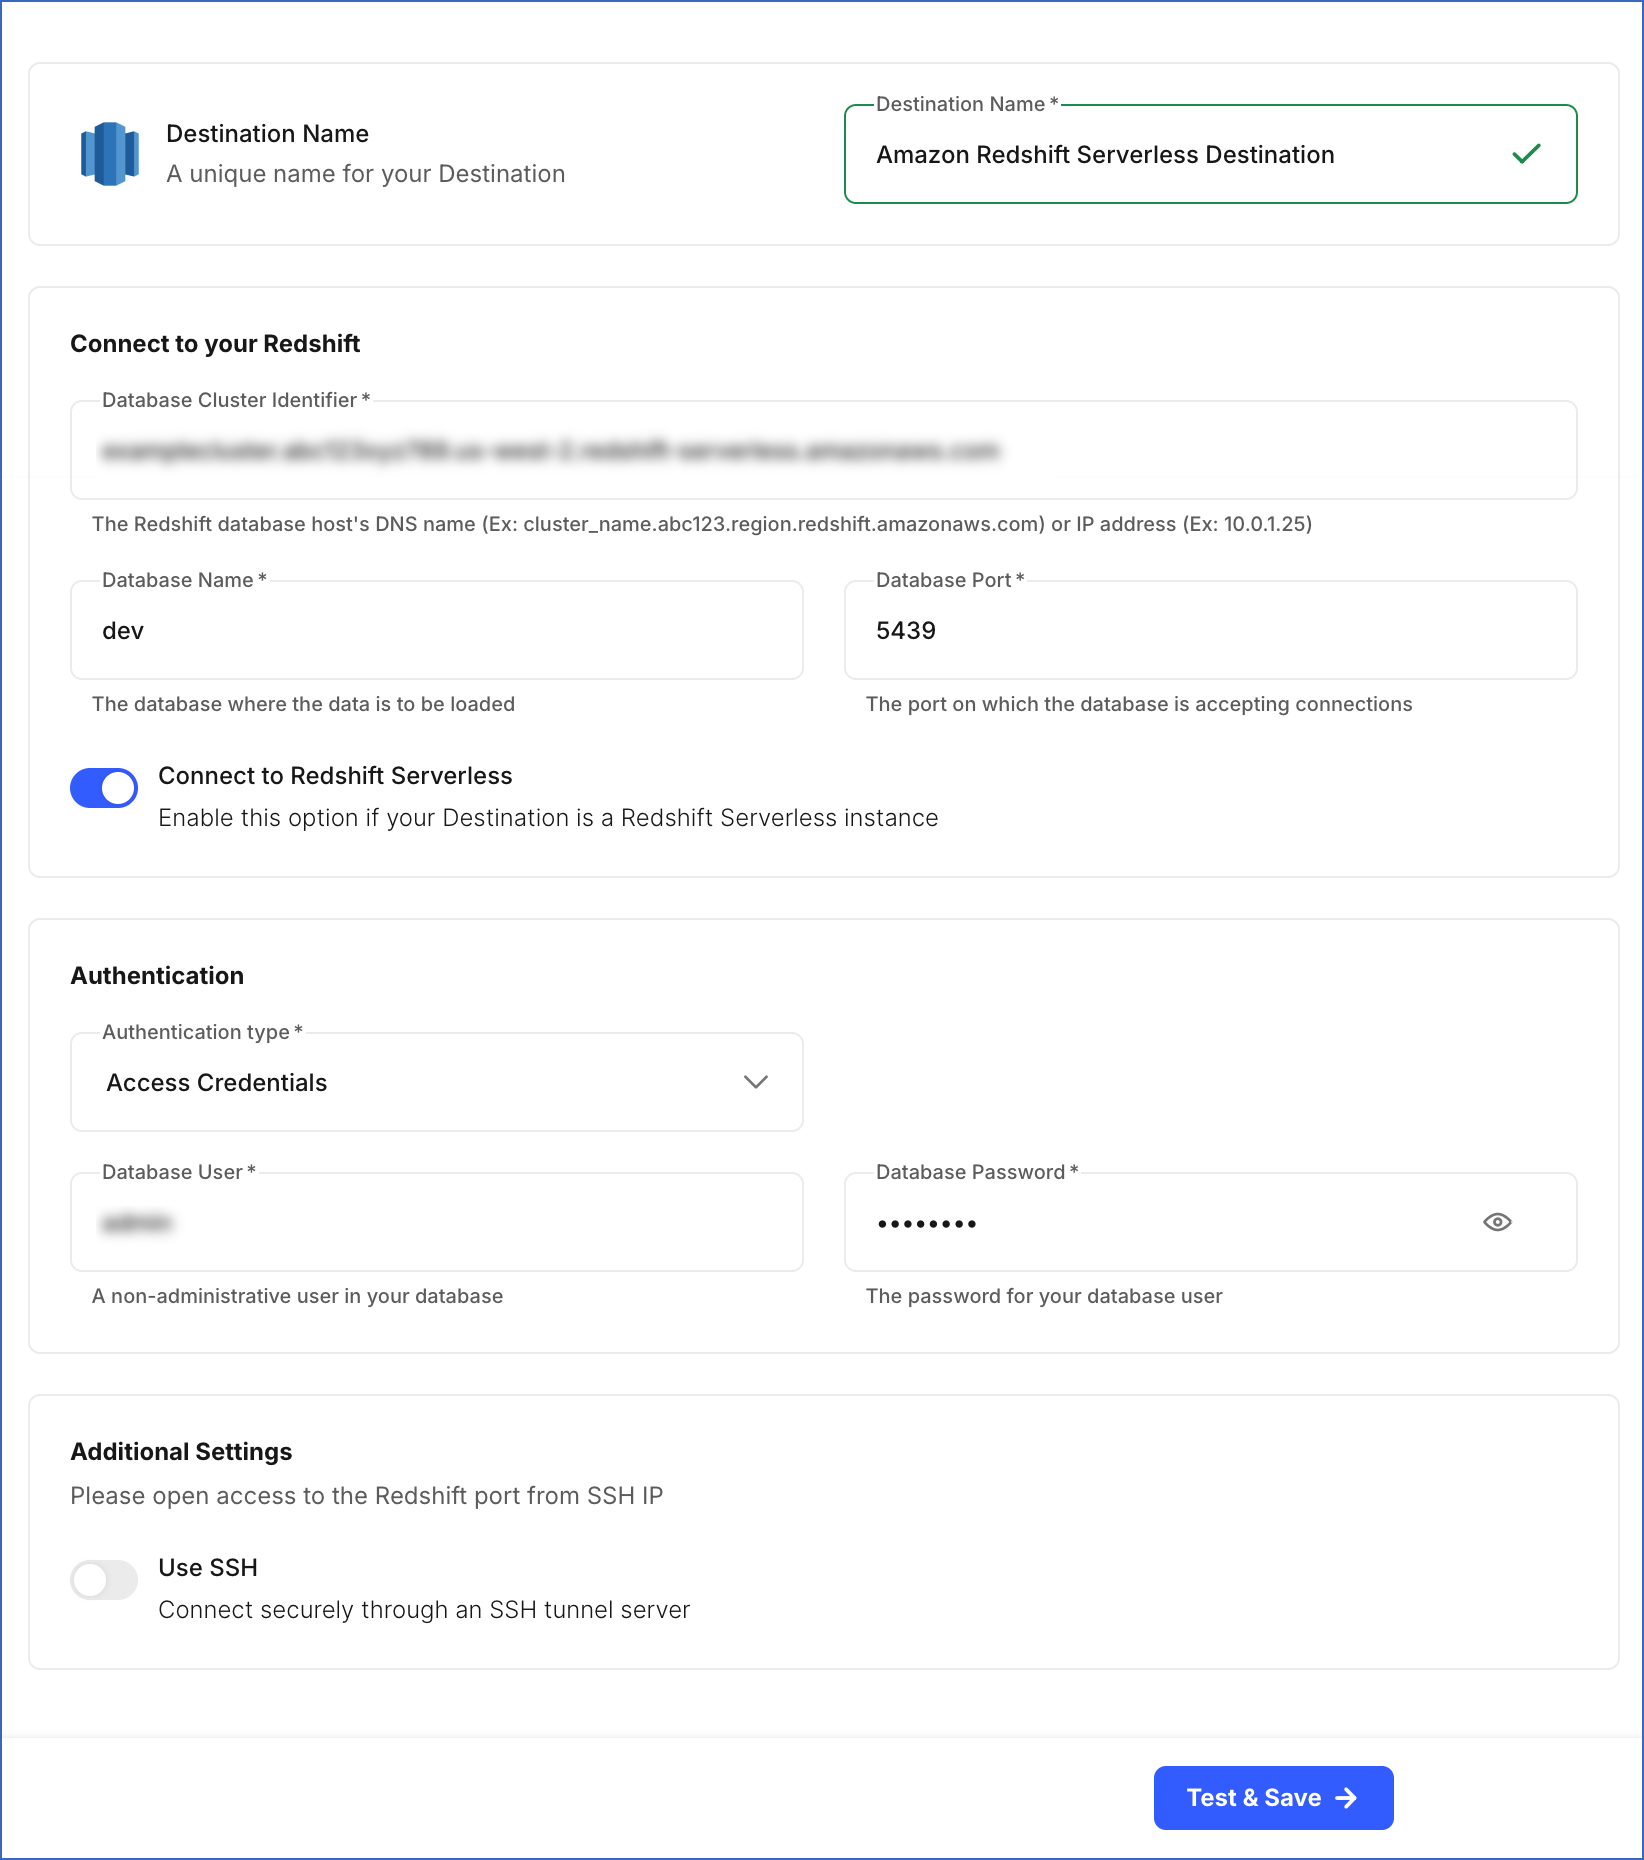
Destination Name: A unique name for your Destination, not exceeding 255 characters. For example, Amazon Redshift Serverless Destination.
-
In the Connect to your Redshift section:
-
Database Cluster Identifier: Amazon Redshift Serverless host’s IP address or DNS name. This is the endpoint that you retrieved in the Obtain the Redshift Serverless Connection Settings section.
-
Database Name: The name of an existing database where the data is to be loaded. This database can be the one created in the Create a Workgroup and Namespace section or an existing one.
-
Database Port: The port on which your Amazon Redshift Serverless server listens for connections. Default value: 5439.
-
-
Connect to Redshift Serverless: Enable this option to connect to the Amazon Redshift Serverless instance.
-
In the Authentication section:
-
Database User: The name of the user with administrator access to your Redshift database. For example, admin. This can be the user created in the Create a Workgroup and Namespace section.
-
Database Password: The password for the database user specified in the Create a Workgroup and Namespace section.
-
-
In the Additional Settings section:
- Use SSH: Enable this option to connect to Hevo using an SSH tunnel instead of directly connecting your Amazon Redshift database host to Hevo. This provides an additional level of security to your database by not exposing your Redshift setup to the public.
-
-
Click Test & Save to test the connection to your Amazon Redshift Serverless database.
Once the test is successful, Hevo creates your Amazon Redshift Serverless Edge Destination. You can use this Destination while creating your Edge Pipeline to start moving data into your Amazon Redshift Serverless database.