Managing Alert Recipients
In Hevo Edge, the alerting system enables you to configure other individuals, called recipients, to receive notifications for events that may require their attention or intervention. A recipient can be associated with a single notification channel, which can be any valid email address or a Slack channel. Only users with team administrator or collaborator roles can configure these recipients. Users with the team administrator role can manage recipients added by any team member. On the other hand, a user with the collaborator role is allowed to administrate only the recipients they added.
Hevo Edge enables you to control alert notifications for recipients who are not your team members. You can perform the following operations:
-
Add any valid email address or Slack channel as a recipient.
-
Switch between the added recipients and update their Pipeline subscriptions.
-
Filter the recipients list based on the required category.
Note: To perform these operations, you must be a user with an administrator or collaborator role in Hevo.
Accessing Pipeline Subscriptions
-
Log in to your Hevo account and do one of the following:
-
Click the Alerts (
 ) icon next to your username.
Then, click the Settings (
 ) icon on the ALERTS slide-in page.
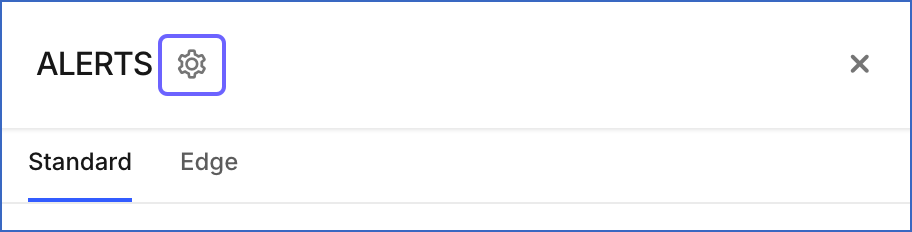
-
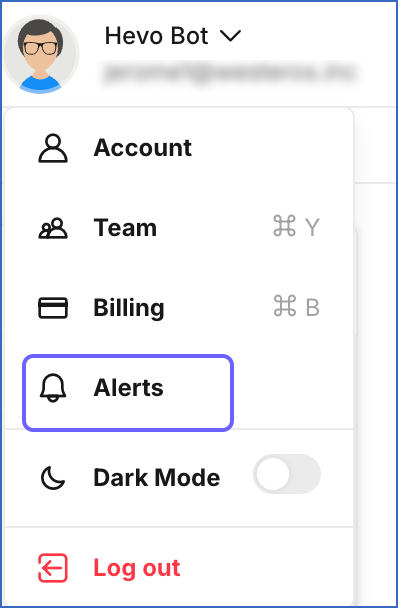
From the drop-down menu next to your username, click Alerts.
-
-
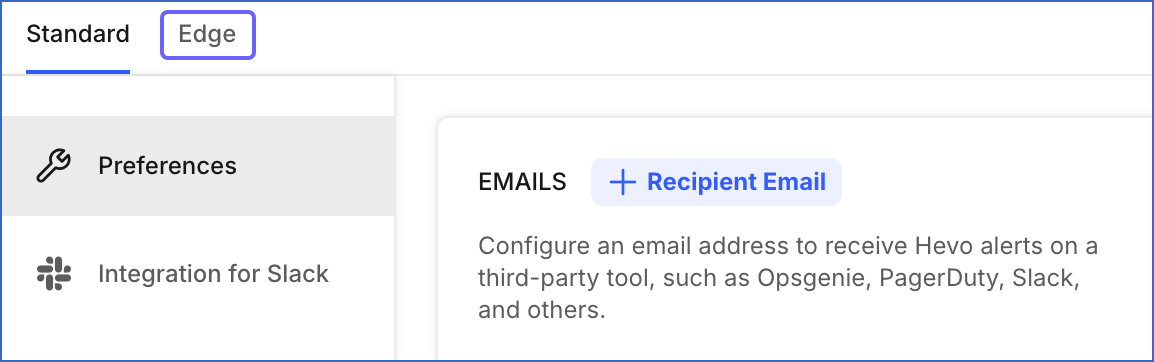
On the page that opens, click the Edge tab to open the Subscriptions page.
-
On the Subscriptions page, click MANAGE RECIPIENTS.

Adding Recipients
You can add a Slack channel or any valid email address, such as an individual or group email ID, as recipients. To do this:
-
Add an email address and or a Slack channel as recipients.
Note: To receive alert messages in a Slack channel, you must first integrate your Slack workspace with the Hevo app.
Add an email address as a recipient
Perform the following steps to add any valid email address as a recipient:
-
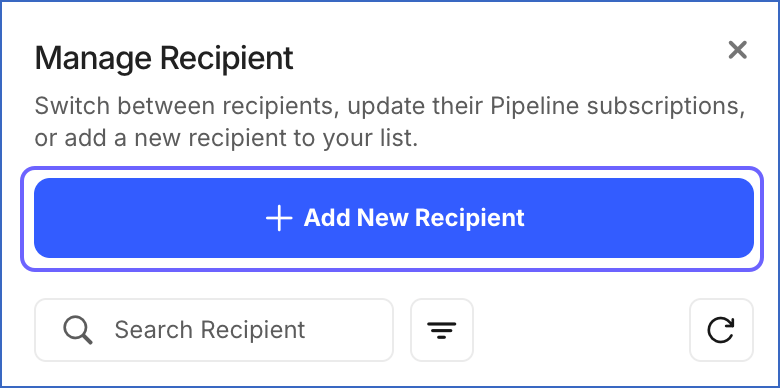
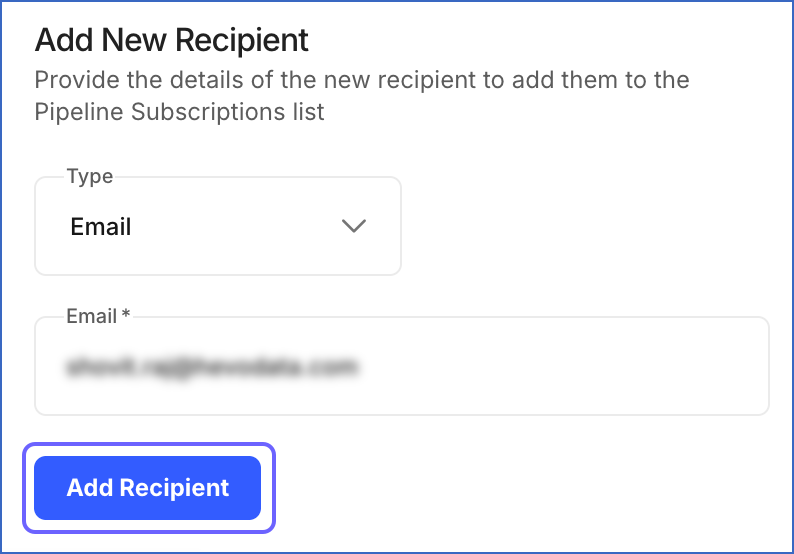
Access the Pipeline Subscriptions page, and on the Manage Recipient slide-in page, click + Add New Recipient.
-
In the Add New Recipient slide-up window, do the following:
-
From the Type drop-down, select Email and in the Email field, specify a valid email address.
-
Click Add Recipient.
-
Note:
-
You cannot add existing team members as recipients.
-
You will not be able to add an email address if it is already a recipient.
Add a Slack channel as a recipient
Perform the following steps to add a Slack channel as a recipient:
-
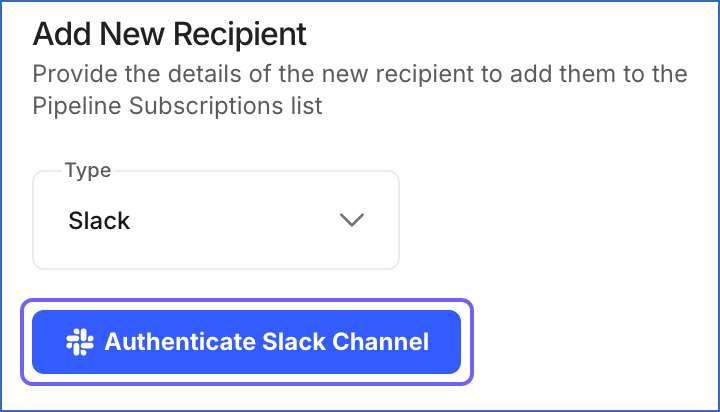
Access the Pipeline Subscriptions page, and on the Manage Recipient slide-in page, click + Add New Recipient.
-
In the Add New Recipient slide-up window, do the following:
-
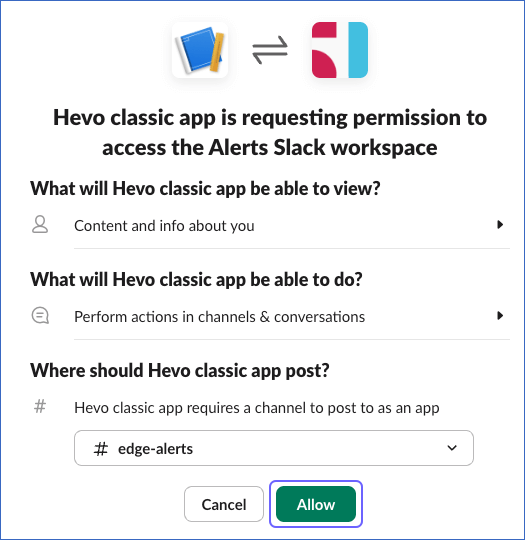
From the Type drop-down, select Slack and click Authenticate Slack Channel.
-
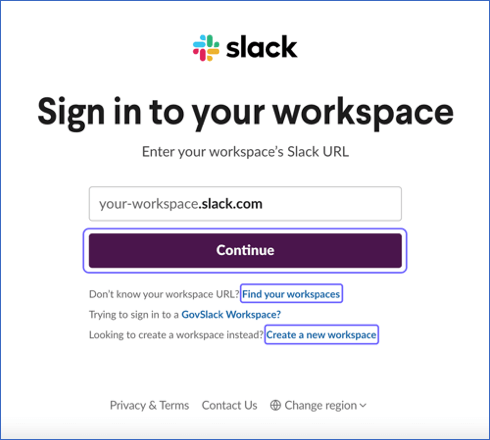
On the Sign in to your workspace page, specify your Slack workspace’s URL in the field, and click Continue. If you need to create a workspace or search for other workspaces, refer to Integrating the Hevo app with Slack. Skip to step 5 if you added a new workspace; otherwise, go to the next step.
-
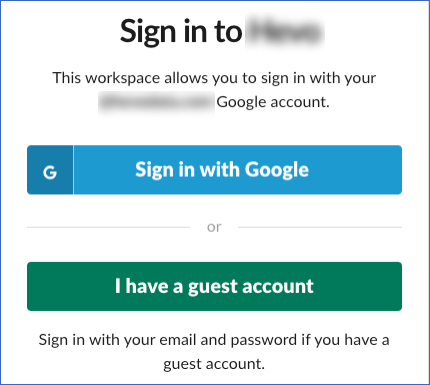
On the Sign in to your <workspace name> page, select the appropriate sign-in method for connecting to your Slack workspace.
-
On the page displayed after you connect to your Slack workspace, select the channel on which you want to receive alerts and click Allow.
-
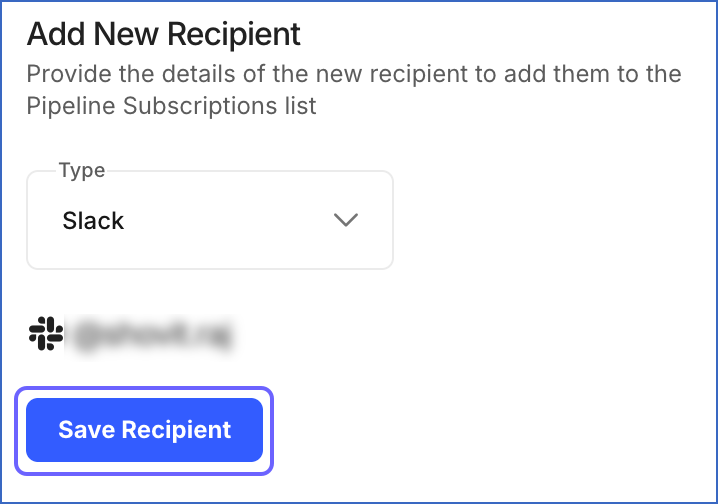
Click Save Recipient.
-
Once the recipient, whether an email address or a Slack channel, is added successfully, you can subscribe them to the required Pipelines.
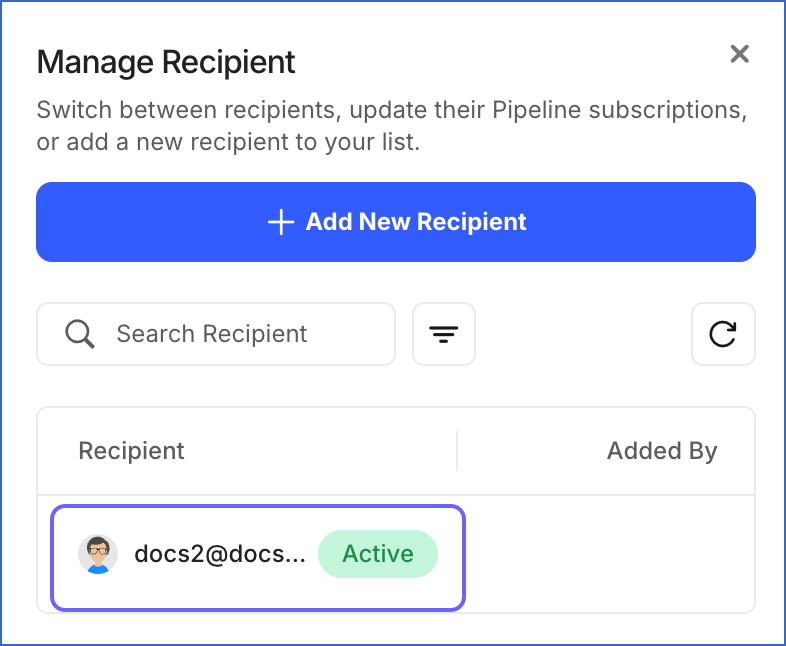
Switching Recipients
To manage the Pipeline subscriptions for any of the added recipients to a Pipeline, you need to switch to that recipient. You can do this in one of the following ways:
-
From the Manage Recipients slide-in page:
-
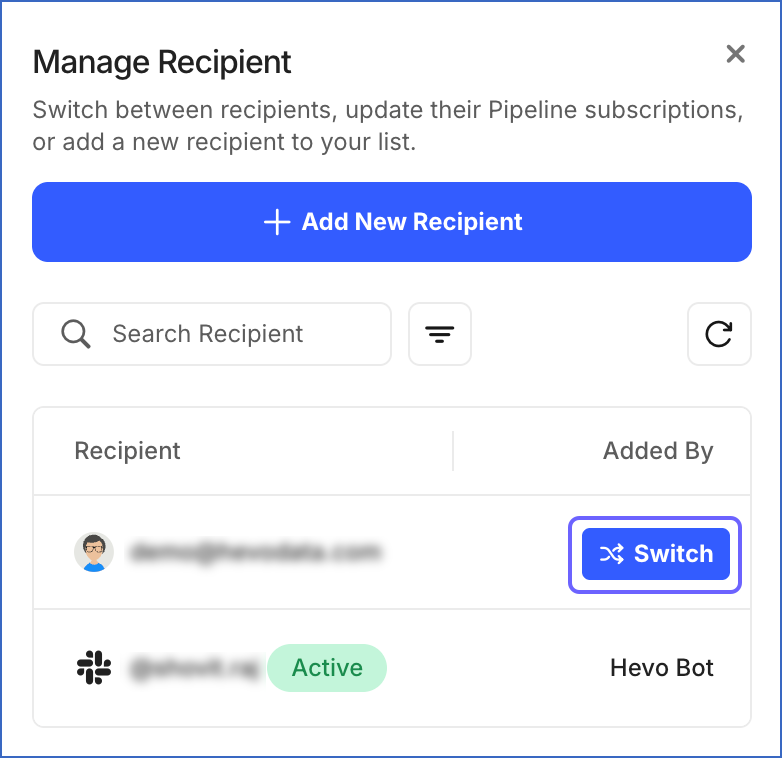
Access the Pipeline Subscriptions page and click MANAGE RECIPIENTS.
A list of all accessible recipients is displayed on the Manage Recipient page.
-
On the Manage Recipient page, navigate to the desired recipient name by scrolling through the list or entering their name in the search bar.
-
Click Switch. The recipient to whom you switched becomes active.
-
Manage the recipient’s Pipeline subscriptions. Here, you can add or remove subscriptions for them.
-
-
From the Subscriptions page:
-
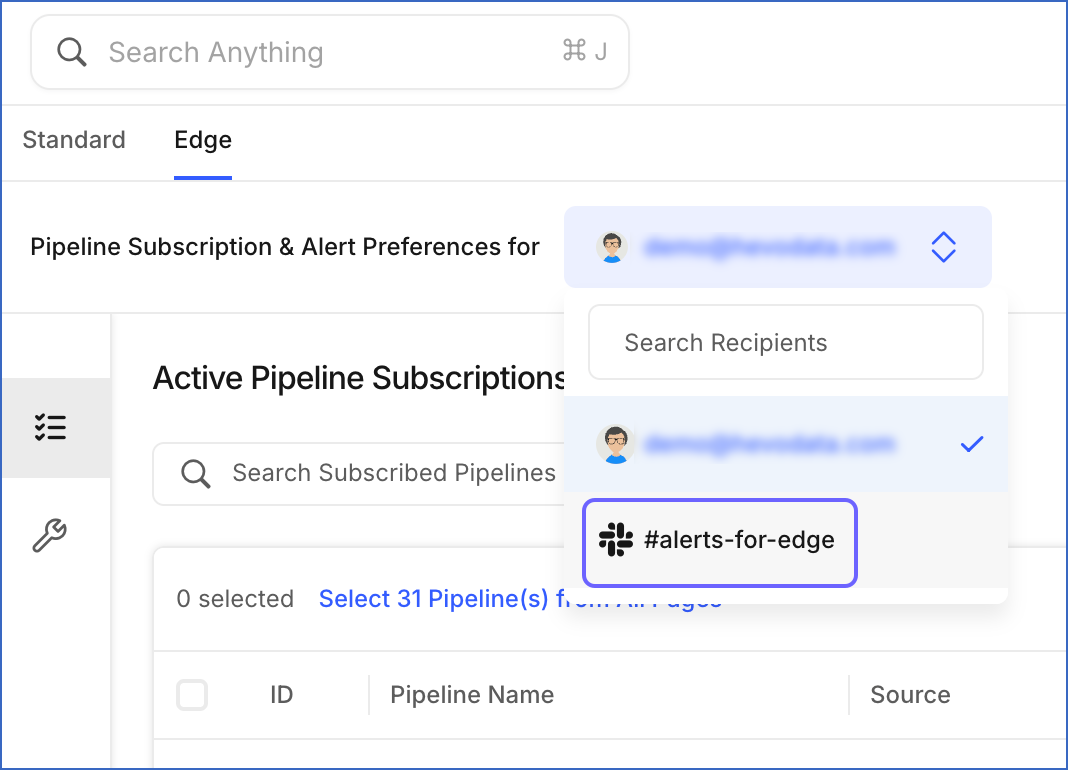
On the Subscriptions page, from the Pipeline Subscriptions & Alert Preferences drop-down, select the desired recipient.
-
Manage the recipient’s Pipeline subscriptions. Here, you can add or remove subscriptions for them.
Note: A user with an administrator role in Hevo can switch to recipients added by them or any other team member. On the other hand, a user with the collaborator role can switch only to the recipients they added.
Deleting Recipients
If you do not want a recipient to get notified of any changes in the Hevo Pipelines, you may delete them. A user with an administrator role in Hevo can delete recipients added by them or any other team member. On the other hand, a user with the collaborator role can delete only the recipients added by them.
Perform the following steps to delete any of the added recipients:
-
Access the Pipeline Subscriptions page and click MANAGE RECIPIENTS.
A list of all accessible recipients is displayed on the Manage Recipient page.
-
On the Manage Recipient page, navigate to the desired recipient name by scrolling through the list or entering their name in the search bar.
-
Click the delete (
 ) icon.
If an active recipient is deleted, the logged-in user becomes active.
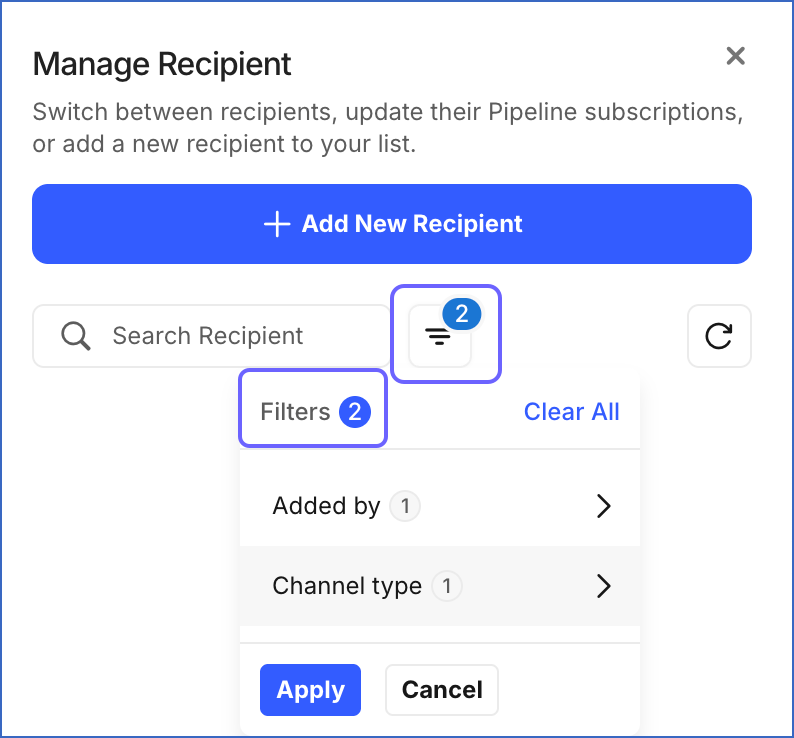
Filtering the Recipients List
You can organize the list of added recipients by creating a filter. Filtering helps you organize the list based on the following categories:
-
Added by: The name of the team member who added the recipient.
Note: This category is only displayed when more than one team member has added recipients.
-
Channel type: The type of channel to which the recipient was added.
Perform the following steps to filter the list of recipients:
-
Access the Pipeline Subscriptions page and click MANAGE RECIPIENTS.
-
On the Manage Recipient slide-in page, click Filters and select your filter criteria.

Note: You can include multiple categories in your filter.
-
Click Apply.
The number of applied filters is displayed on the Filters (![]() ) icon and at the top of the Filters window.
) icon and at the top of the Filters window.
You can clear the applied filters in one of the following ways:
-
Remove each filter individually:

-
Click the Filters (
 ) icon.
 -
Click the desired filter category and do one of the following:
-
Click Clear at the top to remove all the filters for this category.
-
Deselect the checkbox for each Channel type to remove its filter.
-
-
Click Apply.
-
-
Remove all the filters at once:

-
Click the Filters (
) icon. -
Click Clear All to remove all filters.
-
Click Apply.
-