Familiarizing with the Targets UI (Edge)
When you click Activate in the Navigation Bar, the Activations List View is displayed by default. Click the Targets tab to open the Targets List View. This page displays the Targets created by you or your team. You can search for Targets, filter the list, and open a Target in the Detailed View to view its details.
The following sections highlight the main elements of the Targets List View and the Detailed View:
Targets List View
Refer to the image and descriptions below to familiarize yourself with the components of the Targets List View.
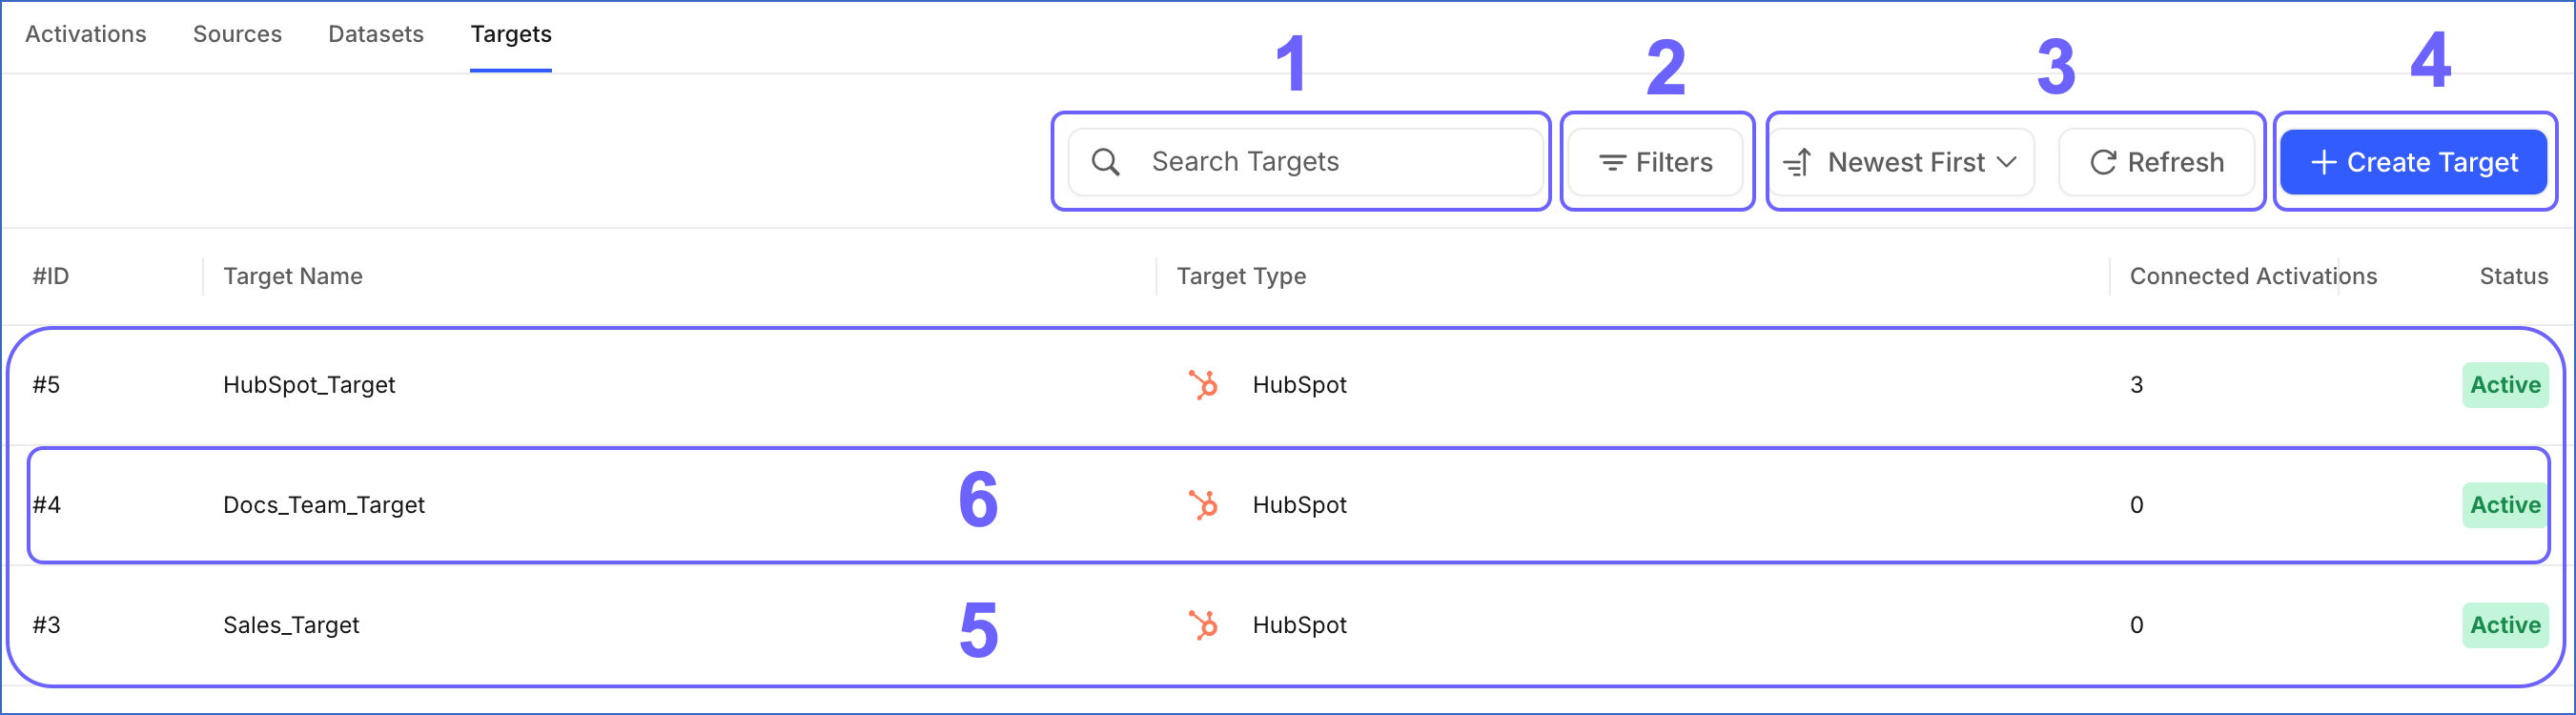
The following table describes each of these components:
| Page Component | Title | Description |
|---|---|---|
| 1 | Search Bar | Searches for Targets created by you or your team. You can search using a partial or complete Target name. |
| 2 | Filters | Filters the list of Targets based on the following criteria: - Target Type: The type of Target, such as HubSpot. - Status: The connection status of the Target, either Active or Failed. |
| 3 | Data Controls | Controls the list of Targets that is displayed. The Data Controls, from left to right, are: - Newest First: Sorts and displays the Targets based on the criterion selected from the drop-down. The available options are Oldest First, A → Z, and Z → A. - Refresh: Allows you to view the newly created Targets that are not yet visible in the UI. |
| 4 | + Create Target | Opens the flow to create a Target. Refer to the documentation for your respective Target type for the steps. |
| 5 | Asset List | Displays the list of Targets created by you or your team. This list can be refined using the Search Bar, Filters, or Data Controls. |
| 6 | Target Summary | Provides a brief summary of an existing Target. This includes: - #ID: The sequential number assigned to the Target when it is created. - Target Name: The name of the Target. - Target Type: The type of Target, such as HubSpot. - Connected Activations: The number of Activations that send data to this Target. - Status: The connection status of the Target, either Active or Failed. A Failed Target needs to be reauthorized. |
Targets Detailed View
Click anywhere in a Target Summary row to open it in the Detailed View. The following image highlights the main components displayed and the actions you can perform on the page:
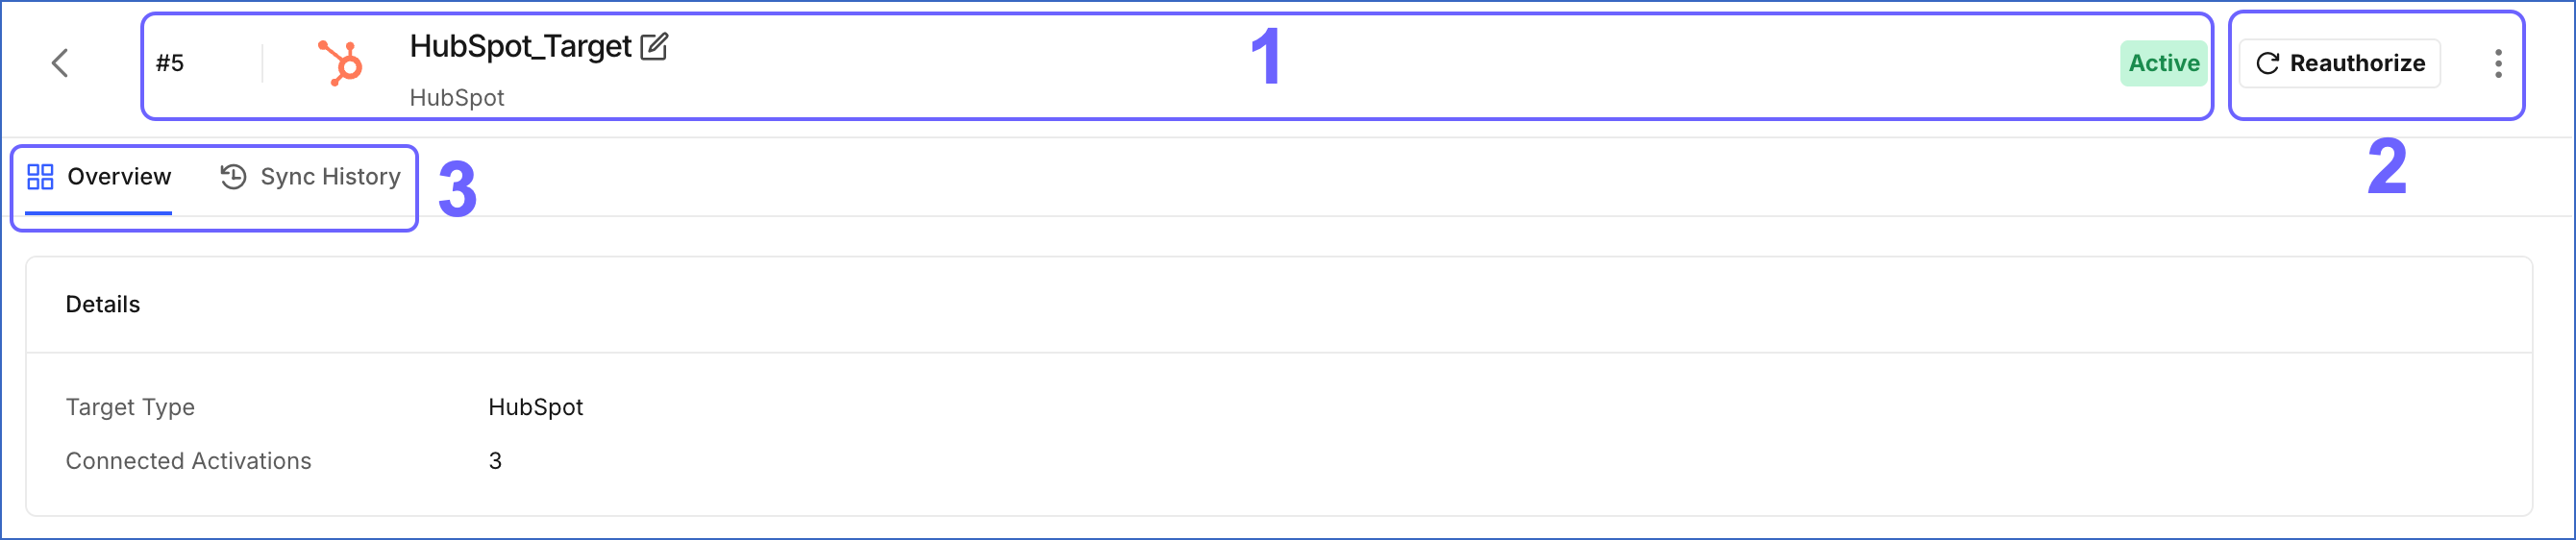
The following table describes each of these components:
| Page Component | Title | Description |
|---|---|---|
| 1 | Target Header | Displays the Target’s ID, name, type, and connection status. Click the Edit icon next to the name to rename the Target. Read Renaming a Target for detailed steps. |
| 2 | Target Actions | Displays the actions you can perform on the Target: - Reauthorize: Opens the connection flow so you can replace the Target’s stored authorization. This option is available for Targets that use authorization-based connections. Read Reauthorizing a Target for detailed steps. - Actions icon: Opens a menu with the Delete option. Read Deleting a Target for detailed steps. |
| 3 | Tool Bar | Provides access to the following tabs: - Overview: Displays the Details section, which lists the Target type and the number of Connected Activations. - Sync History: Displays the runs of every Activation that sends data to this Target. Each row includes an Activation Name column that identifies the Activation associated with the run. The remaining columns are the same as those on the Activation’s Sync History tab. Read Sync History Tab for descriptions of the columns and information about the available statuses. |