Error
Potential Causes
-
Incorrect spelling or case mismatch between actual schema name and the schema name provided in Hevo.
-
The schema does not exist.
-
The user does not have sufficient permissions to access the schema.
Suggested Action(s)
-
Verify that the schema name spelling is correct and is in uppercase.
-
Verify that the schema exists, and the user has sufficient permissions to access the schema. To do this:
-
Log in to the Snowflake instance.
-
Click the Expand chevron (drop-down icon) at the top left.
-
From the Switch Roles list, select the role which you want to use.

-
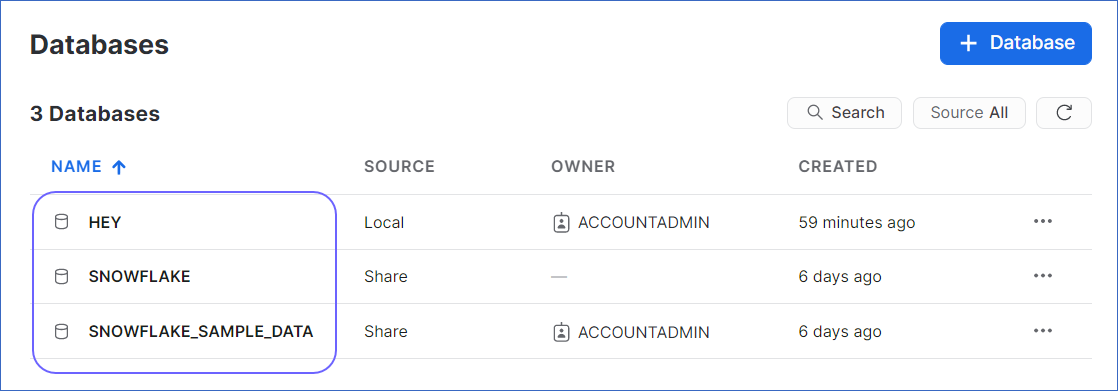
Click Data, and then click Databases.

-
In the Databases page, select the database for which you want to view the schema.

-
Click Schemas.

-
Verify that the schema exists.

-
Click on the schema, and in the Schema Details tab, verify that Hevo has the
CREATE SCHEMA,MODIFY,MONITOR, andUSAGEpermissions for the schema.
-
If the schema does not exist, or the user does not have the required permissions, you need to create the schema with the required permissions, or grant the required permissions on the pre-existing schema for Hevo to access your data, using the following steps:
-
In the left navigation pane, click Worksheets, and then click + Worksheet.

-
Paste the following script in the worksheet. You can use this script to either create a new schema with the required permissions, or grant permissions to a pre-existing schema. Keeping your privacy in mind, the script grants only the bare minimum permissions required by Hevo to load the data in your Destination.
Note: The values for
database_name,role_name, andschemaNamemust be in uppercase.-- Variables for role / schema / database (needs to be uppercase for objects)\ set database_name = 'HEY'; // Replace "HEY" with the role to which you want to grant access to set schemaName = 'HELLO_SCHEMA'; // Replace "HELLO_SCHEMA" with the schema name that you want to grant access to set role_name = 'ACCOUNTADMIN'; // Replace "ACCOUNTADMIN" with the role that you want to grant access to set db_schema = concat($database_name, '.', $schemaName); use role accountadmin; CREATE SCHEMA IF not exists identifier($db_schema); GRANT USAGE, MONITOR, CREATE TABLE, CREATE EXTERNAL TABLE, MODIFY ON SCHEMA identifier($db_schema) TO ROLE identifier($role_name); -
You can specify a new schema name to create it now, or specify the name of a pre-existing schema to grant the required permissions on it in line 3 of the script, for Hevo to load data into it.
-
Press CMD+return (Mac) or CTRL + Enter (Windows) to run the script.
-
Once the script is successfully executed, you can use the credentials from lines 2-4 of the script to connect your Snowflake warehouse to Hevo.
-
-